Winter months are a great time for indoor activities like crafting, reading, garden planning, and other endeavours that can take place from a comfortable chair. Besides doing a fair amount of knitting and crocheting myself this season, I also embarked on another hobby/task: planning our future house. When we bought this property, the plan from the start was to build a house within 5 years. Our small mobile home is serving us well at the moment, but it is old and is likely not going to last too much longer. Moisture problems top the list of issues, and we have a noticeable mouse population sharing our home (despite having a cat). If things continue to go according to plan on the financial front (we should know by summer) we’re hoping by the end of this year to start the initial work (engineering, soil testing, hiring the architect, etc). But even though we are still a ways from breaking ground, I’ve already learned a lot. In today’s post I’m going to share some of this process with you.
Step #1: Know Your Land.
 When we were first looking at land, many resources I consulted said the same thing: if you are planning to build try to live on the property for at least a year, if not longer, before breaking ground on your new home. One of the great features of this property was the mobile home. Old enough (and ugly enough!) that we would happily get rid of it when the time came, but sturdy enough to house us until such time as we were ready to build. Having spent almost two years here I can appreciate how valuable that advice is. I know our land pretty well now. I know where the rarer species grow, where water likes to accumulate, where it flows during the wet season, and where it dries out first. I know where the frost accumulates, where the wind blows from in winter. I know the path of the sun year-round, what obstacles cast significant shadows on growing areas, what animals visit our property at night, where the birds like to hang out, etc. This is all very helpful information when it comes to the next step.
Step #2: Choose Your Building Site.
 In our case, there wasn’t a huge choice of locations despite having 4 acres. Our property is long and narrow and there is a residential power line cutting diagonally across the top third of the property with a right-of-way underneath that precludes any permanent buildings. To build below that line would mean a very long walk from the curb on garbage day. Unless we wanted 2 acres of land between us and the street we’d have to build in a gully between hills and that is a bad site for any house – frost collects there, as does water. We also didn’t want to build on the same spot as our current house so that we could remain living comfortably for however long it takes to build. Moving the house and its connections to another spot on the property would be expensive.
In some ways, having limits can be good. There was really only one logical place to build and fortunately it is not where our mobile home is located. The site we’ve chosen is in the northwest corner of the property, on the highest point and furthest away from roads and neighbours (shown in the photo above). There are some lovely views from there, and its southern exposure will allow us to incorporate passive solar heating into the home design. The north side of the site is part of a large forested area, which will be great for insulating against cold winter winds that blow from the small mountains and hills to the north of us. Unfortunately, the entire west side of the property is lined with a tall forest of Douglas Fir trees so we lose the sun early in the day. However, having consulted my bible of solar home design – The Solar House by Dan Chiras – it is just sufficient to be suitable for the job (more on solar design later).
The site is the top portion of the area we had cleared two years ago when we first moved here, but we didn’t clear all the way to the north property line. There is a large Western Redcedar tree there surrounded by a few smaller ones and I did not want to have to remove them if possible. They provide a dense shield against wind (and block the view from the hiking trail that goes past that northern border) plus we don’t have too many cedars in our neighbourhood (it was logged about a century ago and replanted with Douglas Firs). So that limited how far we could extend the house northwards. Westwards we are right up against the property line, so the minimum clearance sets that limit. Eastwards it’s pretty wide open, but the further east we go the more exposed we are to the street (it ends about halfway along our northern border) and the neighbours’ homes. Southwards we are limited by the powerline right-of-way. But there was one other limiting factor.
This high point on the property was dug into when the original owners placed the mobile home, and then cut into some more when a small detached garage was added (see photo above). Thus there is a chunk of land cut out of the southeast corner of the house site. Originally I assumed this meant we’d have to build an L-shaped house and most of my plans were based on that design. Due to the limitations described above I wasn’t getting anywhere with floor plans (I should point out here that we are adamantly opposed to having more than one storey of living space, for reasons too lengthy to get into just now).
And then one day it hit me that if we built out over the cut-out section we could free ourselves up enormously in terms of size and layout. Essentially we’d build out over the current garage, whose roof is practically level with the top of the hill, and it would become a walk-out half-basement. It would house what it currently houses: tools, three freezers full of meat, and Husband’s drum kit among other garage-type items. And virtually none of it would be buried, allowing sufficient light inside that it doesn’t feel like a dungeon. Why it took me months of pacing around at the top of that hill to figure this out I don’t know. But it’s just one reason why I’m glad I have so much time to work on this planning thing!
Step #3: The Layout.
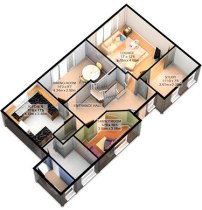 The truth is that we are going to need an architect to design the floor plan and layout of the house. I have zero training in this area and I can’t seem to break outside the box. Literally. I’m using graph paper to work on design plans and I seem to be stuck in this rectangular, stick-to-the-lines thinking that suggests we need a 3000 sq. foot house in order to fulfill our requirements. That is more than double the size I’m interested in. So mostly, drawing floor plans has been an exercise in thinking about the spaces and coming up with a few good ideas here and there. There is no way I could do this in earnest.
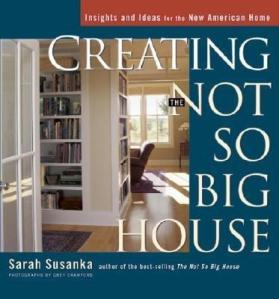
Thankfully, there are some great resources out there and my current bible of home design is from Sarah Susanka’s Not So Big House empire. Specifically, her book Creating the Not So Big House has been an excellent source of ideas, as well as providing me with the language to convey to our future architect what we’re looking for. Finding a book like this which encapsulates your own desires for house design can really help with the whole process. I’m pretty sure that an architect will be able to come up with far more efficient uses of space, and far better workflow patterns, than I’ve been able to come up with during my forays into cubist floor-planning.
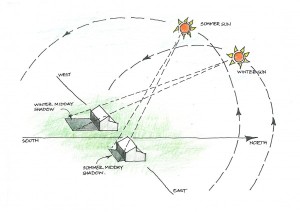
Another important consideration is that we wish to incorporate passive solar design principles into our home. This means orienting the long side of the house to the south, placing most of the windows there, and incorporating thermal mass into areas of the home to retain and release heat when the sun goes down. Without going into too much detail about passive solar design right now, it does place some limitations on layout. But now that I know we’re not limited to an L-shaped site it’s not really an issue anymore.
Step #4: The Materials.
 It won’t come as a surprise to anyone who has been reading my blog for a while to learn that I want to build our home from natural materials, locally sourced wherever possible. The choices boil down to cordwood, rammed earth, cob, and straw bale. While rammed earth construction has been done here (music legend David Crosby has a rammed earth home on nearby Salt Spring Island that was featured in an episode of David Suzuki’s The Nature of Things) and it is beautiful, it’s not really my style. Cordwood is problematic in climates with high moisture like ours, and while I think it looks pretty I don’t want a whole house made out of it. I’d had it in my head for some time that cob would be our best choice because I thought strawbale wasn’t suited to our damp climate. I’ve since learned that this may not be the case. And I’m concerned about the fact that cob is a relatively poor insulator. So right now I’m leaning toward strawbale.
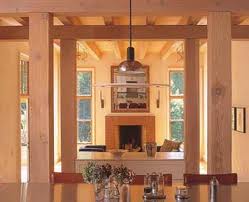
We will, however, be using timber-framing for the skeleton of the house. The strawbales (or whatever we choose) will be infill rather than supporting walls. Timber frame simply looks incredibly beautiful, there are several very skilled companies locally that do timber-framing, and the lumber can be sourced right here on the Island (and some of it probably from our own property).
Step #5: The Idea Book.
 I started this as a Word document some time ago. Any thoughts or observations I have go here. It could be anything from noting that I spend a great deal of time during the day in the kitchen, to wish-lists requesting, for example, a covered outdoor area for hanging laundry when it is raining. I’ve put a huge amount of thought into all the details and recording them in one place makes for a handy reference.
My tip would be to spend a day thinking about where you go in your home at various times of day, what areas are used the most, and which are not used much at all. What items do you have lying around that need a home of their own – plastic shopping bins for groceries before they get taken back out to the car, recycling, mail that needs to be sorted, clothes going to goodwill, etc. Think about what you like about your current home, or what wish you had – for example, when you are taking a shower do you love that there is a window there? Do you wish the shower were wider? And of course there is my favorite topic: how easy is this to clean? I’m amazed at how many design features I see in magazines and websites that look beautiful but I know from experience would be magnets for dust and cobwebs, or be a pain to vaccuum around.
I also wanted to share a great website I found called Houzz.com. Here are hundreds of thousands of images of room design, including exteriors, that you can browse through and add to your own personal Ideabook. My one complaint with the site is that most of these homes are quite ostentatious, much too over-the-top for my liking. I’m looking for something simpler and more humbler than most of the homes shown here, but there are so many great ideas that I continue to build up Ideabooks for various rooms in my future home. The best part will be sharing these books with our future architect, who can then get a very good idea of our taste and style without having to conduct extensive interviews with people lacking the language to describe what they like (that would be me: “Um, I like kind of a rustic look but not messy-looking, sort of traditional but not uppity, something between country and west coast luxury home…but small”…???).
So that’s where I am now. Building up my Ideabooks, having fun with graph paper, and making notes of things that will be important when it comes time to sit down with an architect. Of course there is much that needs to take place in-between, but there’s nothing I like more than immersing myself in some project that leads to the fulfillment of a Dream. Sometimes it doesn’t even matter if the dream ever comes true; I enjoy the process that much.

Posted by Miriam on January 20, 2012 at 10:07 pm
What a great post to read, and very timely! We’ve been thinking of building our next home (a very vague possibility for some undefined time in the future…) and have used the Not So Big House books as a way of starting all the discussions that need to happen. There’s so much to consider – and so many decisions that would need to get made. I can’t say that’s our forte – it took us about two years to choose a bathroom vanity! I think your journey will be very exciting, and I’m looking forward to reading about it.
Posted by maya on January 25, 2012 at 4:59 pm
Hi,
I am so glad I found your blog. I can relate to everything in it. We are a suburbanite family about to take the leap into homesteading and unschooling as soon as we find our place on the island (Oh and we’ve been paleo for the past 2 years) Being total newbies to everything can be so daunting but reading your experiences is inspiring me to do what feels right. Thank you, Maya
Posted by The Dream: revisited « Rural Aspirations on March 21, 2012 at 8:24 pm
[…] Simplicity « House Planning […]
Posted by Planning for the New Home Has Begun! « Rural Aspirations on July 23, 2012 at 8:32 am
[…] at the beginning of this year I wrote about my forays into house planning. It has taken me over 7 months and many, many edits but I have finally come up with a layout that I […]