Archive for the ‘being green’ Category

Planning for the New Home Has Begun!

Back at the beginning of this year I wrote about my forays into house planning. It has taken me over 7 months and many, many edits but I have finally come up with a layout that I like, that gives me what I want, and that puts the house size at under 2500 square feet. In fact, this only just happened two days ago! It was one of those Eureka moments where I was hit with inspiration, ran to get a pencil and some graph paper, and realized I’d finally solved many of the issues I was struggling with.

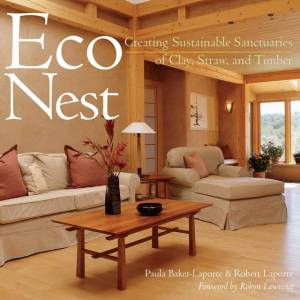
The timing was perfect, too. Today we interview two design/build firms. The first is the EcoNest company, run by Paula and Robert LaPorte. These guys are well-known in the natural building community, and we are fortunate that they are in the area this month giving a series of workshops. They are stopping by this evening with their local certified builder (there are not many builders in North America trained in this procedure and we are so fortunate that one of them is located just 30 minutes away!). I am really excited about meeting with them and hope they can reassure my husband that this isn’t some freaky hippie experiment in building that could cost us a fortune down the road!

In my previous house-planning post I wrote that I was looking at strawbale and cob for the infill material. Then I discovered “light clay”, which is also called straw-slip or chip-slip depending on the fibre ingredient. This is what the EcoNest folks specialize in. Both use a clay slip as a base (a light, watery mixture of clay and water) in which either straw or wood fibre is mixed so that the fibres are coated evenly with the slip. The beauty of this stuff is that you can pack it into forms and thus reduce time and labour costs considerably. Apparently, it also has a higher R-value for insulation than either strawbale or cob. It does not require a netting or base coat to “rough up the surface” so that plaster can be applied. What really appeals to me is that we could supply the wood chips from our own property. However, we need to compare the cost of purchasing enough straw for the project versus time to gather and chip the wood plus cost of renting an industrial-strength chipping machine.

The other company we are interviewing is a local design/build outfit that has done several projects in the area that we like. They claim to be able to do “green building” but this may turn out to mean conventional stick-framing and house-wrapping with simply using less harmful and lower embodied-energy materials. Nevertheless, I’m open to hearing what they have to say, and seeing how this option compares with the above.

From these interviews I hope to settle on 1) what infill material will be used, 2) how big the house will be, and 3) how much it will cost. The latter two are obviously related quite closely, while the first point will determine the nature of that relationship. My understanding is that building green is no more costly than any other quality timber-frame home but hopefully we’ll find out soon. We know roughly what we want to spend, but whether that is realistic based on our desires remains to be confirmed. We may need to increase our budget. Alternatively, we may decide to do some inexpensive finishing to bring down the budget, with the aim to remodel later when we have more cash-in-hand. Given what we are living in now, anything without mould or rodents is an improvement!

House Planning

Winter months are a great time for indoor activities like crafting, reading, garden planning, and other endeavours that can take place from a comfortable chair. Besides doing a fair amount of knitting and crocheting myself this season, I also embarked on another hobby/task: planning our future house. When we bought this property, the plan from the start was to build a house within 5 years. Our small mobile home is serving us well at the moment, but it is old and is likely not going to last too much longer. Moisture problems top the list of issues, and we have a noticeable mouse population sharing our home (despite having a cat). If things continue to go according to plan on the financial front (we should know by summer) we’re hoping by the end of this year to start the initial work (engineering, soil testing, hiring the architect, etc). But even though we are still a ways from breaking ground, I’ve already learned a lot. In today’s post I’m going to share some of this process with you.


Step #1: Know Your Land.

When we were first looking at land, many resources I consulted said the same thing: if you are planning to build try to live on the property for at least a year, if not longer, before breaking ground on your new home. One of the great features of this property was the mobile home. Old enough (and ugly enough!) that we would happily get rid of it when the time came, but sturdy enough to house us until such time as we were ready to build. Having spent almost two years here I can appreciate how valuable that advice is. I know our land pretty well now. I know where the rarer species grow, where water likes to accumulate, where it flows during the wet season, and where it dries out first. I know where the frost accumulates, where the wind blows from in winter. I know the path of the sun year-round, what obstacles cast significant shadows on growing areas, what animals visit our property at night, where the birds like to hang out, etc. This is all very helpful information when it comes to the next step.

Step #2: Choose Your Building Site.


In our case, there wasn’t a huge choice of locations despite having 4 acres. Our property is long and narrow and there is a residential power line cutting diagonally across the top third of the property with a right-of-way underneath that precludes any permanent buildings. To build below that line would mean a very long walk from the curb on garbage day. Unless we wanted 2 acres of land between us and the street we’d have to build in a gully between hills and that is a bad site for any house – frost collects there, as does water. We also didn’t want to build on the same spot as our current house so that we could remain living comfortably for however long it takes to build. Moving the house and its connections to another spot on the property would be expensive.

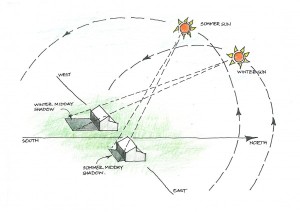
In some ways, having limits can be good. There was really only one logical place to build and fortunately it is not where our mobile home is located. The site we’ve chosen is in the northwest corner of the property, on the highest point and furthest away from roads and neighbours (shown in the photo above). There are some lovely views from there, and its southern exposure will allow us to incorporate passive solar heating into the home design. The north side of the site is part of a large forested area, which will be great for insulating against cold winter winds that blow from the small mountains and hills to the north of us. Unfortunately, the entire west side of the property is lined with a tall forest of Douglas Fir trees so we lose the sun early in the day. However, having consulted my bible of solar home design – The Solar House by Dan Chiras – it is just sufficient to be suitable for the job (more on solar design later).
The site is the top portion of the area we had cleared two years ago when we first moved here, but we didn’t clear all the way to the north property line. There is a large Western Redcedar tree there surrounded by a few smaller ones and I did not want to have to remove them if possible. They provide a dense shield against wind (and block the view from the hiking trail that goes past that northern border) plus we don’t have too many cedars in our neighbourhood (it was logged about a century ago and replanted with Douglas Firs). So that limited how far we could extend the house northwards. Westwards we are right up against the property line, so the minimum clearance sets that limit. Eastwards it’s pretty wide open, but the further east we go the more exposed we are to the street (it ends about halfway along our northern border) and the neighbours’ homes. Southwards we are limited by the powerline right-of-way. But there was one other limiting factor.

This high point on the property was dug into when the original owners placed the mobile home, and then cut into some more when a small detached garage was added (see photo above). Thus there is a chunk of land cut out of the southeast corner of the house site. Originally I assumed this meant we’d have to build an L-shaped house and most of my plans were based on that design. Due to the limitations described above I wasn’t getting anywhere with floor plans (I should point out here that we are adamantly opposed to having more than one storey of living space, for reasons too lengthy to get into just now).

And then one day it hit me that if we built out over the cut-out section we could free ourselves up enormously in terms of size and layout. Essentially we’d build out over the current garage, whose roof is practically level with the top of the hill, and it would become a walk-out half-basement. It would house what it currently houses: tools, three freezers full of meat, and Husband’s drum kit among other garage-type items. And virtually none of it would be buried, allowing sufficient light inside that it doesn’t feel like a dungeon. Why it took me months of pacing around at the top of that hill to figure this out I don’t know. But it’s just one reason why I’m glad I have so much time to work on this planning thing!

Step #3: The Layout.

The truth is that we are going to need an architect to design the floor plan and layout of the house. I have zero training in this area and I can’t seem to break outside the box. Literally. I’m using graph paper to work on design plans and I seem to be stuck in this rectangular, stick-to-the-lines thinking that suggests we need a 3000 sq. foot house in order to fulfill our requirements. That is more than double the size I’m interested in. So mostly, drawing floor plans has been an exercise in thinking about the spaces and coming up with a few good ideas here and there. There is no way I could do this in earnest.


Thankfully, there are some great resources out there and my current bible of home design is from Sarah Susanka’s Not So Big House empire. Specifically, her book Creating the Not So Big House has been an excellent source of ideas, as well as providing me with the language to convey to our future architect what we’re looking for. Finding a book like this which encapsulates your own desires for house design can really help with the whole process. I’m pretty sure that an architect will be able to come up with far more efficient uses of space, and far better workflow patterns, than I’ve been able to come up with during my forays into cubist floor-planning.

Another important consideration is that we wish to incorporate passive solar design principles into our home. This means orienting the long side of the house to the south, placing most of the windows there, and incorporating thermal mass into areas of the home to retain and release heat when the sun goes down. Without going into too much detail about passive solar design right now, it does place some limitations on layout. But now that I know we’re not limited to an L-shaped site it’s not really an issue anymore.

Step #4: The Materials.

It won’t come as a surprise to anyone who has been reading my blog for a while to learn that I want to build our home from natural materials, locally sourced wherever possible. The choices boil down to cordwood, rammed earth, cob, and straw bale. While rammed earth construction has been done here (music legend David Crosby has a rammed earth home on nearby Salt Spring Island that was featured in an episode of David Suzuki’s The Nature of Things) and it is beautiful, it’s not really my style. Cordwood is problematic in climates with high moisture like ours, and while I think it looks pretty I don’t want a whole house made out of it. I’d had it in my head for some time that cob would be our best choice because I thought strawbale wasn’t suited to our damp climate. I’ve since learned that this may not be the case. And I’m concerned about the fact that cob is a relatively poor insulator. So right now I’m leaning toward strawbale.

We will, however, be using timber-framing for the skeleton of the house. The strawbales (or whatever we choose) will be infill rather than supporting walls. Timber frame simply looks incredibly beautiful, there are several very skilled companies locally that do timber-framing, and the lumber can be sourced right here on the Island (and some of it probably from our own property).
 

Step #5: The Idea Book.

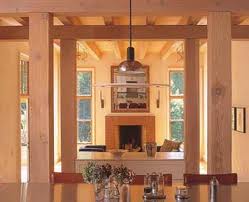
I started this as a Word document some time ago. Any thoughts or observations I have go here. It could be anything from noting that I spend a great deal of time during the day in the kitchen, to wish-lists requesting, for example, a covered outdoor area for hanging laundry when it is raining. I’ve put a huge amount of thought into all the details and recording them in one place makes for a handy reference.

My tip would be to spend a day thinking about where you go in your home at various times of day, what areas are used the most, and which are not used much at all. What items do you have lying around that need a home of their own – plastic shopping bins for groceries before they get taken back out to the car, recycling, mail that needs to be sorted, clothes going to goodwill, etc. Think about what you like about your current home, or what wish you had – for example, when you are taking a shower do you love that there is a window there? Do you wish the shower were wider? And of course there is my favorite topic: how easy is this to clean? I’m amazed at how many design features I see in magazines and websites that look beautiful but I know from experience would be magnets for dust and cobwebs, or be a pain to vaccuum around.

I also wanted to share a great website I found called Houzz.com. Here are hundreds of thousands of images of room design, including exteriors, that you can browse through and add to your own personal Ideabook. My one complaint with the site is that most of these homes are quite ostentatious, much too over-the-top for my liking. I’m looking for something simpler and more humbler than most of the homes shown here, but there are so many great ideas that I continue to build up Ideabooks for various rooms in my future home. The best part will be sharing these books with our future architect, who can then get a very good idea of our taste and style without having to conduct extensive interviews with people lacking the language to describe what they like (that would be me: “Um, I like kind of a rustic look but not messy-looking, sort of traditional but not uppity, something between country and west coast luxury home…but small”…???).

So that’s where I am now. Building up my Ideabooks, having fun with graph paper, and making notes of things that will be important when it comes time to sit down with an architect. Of course there is much that needs to take place in-between, but there’s nothing I like more than immersing myself in some project that leads to the fulfillment of a Dream. Sometimes it doesn’t even matter if the dream ever comes true; I enjoy the process that much.
 

Fall Gardening Project

Today was a lovely fall day. While the sky was clouded over, the sun did peek out every now and then, its diffuse winter-ish light a testament to our planet’s progress on its journey to the “far side” of the sun. The temperature was cool, but after feeding the pigs and chickens and moving the chicken tractor I soon tossed off my knit wool cap and vest. With those chores out of the way I was ready to tackle my fall gardening project. Today was the day I planned to get my garden in shape for winter, with a look ahead to spring.

Last year I just about broke my back digging raised beds out of our hard, rocky soil. I’d planned to green manure the beds but an early snowfall killed the small-seeded fava beans before they got a chance to germinate. I also hadn’t gotten my fence finished, so the various animals that parade through our field managed to compress the soil somewhat over winter. By spring I had sunken beds that needed intense chopping and hoeing to become suitable for planting. Despite these failures we did get some early salad greens and we’re still enjoying tomatoes, although I’m unsure how much longer they’ll be ripening. But some stuff just didn’t grow well, and the problem was shallow soil that was low in nutrients and organic matter. So my goal this time around is to build up the soil over winter so that I get deeper soil, beds that are actually higher than ground level, and a higher nutrient content in the soil. Sure, I could just go buy a truckload of topsoil, but I didn’t want to go that route. We don’t own a pickup truck, it’s expensive to buy topsoil, and I wouldn’t really know where the stuff had come from. I wanted to do it myself.

I had two strategies under consideration, and I ended up trying both of them today. First up was the Lasagna Garden. This is a way to build up a plantable garden over winter. Basically, you lay some kind of paper product (newspaper, cardboard, etc) on the ground in the shape of your garden-to-be. Then you make a “lasagna” by layering compostable materials, alternating between “green” (e.g. grass clippings, kitchen scraps) and “brown” (e.g. straw, hay, dried leaves) layers. The stuff rots down over winter to become humus-rich soil full of organic matter and perfect for spring planting.

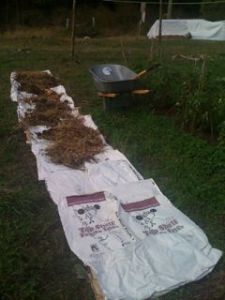
I started with the layer of paper products, in our case feed bags. I’d been saving these up and had a rather tall stack of them. They are made of two layers of heavy-duty paper, sewn shut with string, and contain only a small amount of glue along the bottom and top seams between the two layers. I decided not to be a purist; I don’t think the amount of glue is enough to contaminate my garden. And as I didn’t have enough cardboard or any newspaper around it seemed the smartest way to make use of something that would otherwise be tossed into the recycling box. I already had the outline of a bed – it was one I’d dug last year and didn’t use this year, so it was weedy and hard. A good candidate, I thought, for this “no-dig” garden method.

After bringing the pile of feed bags to the garden, I brought out my brand-new wheelbarrow (yikes, are these things expensive! but being the procrastinator I am, I simply didn’t have time to shop around for a used one; at least I know I’ll get lots of use out of it). I headed to the compost pile and rolled back the logs barring the bottom front, and took a good look at what I had. I’d started this pile over a year ago but I don’t seem to have much luck with compost. My first attempt at our last house resulted in a soppy, wet, yucky mess littered with eggshells. I hadn’t included enough brown matter. This time I seem to have erred in the other direction. I added straw whenever I dumped a bucket of kitchen scraps on the pile, and now I had a whole lot of brown matter but nothing that looked like soil. Still, I could clearly see some rotting food scraps in there.

To make matters more complicated, I’d dumped lots of weeds from the garden on the pile last month and I’m quite sure many of them were in seed. This is a no-no when using compost to build a garden bed. But I decided it would be much easier to just weed a lot next spring than to try and separate the stuff now (probably impossible, anyway). Not one to be easily deterred I filled up my wheelbarrow and began piling it on top of the feed bags. It wasn’t really a lasagna, since I only had two layers. But since my compost seemed to be a mixture of brown and green (okay, more brown but still…) I decided to just lay it on the paper and hope for the best.

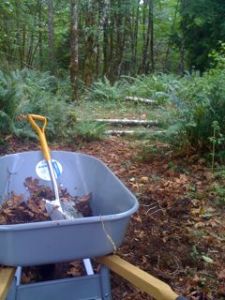
When I was done I realized that I was still missing an ingredient from the usual lasagna recipes: soil. I wasn’t sure how important this was, and looking around me I wondered where I would get soil from. Our field is so thickly planted with grass that you can’t put a shovel into it, and I didn’t want to tear up part of the field anyway. What lies around the edges isn’t thickly grown because the soil there is pretty crappy stuff and I couldn’t see how adding dusty, rocky, lifeless “soil” was going to help me build a garden bed. I knew the soil underneath my feed bags was in bad shape, so adding a top layer of soil would probably be a good thing. But I wasn’t about to go buy some. As I stared off into the distance I thought how silly it was to live on 4 acres and not have a ready source of soil, and then the answer hit me. I was staring at our woods! The ground in there is lovely humus, rich with leaves and bugs. If I scraped some of it off the walking paths I wouldn’t be depriving the forest itself of much, and I’d be clearing up some trails at the same time. So with my wheelbarrow and shovel I headed into our woods.

It was lovely work. The dirt smelled wonderful, and it came up with a nice layer of rotting leaves. It had the perfect texture and “tilth”, and I laughed to myself that I had discovered the perfect source of soil right here in our own woods – free for the taking! I only needed two wheelbarrows full (about 12 cu ft total) to cover up my garden bed. But that was enough for my back muscles anyways. And I got this in just one small patch of pathway. Not only did I solve today’s problem, but now I know I’ve got a wonderful source of humus for topping up beds when I plant next spring.

The finished bed looked pretty good, I thought:

Though I won’t be surprised if it breaks down so much that it’s not very high come spring. Still, it’s a start!

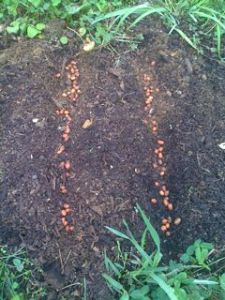
The other option I’d considered for building soil was trying the green manure thing again. Since I had used all my compost and feed bags on the one large bed, I decided I might as well try seeding the smaller beds. However, once again I improvised based on what I had on hand, not feeling like spending my Sunday-in-the-garden driving around to nurseries instead. I had a lot of small-seeded fava beans left over from last year, but they had been inoculated back then and sat in a plastic bag in the potting shed all year long. I figured it was a total crap shoot as to whether these things would germinate, but what the heck. Last year I’d sprinkled them on top of the soil, which I think was a mistake. This year I took the time to plant them in rows, gently covering them up with my hands. I used a pretty dense line of seeds assuming that I’d be lucky if half of them germinated. It was quick work and I enjoyed it very much.

And, just for the heck of it, I scattered some of them on top of my lasagna bed. It wouldn’t matter if they didn’t germinate, but if they did I’d have some extra organic matter to turn into it next spring before planting.

As I was doing this I discovered that my kale seemed to have come back to life in the last couple of weeks. I’d planted it in summer, really not the right time, and it looked small, sickly, and pale all that time. I’d given up on it when, to my surprise today, I discovered it had been revived by the cool wet weather. That was a nice bonus to an already lovely day of hard work. Looking forward to toasting up some kale chips soon!

Dumpster Diving: country style

In the city it is not unusual for people to leave unwanted items on the curb so that others can come by and pick them up. But out here in the country you don’t get that sort of traffic. You also don’t get the kind of garbage pickup you do in the city, and often disposing of it means hauling it to the dump. We have every-other-week service here, and pretty decent recycling service too. But just cleaning up around the property we gathered enough garbage to take a run to the dump. It wasn’t that expensive, and if you have a utility trailer it’s not that difficult a task. But apparently some people find it all just too much hassle.

Sad to say, the forest beside our property is littered with garbage. Everything from wrappers to deep freezers and microwaves, car batteries and old mattresses, broken strollers and piles of clothing. Seems some local yahoos like to drive their ATV’s in there at night and toss whatever they can’t be bothered to keep right into the woods. The neighbours and I have been discussing what we can do about it, but in the meantime it’s a growing problem.

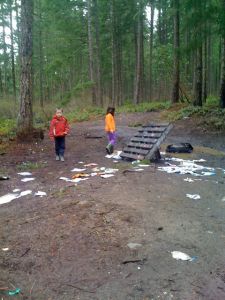
The other day while on a walk we found a new pile of dumped material, and right there in the middle was a mini-trampoline. Upon closer inspection it was in excellent condition, other than a small tear in the fabric that covers the springs. Then the kids noticed a set of building blocks, much like Lego, along with little fences and a whole pile of small plastic farm animals. They wanted to bring the stuff home. In less than a minute we’d found an old ice cream bucket. We had to sit there picking the pieces up out of the mud, but a good rinsing at home would take care of that. When we left the woods we all felt we had scored. I said out loud “One person’s trash is another person’s treasure” and later I heard the kids repeating the phrase. I love that they are adopting these values of thrift and haven’t succumbed to the consumer culture of wanting everything to be new and from a Mall. Here’s hoping it lasts!

Toilet Talk

It’s important to practice water conservation even when you live in the City, but living in the country and having a well brings the issue right to the forefront. I’m much more aware of water usage here and our habits have changed in order to avoid wasting water. Summers are supposed to be dry here and we don’t know how our well will hold up once the wet season is over. One set of changed habits concerns using the toilet, and that’s what I’m going to talk about today.

We have old toilets with big tanks. Instead of replacing perfectly good toilets we’ve taken some steps to reduce our water usage considerably. I’ve adjusted the float balls to cut off the refill supply sooner. And as soon as I get my hand on a couple of bricks I’ll be placing them inside the toilet tanks to reduce the amount even further . But what really cuts down on water use for the toilets is sticking to the following guideline: If it’s Yellow, Let it Mellow; If it’s Brown, Flush it Down

We do flush in the morning after everyone has had their first pee of the day; it’s concentrated stuff then and has a strong odor. But for the rest of the day we do not flush if there is just urine in the bowl. None of us have noticed an unpleasant smell from doing this and it saves countless litres of water every day.

Of course, if you are going to follow this adage you need to do something about the toilet paper. After several people have peed and dropped paper in the toilet you may end up clogging the pipes when you finally go to flush. So, to aid us in our water saving efforts we have become fastidious about using our cloth wipes (we started using cloth wipes a while ago, but until we moved here it was a now-and-then thing).

This photo is the View From the Throne. Wipes are right in front of you, and the wet bag is hanging right above them. It’s hard to miss, and serves as a reminder to everybody in the family what we’re doing. So with no toilet paper in the bowl we can “let it mellow” for as long as need be without worrying about clogs when the time comes to flush.

Now some of you may be wondering about the how we handle “#2” (and some of you might be screaming “TMI!!!” right about now, too). We don’t use cloth wipes for that (after almost 5 years of rinsing cloth diapers in the toilet I am so done with that job!). Hubby uses good ol’ fashioned toilet paper; that’s his preference. And since we “flush it down when it’s brown” there’s no issue there. But the kids and I use flushable wipes. Except we don’t flush them…

I know, they are far more costly than toilet paper and really aren’t the least bit “green”. They are my guilty pleasure and I fully confess to this environmental Sin. Not only do they ensure that the kids do a proper job of wiping, but I personally find they do a better job and leave me feeling much cleaner than the dry stuff. I’m kind of addicted…to the point where, on the rare occasion when I travel without kids, I bring some along anyway.

But I can now argue that they are actually saving our septic system. Because we don’t flush them. We are not convinced that they are safe for septic tanks, even though the packaging says so (the first summer we had our trailer they clogged up the blackwater holding tank pretty bad and clearing that out was lesson enough for us!) so we put used ones in the waste bin. At first I thought this would make things rather smelly but after using them in our trailer this way I found that they actually didn’t smell the place up at all and the same has held true in our new place.

So, between using cloth wipes for pee and using wet wipes that go in the garbage we are putting very little toilet paper into our septic tank. And because we follow the advice to “Let it Mellow when Yellow” we are using far less water. They say that flushing the toilet uses more water than any other household use, so it’s an important area to begin thinking about water conservation.

The Evolution of Moving

As someone who spent 12 years going to University I have moved around a LOT in my lifetime. As a student it’s not so bad: most of my belongings fit in the back of a pickup and my Ikea furniture could be flat-packed almost back to the state they arrived in when I first purchased them. Moving meant buying pizza for as many True Friends as would show up on moving day, with extra beer for the guy who owned the truck (saved for after the driving, of course).

When I finally finished school and moved across North America for my first “real job” I also went on the cheap. I left most of my stuff in storage (read: my Mum’s basement), put what few articles I couldn’t part with in my suitcase, and bought what I needed after I arrived. I still shake my head at my financial ignorance and folly back in those days: I purchased a studio-apartment-full of furniture from Ikea and other places, racking up almost $2000 on my credit card in doing so. I was so sure I was going to be a highly-paid successful career woman, and soon, that I dove into this as if it were the most normal thing in the world…but I digress.

The next move after that was when I married my husband and went to join him in Boston. We gave away my studio apartment’s lot of furniture (which I still hadn’t paid off) to a co-worker who had just arrived with his family from Switzerland. We packed what was left in a small U-Haul trailer that we drove across 3 states with my Mazda Protege. Thank goodness my husband had the good sense to insist we rent places that came fully furnished, because over the next 3 years we moved cross-country three times, in the same manner (I still can’t believe my little 4-cylinder Mazda pulled a U-Haul, even a small one, over the Rockies 3 times!).

Our most recent move was 2.5 years ago when we moved into our current suburban abode. By this time our situation was much different. We had two young children and husband was working full-time outside the home. All our friends were folks with young families like ourselves and a day spent helping a friend move was time that just could not be spared. I decided we were grownups and should move like grownups so I hired movers. I was even contemplating hiring professional packers when I came across a new concept: reusable moving boxes.

Beth over at Fake Plastic Fish recently wrote about these in this blog post. Aside from the environmental benefits of using plastic moving boxes, there is a whole lot of practical benefit as well. First, I can tell you from personal experience that hunting around for used cardboard boxes is a time-consuming activity best reserved for those without young children. You can’t just hop out of your car, run two blocks to the alleyway dumpster, and grab those fresh clean boxes you just saw being put out while your children are strapped into their car seats. Young kids also have a very small window of “errand running tolerance” so you must plan and execute your missions with the skill of a seasoned professional. Spontaneous trips to the liquor store for boxes generally do not factor into your version of reality, and yes I have actually been told that I cannot enter the liquor store because I have minors in my company (darn, and little Johnny SO wanted that bottle of Merlot to wash down his mashed banana…!).

Packing with young children underfoot is also an activity reserved for the brave. You cannot pack any toy or favoured stuffy without being assured that your child will, within the next few hours, suddenly NEED that item to the point of desperation. Then you have to hunt through your boxes, turning them this way and that to find the black jiffy marker scratchings you made among the several black printed captions, hopefully giving you some clue as to what is inside. After you finally find the box-cutter that you so carefully hid from the children that you need a stepladder to retrieve it you must cut away the packing tape, wrestling with the bits that stick to the blade, and then undo several precious long minutes of packing time while you hunt through bubble-wrapped knick knacks and other non-identifiables. Kids also have this love affair with boxes (and who can blame them, really) – just when you need that wardrobe box you will learn that it is actually a Spaceship on a special mission to Jupiter and the tears that fall when you suggest it has other purposes will make it seems like budget-cutting time at NASA.

Reusable moving boxes are exactly what any busy mother needs. They come in tall, sturdy stacks that the children cannot tip over. They all look alike, meaning that any one of them can serve as a distracting (and, importantly, unbreakable) play item while the others are put to good use. They are easily and clearly labelled with index cards that fit into a special slot welded to the box. They are easy to move around since they stack when full, too, and all the labels are on the same side. So when Daughter suddenly NEEDED that purple felt pen that she found at the playground two months ago, I could simply go to the box labelled “kids art supplies”, remove it from its stack, fish out the marker, and then dump it back in when it had been used and once again forgotten.

Not having to put boxes together and wrestle with rolls of packing tape (and may I say that those razor-edged wheels they come with aren’t the best things to have lying around when you have little kids) saved me oodles of time. I could not believe how fast and easy it was to pack. I could actually have several bins going at once so that like really was packed with like, rather than trying to find a specific object to put in a box based solely on its size and shape and ability to maximize the efficient use of space.

The bonus came on Moving Day. After the furniture and large items had been loaded the rest went in lickety-split. The movers loved that the boxes stacked and were easily moved with the dolly provided by the moving box company. They said it literally saved them hours of hauling boxes down by hand, or trying to precariously balance as many as they could on a dolly when all were different sizes and grades of cardboard. They were easy to place in the truck in the most space-efficient manner, too. The amount of time I saved on labour more than made up for the cost of renting the boxes.

The best part was when it came time to unpack in our new home. The empty bins stacked in neat piles and the company came and hauled them away when we were done. I vowed I would never move without them.

And so tomorrow our moving boxes arrive. I’ve chosen to go with FrogBox this time. Since we are not doing a local move we’re going to have to return the boxes ourselves and these guys were totally cool with that arrangement. Importantly, they offer discounted pricing for extended weeks and I knew we’d want to give ourselves at least 3 weeks to pack, move, and unpack before needing to bring them back. This made the price very reasonable. Finally, what’s not to love about their cute Frog mascot and the fact that they donate 1% of their profits to frog habitat restoration?

Not so LUSH-ous after all: shampoo bars

I’m venturing out of semi-retirement with this blog to tell you (if there’s anyone left reading this) about my poor experience buying a shampoo bar from a well-known “natural products” company that has franchises across North America (the title just slightly gives it away)…

So, I have been using natural soaps and shampoo bars for about 7 months now and will just never go back to the commercial stuff. Recently, due to procrastination, I found myself out of shampoo bars and none coming in the mail any time soon. With the hair really needing a wash (I run; need I say more?) I was desperate to avoid using the gunky chemical goop that we call Shampoo. The only place I knew of in our fair city where one could purchase a shampoo bar was a certain place that prides itself on its “natural, handmade cosmetics”. So I went to buy one.

Walking into the store I just about choked on the cloying, overwhelming air pollution created by an entire room full of over-perfumed product. There couldn’t possibly be anything natural about the stuff they are using to fragrance these products, and I’d be surprised if long-term workers don’t suffer from respiratory ailments. The lady on the bus who drenches herself in perfume each morning has nothing on this place. 

When I found the shampoo bars the first thing I noticed is their odd composition. They are not solid bars, but rather made up of thousands of tiny pellets that are almost exactly the same size and shape as chocolate sprinkles. These have been pressed together to form a small, hockey puck-shaped disc. At first I wondered why on earth someone would go to the trouble of making and curing soap only to extrude it in tiny pellets and then mold it again…

…and then I saw the ingredients list.

The first ingredient in every bar was Sodium Laurel Sulfate. Yeah, that’s just so Natural. The rest of the ingredients didn’t read anything like those in my natural soaps: where was the palm oil? The shea butter oil? And then it hit me…these aren’t actually Soap!

The name “shampoo bar” was actually literal. These bars were made of shampoo ingredients that had been pressed into pellets and formed into discs. YUCK. 

But…I had gross, sweaty hair (and I’d tried using my body soap but it just didn’t clean it well) and tiny shampoo pellets without a plastic bottle were better than goop IN a plastic bottle, so I reluctantly  brought it home. 

The interesting thing is, now that I’ve not used commercial “soaps” in so long, I noticed that what we have been programmed to believe is a “rich, creamy lather” is actually rather oily in texture when compared to the natural lather from real soap. Instead of feeling “luxurious” I felt like I had just dumped a pile of oily stuff on my head. And my vinegar rinse has been sorely challenged as a conditioner after coating my hair with this stuff. Must explain why the store also sells “solid conditioner”. The clerk there looked shocked when I said I use vinegar – in fact, she didn’t seem to understand what real soap is or how it’s made. When I asked about what oils were saponified to make the soap she rattled off some prepared statement about using “organic, natural ingredients, blah blah blah”. Since when is “Yellow #5” considered natural?

Thankfully my regular bars will be arriving any day now and I can put aside my shampoo-hockey-puck for emergencies. I don’t know why I thought a large chain of franchise stores would actually have Real Soap. Silly me.

SitRep: operation Cloth Wipes and operation Shampoo Bar

Pardon the geeky terminology – I just watched the season premiere of Battlestar Galactica last night (awesome show, and I generally hate TV so take heed!). If you are going to ban cable from your home (which we have happily done for 4 years now) you at least need one tech-savvy person in the family…’nuff said!

wipesSo I’m going to update you readers on two projects that are underway. First, I have started using my cloth wipes in place of toilet paper. I was able to tally up our pre-wipe TP usage to roughly 10 rolls per month so it will be interesting to see how using cloth for “#1” will affect that number. Daughter has decided to opt out of my little project, but I still hope to see a significant drop in TP consumption. My parents and inlaws think I’m crazy, but at least it’s a laughing sort of crazy and not a “you’re ruining the children” kind of crazy! Here is what I have learned from using the wipes for one week now:

1) They do feel softer and nicer than TP.

2) The wiping action is quite different and takes some getting used to. All my life I’ve wiped and dropped, but now I have to pull the wipe out of the area, which was a little awkward at first. Locating the wipe bag on the right side of the toilet (being that I’m right-handed) would make the motion even more smooth. But right now I don’t have anywhere to hang my wet bag on the right side (taking notes for our future home!).

3) I made them too small and am having to use 2 at once. Yes, I wash my hands after using the toilet but that doesn’t mean I like getting my hands wet when I wipe. The next batch I make will be much bigger and I’ll fold them like a handkerchief. Currently they are about 4 cm square so I’ll aim for 8 cm x 8 cm (I have some lovely donated soft, gorgeous flannel waiting for that!).

4) I’m happy to report that my peri-bottle rinse idea appears to be unnecessary. I have been using them for seven days now without rinsing myself and there is no smell from the wipes (from my son missing the toilet when he pees, yes there is urine smell, but not from my wipes bag!). I am using an old Bummis size small wet bag from when we used cloth diapers and it’s working just fine. Eventually I’d like to find a lidded basket I can use to make it all look more aesthetically pleasing. I keep my wipes in a basket on the bathroom counter beside the toilet.

5) There is definitely a difference between that first pee of the day, and later pees. In terms of “letting the yellow mellow” I am flushing after me and the kids have done our morning pees (Husband prefers the other bathroom), and then it’s good until someone does #2. We are saving water and there is no urine smell because the later-in-the-day pees really don’t smell much at all (thus most of the wipes in the bag aren’t smelly, cutting down on overall odor).

I’m definitely going to keep this up as it is reducing our consumption and allowing us to reduce water usage. Win-win!

shampoobarbrushOn to section 2 of this report, an update on using natural shampoo bars instead of bottled, commercial liquid shampoo. Can I just tell you that I am LOVING my hair! Here’s what I’ve learned since we started using the bar two months ago (and yes, we are still on the same bar!):

1) For me at least, the vinegar rinse definitely acts as a conditioner/detangler of sorts, although even on the day I forgot to use it my hair was far more manageable than it ever was without using conditioner with conventional shampoo. I don’t even rinse the vinegar out anymore – I have a spray bottle in the shower of diluted vinegar and I just spray it on after shampooing and that’s it. And no, I don’t smell like a salad.

2) My hair feels wonderful!

3) I do notice that the day after shampooing it is more oily than it would be a day after using the bottled stuff. However, this is not the same kind of “oily”. The hair still looks great, it doesn’t have that greasy, dirty limp look to it. There is still body. And it then stays at this level of oiliness for another couple of days, whereas with the old stuff I would have to wash by then because it just looked greasy. I think what I’m seeing is the natural oils in my hair, which my old shampoo completely stripped.

4) Can I just say for the umpteenth time that I’m still amazed every day that my hair can look and feel so good with NO conditioner? 

5) We have nice, soft water and I understand that the bars don’t work well in hard water, so consider that if you wish to give these a try.

So if you are thinking about using cloth wipes make them big, and don’t worry about odor. If you are thinking about using a natural shampoo bar, if you have soft water go and do it – you won’t regret it!

Freezin’ My Buns Off (but not really)

freezing

Crunchy Chicken is on her second (or is it third?) Freeze Yer Buns Off Challenge. I didn’t sign up for it this year because I was on a blogging break for a while, but I joined it in spirit. I decided to see how long I could go into winter before caving in to the cold and turning on the central heating. 

October was warm, even for here, so it wasn’t until November that it began to get noticeably chilly in the house. We have a large gas fireplace in the living room and since we spend most of our time in that part of the house, I started turning it on (with ceiling fan) and seeing how long we could go with just that. We turn it off when it starts to get too hot. So far it’s worked out so well that I have barely used the central heating at all.

And truth be told, everyone in the family except ME doesn’t seem to mind the cold at all. The kids are usually naked or half-naked and quite happy. I’ve got wool slippers and lots of wool socks and sweaters, extra wool blankets on the bed. When they said it would get really cold at night I worried for the kids, but I worried for me more since they seem so much more cold-tolerant than I am. So I had them sleep with me and their warm bodies kept me quite cozy.

Even though we had “Snow-mageddon” this year, I only turned on the central heating a few times. Temps have been unseasonably cold, some nights threatening to drop to minus double digits (Celsius)! On those few nights I set the thermostat to 10 degrees (50 F), though I’m not sure it kicked in at all. Mostly I wanted to guarantee I didn’t wake up in the night freezing.

I’m so used to it now that I don’t even think about turning it on. I just put on more clothes, and if I get that sort of chill that won’t leave my bones, I just go sit in front of the fireplace for a while. Or do some housework, lol. I do confess, however, that after running in this damp, cold weather I have a nice, long, HOT shower. Mea culpa.

Now I’ve heard that gas fireplaces are not efficient heaters. But the point is to only heat that one room (the living area). The back end of the house, where the bedrooms are, stays quite cool. And it’s not on all the time. Someone also suggested to me that it uses less gas b/c it only aims to get a yellow flame, whereas furnaces use blue flames which require hotter temperatures. I have no idea, but my guess is that just heating one room of the house with a gas fireplace is going to be less energy-consumptive (and therefore less expensive) than heating the whole house with a furnace.

We get our bills through the landlord and pay every 3 months, so I’m not sure yet how much this practice has affected our heating bills. Also, we share with a guy in the basement suite and I am quite sure he isn’t making much effort to keep his heat down. Still, it will be an interesting experiment in finances. I figure if we can make it through this winter with barely using our central heating and just the fireplace, then we’ll be in great shape!

I’m sewing!

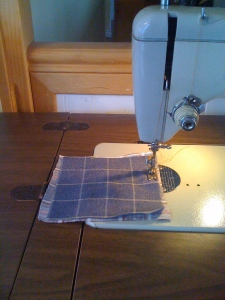
sewing-machineIt was several months ago that I excitedly took possession of an old hand-me-down sewing machine. After “test driving” it with some scraps of paper and finding it working perfectly, it sat for all this time waiting for me to find a project. That opportunity presented itself recently when I purchased a pair of pants that needed to be hemmed – usually I would send these to my mother, an excellent seamstress, but this time I decided to do it myself.
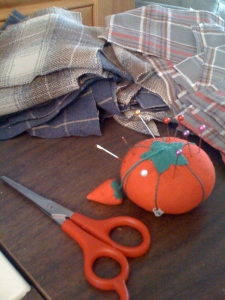
I also happened to finally get around to a thrift store expedition, from which I brought home 3 men’s flannel shirts ($5.99 each) to turn into cloth wipes. I cut them up into squares, not bothering to measure since I don’t really know what size I like best anyway, and because I am impatient, and because I wanted to use as much of the fabric as I could. 

scrapsreadyFor the last few days I have been happily sewing away whenever I get the chance, even treating myself to an old movie (The Apartment, 1960, staring a very young and beautiful Shirley McLean) one evening. The flood of memories this brought back was really lovely – my mother sewed throughout my whole childhood, and I had forgotten how many evenings were spent with her sewing while watching a movie on TV. Not only were the memories happy ones, but it felt extra special to be passing this scene on to my own children.
I had a few glitches to overcome. First, the bobbin winder didn’t work because the rubber ring that rubs against the main wheel had dried up and broken off. Determined not to be put off I wrapped a rubber band around it. I have to remove the cover plate and hold onto a few parts, but I can wind my bobbins and that’s all that matters!

I also had a frustrating first attempt when the stitches kept getting all tangled up. If I hadn’t used it when I first brought it home I’d have worried it was broken. After trying all sorts of variations on thread and bobbin tension I resorted to Googling the subject. Sure enough the advice was to check the needle to make sure it was inserted correctly. I double-checked and, even though I’d read the instructions, I’d still managed to put it in the wrong way! With another problem solved, I happily proceeded.

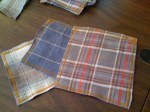
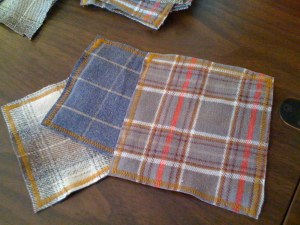
Since then I’ve broken a few needles but was finally able to head out yesterday and get some replacements (thank goodness the standard needle size hasn’t changed in the last 40 years!). The pants were successfully hemmed and I’m almost finished with my wipes. I used a wide zig-zag stitch and polyester thread since they will be washed frequently. Here’s a sneak preview:

wipes

I’m very happy to have learned another skill in the repertoire of self-sufficiency. I doubt I will take this hobby much farther than doing little projects like this one – I am far too impatient to properly measure things. (knitting a test gauge is usually done under self-imposed duress!). But it is still a very useful tool and, combined with the warm memories it provides of my own childhood, a priceless addition to my home.