Archive for the ‘outdoor projects’ Category

House Planning

Winter months are a great time for indoor activities like crafting, reading, garden planning, and other endeavours that can take place from a comfortable chair. Besides doing a fair amount of knitting and crocheting myself this season, I also embarked on another hobby/task: planning our future house. When we bought this property, the plan from the start was to build a house within 5 years. Our small mobile home is serving us well at the moment, but it is old and is likely not going to last too much longer. Moisture problems top the list of issues, and we have a noticeable mouse population sharing our home (despite having a cat). If things continue to go according to plan on the financial front (we should know by summer) we’re hoping by the end of this year to start the initial work (engineering, soil testing, hiring the architect, etc). But even though we are still a ways from breaking ground, I’ve already learned a lot. In today’s post I’m going to share some of this process with you.


Step #1: Know Your Land.

When we were first looking at land, many resources I consulted said the same thing: if you are planning to build try to live on the property for at least a year, if not longer, before breaking ground on your new home. One of the great features of this property was the mobile home. Old enough (and ugly enough!) that we would happily get rid of it when the time came, but sturdy enough to house us until such time as we were ready to build. Having spent almost two years here I can appreciate how valuable that advice is. I know our land pretty well now. I know where the rarer species grow, where water likes to accumulate, where it flows during the wet season, and where it dries out first. I know where the frost accumulates, where the wind blows from in winter. I know the path of the sun year-round, what obstacles cast significant shadows on growing areas, what animals visit our property at night, where the birds like to hang out, etc. This is all very helpful information when it comes to the next step.

Step #2: Choose Your Building Site.


In our case, there wasn’t a huge choice of locations despite having 4 acres. Our property is long and narrow and there is a residential power line cutting diagonally across the top third of the property with a right-of-way underneath that precludes any permanent buildings. To build below that line would mean a very long walk from the curb on garbage day. Unless we wanted 2 acres of land between us and the street we’d have to build in a gully between hills and that is a bad site for any house – frost collects there, as does water. We also didn’t want to build on the same spot as our current house so that we could remain living comfortably for however long it takes to build. Moving the house and its connections to another spot on the property would be expensive.

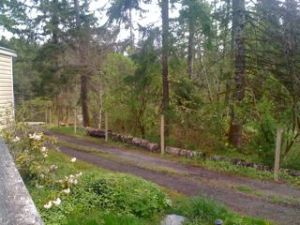
In some ways, having limits can be good. There was really only one logical place to build and fortunately it is not where our mobile home is located. The site we’ve chosen is in the northwest corner of the property, on the highest point and furthest away from roads and neighbours (shown in the photo above). There are some lovely views from there, and its southern exposure will allow us to incorporate passive solar heating into the home design. The north side of the site is part of a large forested area, which will be great for insulating against cold winter winds that blow from the small mountains and hills to the north of us. Unfortunately, the entire west side of the property is lined with a tall forest of Douglas Fir trees so we lose the sun early in the day. However, having consulted my bible of solar home design – The Solar House by Dan Chiras – it is just sufficient to be suitable for the job (more on solar design later).

The site is the top portion of the area we had cleared two years ago when we first moved here, but we didn’t clear all the way to the north property line. There is a large Western Redcedar tree there surrounded by a few smaller ones and I did not want to have to remove them if possible. They provide a dense shield against wind (and block the view from the hiking trail that goes past that northern border) plus we don’t have too many cedars in our neighbourhood (it was logged about a century ago and replanted with Douglas Firs). So that limited how far we could extend the house northwards. Westwards we are right up against the property line, so the minimum clearance sets that limit. Eastwards it’s pretty wide open, but the further east we go the more exposed we are to the street (it ends about halfway along our northern border) and the neighbours’ homes. Southwards we are limited by the powerline right-of-way. But there was one other limiting factor.

This high point on the property was dug into when the original owners placed the mobile home, and then cut into some more when a small detached garage was added (see photo above). Thus there is a chunk of land cut out of the southeast corner of the house site. Originally I assumed this meant we’d have to build an L-shaped house and most of my plans were based on that design. Due to the limitations described above I wasn’t getting anywhere with floor plans (I should point out here that we are adamantly opposed to having more than one storey of living space, for reasons too lengthy to get into just now).

And then one day it hit me that if we built out over the cut-out section we could free ourselves up enormously in terms of size and layout. Essentially we’d build out over the current garage, whose roof is practically level with the top of the hill, and it would become a walk-out half-basement. It would house what it currently houses: tools, three freezers full of meat, and Husband’s drum kit among other garage-type items. And virtually none of it would be buried, allowing sufficient light inside that it doesn’t feel like a dungeon. Why it took me months of pacing around at the top of that hill to figure this out I don’t know. But it’s just one reason why I’m glad I have so much time to work on this planning thing!

Step #3: The Layout.

The truth is that we are going to need an architect to design the floor plan and layout of the house. I have zero training in this area and I can’t seem to break outside the box. Literally. I’m using graph paper to work on design plans and I seem to be stuck in this rectangular, stick-to-the-lines thinking that suggests we need a 3000 sq. foot house in order to fulfill our requirements. That is more than double the size I’m interested in. So mostly, drawing floor plans has been an exercise in thinking about the spaces and coming up with a few good ideas here and there. There is no way I could do this in earnest.


Thankfully, there are some great resources out there and my current bible of home design is from Sarah Susanka’s Not So Big House empire. Specifically, her book Creating the Not So Big House has been an excellent source of ideas, as well as providing me with the language to convey to our future architect what we’re looking for. Finding a book like this which encapsulates your own desires for house design can really help with the whole process. I’m pretty sure that an architect will be able to come up with far more efficient uses of space, and far better workflow patterns, than I’ve been able to come up with during my forays into cubist floor-planning.

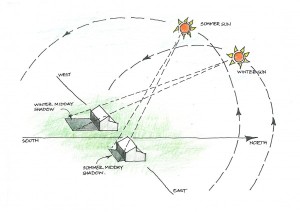
Another important consideration is that we wish to incorporate passive solar design principles into our home. This means orienting the long side of the house to the south, placing most of the windows there, and incorporating thermal mass into areas of the home to retain and release heat when the sun goes down. Without going into too much detail about passive solar design right now, it does place some limitations on layout. But now that I know we’re not limited to an L-shaped site it’s not really an issue anymore.

Step #4: The Materials.

It won’t come as a surprise to anyone who has been reading my blog for a while to learn that I want to build our home from natural materials, locally sourced wherever possible. The choices boil down to cordwood, rammed earth, cob, and straw bale. While rammed earth construction has been done here (music legend David Crosby has a rammed earth home on nearby Salt Spring Island that was featured in an episode of David Suzuki’s The Nature of Things) and it is beautiful, it’s not really my style. Cordwood is problematic in climates with high moisture like ours, and while I think it looks pretty I don’t want a whole house made out of it. I’d had it in my head for some time that cob would be our best choice because I thought strawbale wasn’t suited to our damp climate. I’ve since learned that this may not be the case. And I’m concerned about the fact that cob is a relatively poor insulator. So right now I’m leaning toward strawbale.

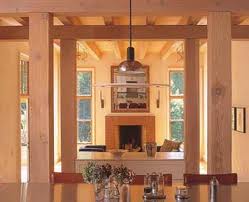
We will, however, be using timber-framing for the skeleton of the house. The strawbales (or whatever we choose) will be infill rather than supporting walls. Timber frame simply looks incredibly beautiful, there are several very skilled companies locally that do timber-framing, and the lumber can be sourced right here on the Island (and some of it probably from our own property).


Step #5: The Idea Book.

I started this as a Word document some time ago. Any thoughts or observations I have go here. It could be anything from noting that I spend a great deal of time during the day in the kitchen, to wish-lists requesting, for example, a covered outdoor area for hanging laundry when it is raining. I’ve put a huge amount of thought into all the details and recording them in one place makes for a handy reference.

My tip would be to spend a day thinking about where you go in your home at various times of day, what areas are used the most, and which are not used much at all. What items do you have lying around that need a home of their own – plastic shopping bins for groceries before they get taken back out to the car, recycling, mail that needs to be sorted, clothes going to goodwill, etc. Think about what you like about your current home, or what wish you had – for example, when you are taking a shower do you love that there is a window there? Do you wish the shower were wider? And of course there is my favorite topic: how easy is this to clean? I’m amazed at how many design features I see in magazines and websites that look beautiful but I know from experience would be magnets for dust and cobwebs, or be a pain to vaccuum around.

I also wanted to share a great website I found called Houzz.com. Here are hundreds of thousands of images of room design, including exteriors, that you can browse through and add to your own personal Ideabook. My one complaint with the site is that most of these homes are quite ostentatious, much too over-the-top for my liking. I’m looking for something simpler and more humbler than most of the homes shown here, but there are so many great ideas that I continue to build up Ideabooks for various rooms in my future home. The best part will be sharing these books with our future architect, who can then get a very good idea of our taste and style without having to conduct extensive interviews with people lacking the language to describe what they like (that would be me: “Um, I like kind of a rustic look but not messy-looking, sort of traditional but not uppity, something between country and west coast luxury home…but small”…???).

So that’s where I am now. Building up my Ideabooks, having fun with graph paper, and making notes of things that will be important when it comes time to sit down with an architect. Of course there is much that needs to take place in-between, but there’s nothing I like more than immersing myself in some project that leads to the fulfillment of a Dream. Sometimes it doesn’t even matter if the dream ever comes true; I enjoy the process that much.

 

Our first year of raising meat birds: what we’ve learned

Today I picked up our last batch of chickens from the processor: twenty-four yummy whole chickens have been added to our freezer stash. In looking back on this, our first summer of raising meat birds (or any kind of bird, for that matter), we’ve learned a few things about what we like and don’t like, and gained ideas about what to try next year.

We raised Cornish Rock Giants, which are basically the same type of bird used in mass-production factory farms. Ours actually got to see the outdoors, however. In fact they lived outdoors and enjoyed fresh air, sunshine, tasty grass and bugs. But the truth is they are, as many backyard chicken types will tell you, freaks of nature. They have been intensively bred for maximum meat production in minimum time. We got them as tiny, day-old chicks and by 8 weeks they were ready for harvest. This is good in terms of cost: a shorter duration to harvest means spending less money on feed. But I don’t think it’s very good for the chickens.

As many other people have reported, we noticed that our chickens didn’t seem to want to move around much. I’d often see them take a few clumsy steps as they attempted to balance their rapidly-growing bodies on legs whose bones couldn’t possibly keep up with those demands, only to drop to the ground as if they had just run a marathon. This most recent batch of birds went 9 weeks (because I didn’t make an appointment early enough) and by that time I noticed that some of them appeared to be having difficulty walking and one hen had what looked like a broken wing and perhaps a broken leg, too (she could not walk at all). She was perky and had less then 24 hrs to live so I just brought some feed to her and some water and told her it would all be over soon. I don’t like having injured birds: it may not affect the meat quality but that’s not the kind of farming I want to do. I couldn’t  help but think of the scene in the movie Food Inc. when the chickens were collected for processing and many of them could not walk. I want no part of that kind of “farming”.

I’d also heard that the mortality rate for these birds is high. We did lose 7 of our first batch of 20 chicks, all within the first week of life. I suspect it was a management and inexperience issue because we didn’t lose a single chick in our second batch. However, one of that second batch did die at around 7 weeks, apparently from a heart attack which is common for this breed. This sort of thing kind of makes you ponder the meaning of the word “healthy” – yes our birds were disease-free, but how healthy is an animal that can barely walk?

Another thing we noticed is that raising these birds the usual way (with a chicken tractor) is still really messy, despite the fact that they are outdoors. They eat huge amounts of food and thus generate great quantities of excrement. Despite having their tractor moved every 24 hours, within that time they would manage to coat the ground with waste, which then got all over their feathers on the underside. And my tractor was big compared to the recommended size for that many birds. They didn’t seem crowded in terms of space, but the tractor should probably have been moved twice a day towards the end to keep up with the poop – by that time all of them had wet, dirty undersides. But moving the tractor is a bit of a chore – I could tweak the design a bit to make it easier, but I keep thinking there has got to be a better way. Finally, because of the copious amounts of waste, the area around the tractor smelled pretty bad, and you could smell it wafting on the air all around the farm depending on which way the wind was blowing. Not pleasant.

Overall, we were left feeling like the chicken tractor was really just a step up from confinement operations. When I first looked into raising meat birds I asked people (on BackyardChickens.com, which is THE place to learn about such things) why meat birds weren’t raised like layers – able to strut around a farmyard at their leisure during the day. Some people said there was no point because the things are so poorly designed for mobility that they don’t really bother ranging, even if given the space to do so. We would like to at least give it a try ourselves, as others had a better experience.

The bigger issue is predation. When the birds are small they are perfect prey for raptors, and we have several species of such hunting birds in our neighbourhood. How to keep them safe from overhead ambush is one issue we still have to think about. Normally chicks would be raised with adult hens and roosters, the latter serving as guards for the flock, warning others of approaching marauders and herding the women and children into the brush. Not only do the meat birds not have any experienced chickens around to protect them, but it’s doubtful to me how well they would respond to an alarm scenario anyway. They have had most of the “chicken” bred out of them, perhaps to make them more amenable to a life of confinement. I wouldn’t be surprised if they all just stood around staring stupidly at any rooster trying to warn them of impending predatory doom.

So one of my projects this winter will be to come up with a new management scheme for next year’s meat birds. I’d also like to try a few heritage meat breeds to see if we can find something a little less freakish. Growing them longer will mean increased feed costs, but perhaps that can be mitigated somewhat by allowing them greater access to forage. The chicks themselves are about twice the price of the commercial breeds, too. I don’t mind paying more for good chicken, however, so we’ll just have to do the experiment and see. Most people will tell you that the taste of the commercial breeds makes all the freakishness worth it, and perhaps we’ll find that to be the case (though we still believe there is much room for improvement). This is one of the things I’m really enjoying about our “back to the land” experience: you can read all you want but really you need to go out there and just do it yourself. That’s the only way to determine what works best for you, and as a bonus you learn a lot in the meantime.

Fall Gardening Project

Today was a lovely fall day. While the sky was clouded over, the sun did peek out every now and then, its diffuse winter-ish light a testament to our planet’s progress on its journey to the “far side” of the sun. The temperature was cool, but after feeding the pigs and chickens and moving the chicken tractor I soon tossed off my knit wool cap and vest. With those chores out of the way I was ready to tackle my fall gardening project. Today was the day I planned to get my garden in shape for winter, with a look ahead to spring.

Last year I just about broke my back digging raised beds out of our hard, rocky soil. I’d planned to green manure the beds but an early snowfall killed the small-seeded fava beans before they got a chance to germinate. I also hadn’t gotten my fence finished, so the various animals that parade through our field managed to compress the soil somewhat over winter. By spring I had sunken beds that needed intense chopping and hoeing to become suitable for planting. Despite these failures we did get some early salad greens and we’re still enjoying tomatoes, although I’m unsure how much longer they’ll be ripening. But some stuff just didn’t grow well, and the problem was shallow soil that was low in nutrients and organic matter. So my goal this time around is to build up the soil over winter so that I get deeper soil, beds that are actually higher than ground level, and a higher nutrient content in the soil. Sure, I could just go buy a truckload of topsoil, but I didn’t want to go that route. We don’t own a pickup truck, it’s expensive to buy topsoil, and I wouldn’t really know where the stuff had come from. I wanted to do it myself.

I had two strategies under consideration, and I ended up trying both of them today. First up was the Lasagna Garden. This is a way to build up a plantable garden over winter. Basically, you lay some kind of paper product (newspaper, cardboard, etc) on the ground in the shape of your garden-to-be. Then you make a “lasagna” by layering compostable materials, alternating between “green” (e.g. grass clippings, kitchen scraps) and “brown” (e.g. straw, hay, dried leaves) layers. The stuff rots down over winter to become humus-rich soil full of organic matter and perfect for spring planting.

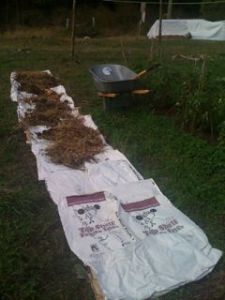
I started with the layer of paper products, in our case feed bags. I’d been saving these up and had a rather tall stack of them. They are made of two layers of heavy-duty paper, sewn shut with string, and contain only a small amount of glue along the bottom and top seams between the two layers. I decided not to be a purist; I don’t think the amount of glue is enough to contaminate my garden. And as I didn’t have enough cardboard or any newspaper around it seemed the smartest way to make use of something that would otherwise be tossed into the recycling box. I already had the outline of a bed – it was one I’d dug last year and didn’t use this year, so it was weedy and hard. A good candidate, I thought, for this “no-dig” garden method.

After bringing the pile of feed bags to the garden, I brought out my brand-new wheelbarrow (yikes, are these things expensive! but being the procrastinator I am, I simply didn’t have time to shop around for a used one; at least I know I’ll get lots of use out of it). I headed to the compost pile and rolled back the logs barring the bottom front, and took a good look at what I had. I’d started this pile over a year ago but I don’t seem to have much luck with compost. My first attempt at our last house resulted in a soppy, wet, yucky mess littered with eggshells. I hadn’t included enough brown matter. This time I seem to have erred in the other direction. I added straw whenever I dumped a bucket of kitchen scraps on the pile, and now I had a whole lot of brown matter but nothing that looked like soil. Still, I could clearly see some rotting food scraps in there.

To make matters more complicated, I’d dumped lots of weeds from the garden on the pile last month and I’m quite sure many of them were in seed. This is a no-no when using compost to build a garden bed. But I decided it would be much easier to just weed a lot next spring than to try and separate the stuff now (probably impossible, anyway). Not one to be easily deterred I filled up my wheelbarrow and began piling it on top of the feed bags. It wasn’t really a lasagna, since I only had two layers. But since my compost seemed to be a mixture of brown and green (okay, more brown but still…) I decided to just lay it on the paper and hope for the best.

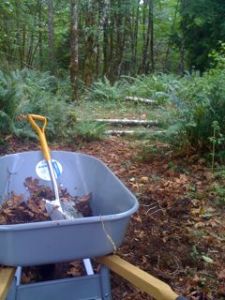
When I was done I realized that I was still missing an ingredient from the usual lasagna recipes: soil. I wasn’t sure how important this was, and looking around me I wondered where I would get soil from. Our field is so thickly planted with grass that you can’t put a shovel into it, and I didn’t want to tear up part of the field anyway. What lies around the edges isn’t thickly grown because the soil there is pretty crappy stuff and I couldn’t see how adding dusty, rocky, lifeless “soil” was going to help me build a garden bed. I knew the soil underneath my feed bags was in bad shape, so adding a top layer of soil would probably be a good thing. But I wasn’t about to go buy some. As I stared off into the distance I thought how silly it was to live on 4 acres and not have a ready source of soil, and then the answer hit me. I was staring at our woods! The ground in there is lovely humus, rich with leaves and bugs. If I scraped some of it off the walking paths I wouldn’t be depriving the forest itself of much, and I’d be clearing up some trails at the same time. So with my wheelbarrow and shovel I headed into our woods.

It was lovely work. The dirt smelled wonderful, and it came up with a nice layer of rotting leaves. It had the perfect texture and “tilth”, and I laughed to myself that I had discovered the perfect source of soil right here in our own woods – free for the taking! I only needed two wheelbarrows full (about 12 cu ft total) to cover up my garden bed. But that was enough for my back muscles anyways. And I got this in just one small patch of pathway. Not only did I solve today’s problem, but now I know I’ve got a wonderful source of humus for topping up beds when I plant next spring.

The finished bed looked pretty good, I thought:

Though I won’t be surprised if it breaks down so much that it’s not very high come spring. Still, it’s a start!

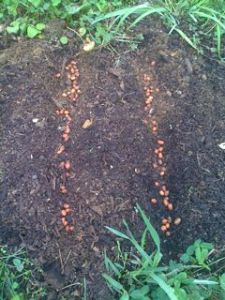
The other option I’d considered for building soil was trying the green manure thing again. Since I had used all my compost and feed bags on the one large bed, I decided I might as well try seeding the smaller beds. However, once again I improvised based on what I had on hand, not feeling like spending my Sunday-in-the-garden driving around to nurseries instead. I had a lot of small-seeded fava beans left over from last year, but they had been inoculated back then and sat in a plastic bag in the potting shed all year long. I figured it was a total crap shoot as to whether these things would germinate, but what the heck. Last year I’d sprinkled them on top of the soil, which I think was a mistake. This year I took the time to plant them in rows, gently covering them up with my hands. I used a pretty dense line of seeds assuming that I’d be lucky if half of them germinated. It was quick work and I enjoyed it very much.
And, just for the heck of it, I scattered some of them on top of my lasagna bed. It wouldn’t matter if they didn’t germinate, but if they did I’d have some extra organic matter to turn into it next spring before planting.

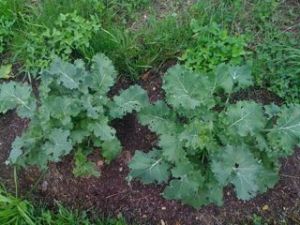
As I was doing this I discovered that my kale seemed to have come back to life in the last couple of weeks. I’d planted it in summer, really not the right time, and it looked small, sickly, and pale all that time. I’d given up on it when, to my surprise today, I discovered it had been revived by the cool wet weather. That was a nice bonus to an already lovely day of hard work. Looking forward to toasting up some kale chips soon!

Fall on the Farm

Fall is definitely here. It was amazing how quickly it happened. But I’m not complaining. Despite our very short summer I still love autumn. I think it’s my favourite season. Today’s post will tell a disjointed story in pictures, but the overall theme is: here’s what’s going for us these days!

 The chickens are starting to look like…well, like chickens. They have most of their feathers now, but with the evenings getting pretty cool I’m keeping their heat lamp on at night. I’m proud to say we didn’t lose a single chick. I’m wondering if this is because the feed store had them for the first 24 hours and got them past the worst of it. But with 25 birds I’ve got two feeders going now and will have to add another water bucket too so I only have to fill them once a day. These guys eat and drink a lot! I’m moving the tractor pretty much every day, and they have gotten into the spirit now. When I begin to move it they all rush forward to the new clover and grass and dig in. Just like the other chickens, if either the feed or the water gets empty they will crowd around the walls closest to the house and just stare, apparently in the hopes of catching someone’s eye. Guess they aren’t so dumb after all!

The garden is looking neat, if not productive, since I finally got around to mowing the grass. Next year I plan to lay down some sawdust or wood chips to create proper pathways between the beds. While we did get a fair bit of lettuce before it bolted, there wasn’t much else going on this summer, except for the tomatoes! Those five plants have eight neighbours in a row outside the view in this photo, and most of them have done well. We’ve been eating tomatoes every day for weeks now, and my new favourite meal is bacon and eggs with fried tomatoes – so sweet! I know with the weather cooling and the rainy season on its way our tomato days are numbered. Hopefully I can pick all the green ones before that time comes and ripen what I can indoors. It will be incredibly depressing to go back to grocery store tomatoes. I’ve given up on a fall/winter garden in exchange for working on soil building. My raised beds are actually sunken beds with very little topsoil, so my plan this fall is to do some mulching with paper feed bags, compost, dry leaves, cut plants (like mullein, which grows in abundance here and fixes nitrogen) and any other organic matter I can get my hands on. My hope is to have much deeper and richer soil in time for spring planting next year.

We took the tarps off our lumber when the dry season started, but soon they’ll be tarped up again. We’ve had two days of sunshine during which we laid the huge tarps out to dry. Tomorrow we’ll put them back over the lumber. While building the chicken tractor earlier this year I noticed the wood was still a bit wet in the middle, so more drying will be a good thing. We are thinking about using the lumber to build a greenhouse, and some exciting opportunities for a barter are in the works. A local family we know through our homelearning network needs firewood, and we have it in abundance. They are willing to exchange experienced labour (carpentry, no less) so we may use that to get a start on the green house. I’ll keep you posted on that project!

The leaves are starting to turn around here, but we simply don’t get anything close to the spectacular show seen in the eastern parts of our continent. Here you can see a Western Flowering Dogwood, its leaves turning a lovely shade of red. It would probably look much better, however, if the leaves weren’t so dry and dead-looking. Still, I will be collecting the leaf fall for mulching and composting this year, and in that case it really doesn’t matter how pretty they are! In the background of this photo you can see our bushy Sitka Alder tree. A resident Stellar’s Jay has returned, sending out his raucous call every morning. He/she was here last year and it is neat to see the bird has returned. It will be one more way to mark the seasons around here. Oh, and speaking of trees, I identified three new ones on the property in the last couple of weeks. We have a Western White Pine, the only one I’ve found around her so far, an Oregon Ash, and a Smooth Sumac. Being the categorization geek that I am, I maintain an Excel spreadsheet with a list of all the flora and fauna I have identified. There are over ten varieties of tree on my list now, and I’m sure I’ll find a few more in the future.

One surprise harvest that required no work at all in creating it was that of wild blackberries. The Himalayan Blackberry may be considered an “invasive species” but I’m not unhappy that a huge whack of them grew up around our big debris pile this year. After stumbling upon the plentiful berries yesterday while walking around the property, I stuffed myself silly and then, realizing there were still tons more, went back to the house to grab a bowl. I noticed that some large animals must have been trying to get at the berries too, as there were some paths trampled through the long growth around the berry patch. That made my job a bit easier, so I’m happy to share with the local wildlife.With only a few cuts and stabs from the evil spikes I filled up the bowl rather quickly (I sat it on a camping chair for this photo to provide some perspective on size). I’m planning on turning it into a low-sugar jam/spread and canning it (guess who picked up a complete canning kit recently?!). Then I can enjoy a taste of summer with my breakfasts for a while into the cold season. I’m sure even this big bowl will cook down to maybe only one or two jars, but perhaps if I’m lucky I’ll be able to harvest some more before they’re gone. One benefit of having so much property is allowing it to grow in some places. I’ll definitely be encouraging this “invader” in years to come!

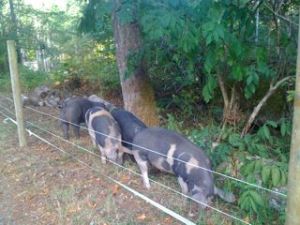
The pigs have grown huge over the summer, and will be ready for harvesting in about another month. Which is a good thing because we ran out of bacon!! We’re excited about having lots of bacon, sausage, ribs, and pork roasts soon. I don’t think we really can appreciate how much meat we are going to get from these four critters, but I’m sure there will be more than we need, and I’m hoping next year to offer some pork shares to friends and family. The pigs have really enjoyed their pasture – you can see a bit of the wooded section here. They truly are forest creatures, preferring to spend hot days and even rainy days under the trees, despite the fact that they have a shelter. They didn’t end up doing too much damage to the area, proving that we have a good ratio of pigs to land in this pasture. While we wanted them to clear things out a bit, we didn’t want to denude the land. I’m sure their manure will provide a new bounty of shoots and roots next spring for the next round of pigs.

On another, dreamier note, I decided over the summer to change my plans for the layout of the farm. The northwest corner of our property is the highest point, and has a nice large flat area that is just calling out for a lovely cob house to be built there. I’d originally dismissed the idea because the tall forest on the west side of the property robs the spot of sun relatively early in the day. However, I’ve decided it doesn’t matter. Many a time I’ve gone up there to sit and reflect and admire the view, imagining that one day I’ll be seeing this view from our living room or south-facing deck. These two photos show the view, with a bit of overlap:

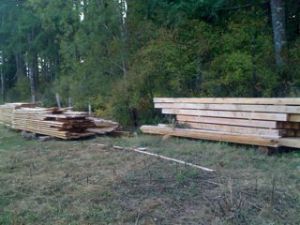
The lumber piles on the right are along the west border of the property, and that tall treeline continues on down the hill beyond the debris pile (this photo is facing due south). Husband and I have also decided that horses will be part of our future farm (more on those exciting developments in a subsequent post!) and the spot where the debris pile and scrap logs are sitting is a nice flat area that is just crying out for a barn. We’ll clear a strip about half the width of that photo all the way down to the bottom of the property for a pasture. But I’d like to keep the woods on the east side as they are of a different, and unique, composition (lots of cherry trees, maples, stinging nettles, and pacific bleeding hearts compared to the mostly fir and salal of the west side). The garden will stay where it is, but I’m trying to figure out how not to make it look like a stockade while still keeping out the deer. I could put a perimeter deer fence around the whole place, but I don’t want to shut out the elk who wander through this very field regularly throughout the year, so I’ll have to figure out something. On the left side of the left photo you can see my compost bins, and behind them one of the big maple trees I love. Meanwhile, whenever I need to think, cool off, or just want to take it all in I come and sit up here (on that cinder block) and dream about our plans for the future. I still have to pinch myself sometimes when I realize that we finally got our piece of land. And while it is still a work in progress, I’m very much in love with this place.

Chickenomics

Our chickens were processed this past Thursday and we netted over 81 lbs of meat among our 18 birds. Tomorrow night I’m going to roast one of them and we’re all looking forward to tasting our first home-grown chicken.

In going over the costs involved, I’d say it was definitely worth it. Each chick was $1.87 for a total of $33.66. I’m not counting the birds we lost in the first few days, hoping that with experience we’ll not have so many losses, plus the Hatchery is giving us a coupon for lost chicks (the process of transporting them is very stressful and they are extremely prone to sudden death in the early days if conditions aren’t exactly right). We went through about 5 bags of feed over their 8 weeks, with each bag costing about $10 (the ones that died did so early enough that they didn’t consume a significant amount of feed). The processing fee was $3.95 per bird, with the total after taxes coming to $79.63. Thus, in total, we spent $163.29 which works out to $2/pound.

The cheapest chicken you can buy at our local big box store sells for about $2.50/lb. This is the lowest quality meat that is fit for human consumption, coming from birds who never saw daylight, lived in confinement cages, and ate nothing but the cheapest feed. I don’t consider any animal raised under such conditions to be anywhere close to optimal health, but if they are free of disease they are considered edible by the Powers That Be (personally, I will only feed this meat to my dog). I wouldn’t be surprised if these bargain basement chickens were lame or otherwise rejected by the “prime” chicken producers.

At the local farm where we usually buy whole chicken (not any more, woo hoo!), the animals are free range (and yes, they really do go outside) and their diet is supplemented with fresh plants, bugs, and anything else they can find. The farm has its own store on-site, open 24 hours and run under the honour system (you take your bird, you leave your cheque). That way you can also see the chickens and the nice life they lead. The chickens are delicious, the fat nice and yellow as it is supposed to be, and this is had at the very reasonable price of $3.15/lb. If you go to a farmer’s market, or a retail outlet that sells ethically raised birds, you’ll pay more. In our old neighbourhood, miles and miles away from the nearest farm, I paid over $6/lb for farm-raised, pastured chickens.

The work in raising the meat birds was minimal. As chicks they didn’t go through feed too quickly, but even as adults I set things up so I only needed to tend to them once a day. I’d move the chicken tractor to a fresh patch of clover, and as the chickens dug in to eat the lush leaves and peck at bugs I’d refill their two feeders and two water buckets. In all it took me less than 30 minutes each day to tend to them (mostly because the feed and water is not close to the field). Anybody who has a bit of land could do this for themselves, and I’m quite certain the taste and quality of our meat will make it all worthwhile.

I’m planning to do another batch of 25 before the season is over. Assuming we lose a few I’m hoping to end up with about 40 chickens in the freezer when all is said and done. Since going on the Paleo diet we’re eating a lot more meat, and this means we will be able to enjoy chicken 3x per month throughout the next year. A big roasting bird goes a long way, what with fresh roasted meat, chicken salad, not to mention wonderful soup stock. So definitely a plus for the food budget!

I built a Chicken Tractor!

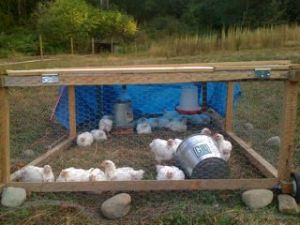
I am so darned proud! Before this the biggest construction project I ever undertook was when I made my square-foot garden beds. This (the photo above) is my chicken tractor (I’ve since covered one end with a tarp to provide shelter from the rain). You can see the handles at the near end; at the far end are a pair of lawnmower wheels. It has no floor, but is covered on all sides with 1×1 chicken wire, with an added skirt (which I later weighed down with some rocks) to deter the digging predators. The back half of the top is actually a hinged lid, secured with slide locks. This allows me to get inside to change water, etc. The chickens have access to green stuff, bugs and worms, and within minutes of being moved into their new home they were scratching and pecking and running around with bugs in their beaks while their littermates tried to snatch them away. It feels really good to see the chickens outside in Nature, doing what chickens are supposed to do!

The idea is to move the tractor every couple of days (daily when they get bigger) so they always have access to fresh food and their manure fertilizes the ground they left rather than becoming a waste product that needs to be dealt with. They still get their pelleted feed, and I did move the heat lamp in there as it’s a bit cool in the evenings right now, but now they can have fresh air, sunshine, and some variety to their diet. The handles and wheels make it relatively easy to move, but I’m glad Hubby is coming home tonight as it’s a bit of a walk from the patch of grass they are on right now and the big pasture and I could use some help moving the tractor over there (and making sure nobody gets squished or escapes!). After that it will be easy for me to move it myself a few feet to a new patch of greens.

The chickens have been growing at a (frankly) freakish rate. They must be at least 3 times their size after only 2 weeks. The brooder was moved into the garage last week after I felt sure they were all doing fine (and the smell got too much for me). I’ve never had chickens before but I’ve heard these meat birds make quite a mess (they eat and drink copious amounts, so I guess that makes sense) and these guys were clearly out-pooping their brooder’s capacity! Tonight is their first night outdoors and I keep checking on them, worried they’ll be cold. They are about half-feathered right now but between the heat lamp and the company of others I am hoping they’ll be fine.

Pigs and Chickens (and Veggies), oh my!

We got a surprise this past Friday – our pigs are ready to come home! Either we miscalculated the time, or they are from a slightly earlier batch of piglets, but they were ours as of Saturday. As much as we wanted to pick them up right away, we had to ask if we could wait until the following weekend because we had already booked a 3 day holiday and did not want to leave less than 24 hours after bringing the piglets home (and Husband – who needs to complete the wiring for the electric fence – was leaving for the mainland the day after we got back). Thankfully, the farm was very accommodating and we’ll be picking them up together, with the kids, this Sunday.

The farm, by the way, is Sloping Hill Farm located in Qualicum Beach on Vancouver Island. They sell their product to some of the top restaurants in Vancouver and elsewhere and we are very pleased to have developed a good relationship with them. When we bought piglets from them last year they informed us they’d never sold them before! But when Husband contacted them they just happened to have some extras. They were very particular about how the pigs would be housed and treated (which aligned with our plans exactly), which only raised our respect for them. We kept in touch regarding how they fared, they apparently approved, and so now we are regular customers!

In other unexpected good news, the chicks I ordered will be ready a week ahead of schedule. They arrive next Wednesday! Setting up a brooder won’t be hard – I can pick up all the supplies at the farm supply store. Then I’ll have two weeks to make the chicken tractors for when they are ready to move outside. I need to find a good set of plans (by browsing through the dozens on BackyardChickens.com) but we have the lumber and the chicken wire so I don’t think it will be too much trouble to put something together. Meanwhile, our field is dense with clover and other yummies, so I hope the birds will be happy during their brief stay with us.

With things moving a bit faster than planned, some aesthetic details are being overlooked for now. I won’t have the pasture looking as neat as I’d hoped – some of the wood piled around will doubtless not make it out. It really doesn’t matter as they have a 1/2 acre to roam and they’ll likely dig up a good deal of it anyways. We won’t have the new roof for the shed done, either, though we can certainly work on that after they are here. My garden won’t get any better-looking in terms of fencing, either, but it’s functional for now and appears to be keeping the critters out. But planting more seeds won’t take long, thanks to the beds being pre-dug last fall, and so I should be able to add to the summer harvest soon.

I’ve been thinking about how much I want to have a nice-looking farm, but really the most important thing is growing the food. For that, all you really need is the land (and the right zoning, I suppose). An open field, nothing fancy, will support our chickens. Another chunk of land supports the pigs (and really, they did fine with the portable electric fencing we had last year, it was just a bit more work for us). The garden fencing was inexpensive and relatively easy to put up. Sure it looks ugly, but it keeps the critters out. Don’t get me wrong, I want a nice-looking place, too. But that can wait, and it’s really cool to realize that it’s not a barrier to having a freezer full of chicken, pork, and veggies (assuming there are any leftover from the harvest that we don’t eat fresh and that will freeze well). Once the pigs and chickens are here and settled, and the rest of the veggies are planted, I can devote other sunny days to sprucing up the place (and may even get around to mowing the dandelion-and-weed jungle growing in front of the house). In the meantime, we’ll be enjoying having animals around the farm again and knowing that we are supplying our family with the healthiest and best food you can grow!


We have Fences!

It was an exciting couple of days here this past week when the fencing guys showed up to install our new fencing. After going over many possibilities we decided to have professionals come and do the side of the pig pasture that lay along the property line with our neighbour. We chose a woven wire livestock fence, with 6-inch diameter round cedar posts and wire mesh that has smaller (rectangular) holes near the bottom and larger ones near the top. This 300-foot section ran over some uneven ground and, as it turned out, required the removal of a few small trees. We could never have done a proper job of this ourselves, not having any earthmoving equipment. The fencing guys arrived with a nifty little Bobcat – well, actually it’s the biggest Bobcat you can get, so we were told – and we were fully impressed with the strength and versatility of this little machine.

The first thing they did was create a path about 10 feet wide along the property boundary so they could properly sight the line. The fence would go about 4 – 6 inches inside this boundary so that it was “all ours”, legally speaking. Then they smoothed the grade a bit in preparation for the posts. Part of this process required them to fill in a low-lying boggy area. This was a bonus since they used a huge pile of wood debris sitting nearby that was leftover from when the utilities crews came by to clear the right-of-way several years ago. They used it to fill in the low-lying area, then topped it off with dirt and ran over it until it was pretty solid. What a difference! And it was nice to finally be able to reach the gate (which you can’t see in this photo – it’s beside the utility pole) without being ripped apart by nasty thorny bushes.

Ditto with the bottom short side of the pasture, another section that was full of thorny bushes, piles of logs and small poles, and really messy-looking. Hopefully the pigs will take care of the mess on the left side of the photo. We’ll get to the mess on the right when the budget next allows.

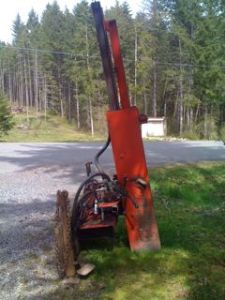
It was neat watching them put the posts in. I’ve done my fair share of digging in our rocky soil and I can tell you it is back-breaking work. Even a brand-new sharpened shovel will go in maybe 2 – 4 inches before hitting a rock. Hand-held post hole scoopers are useless and even hand-held powered augers don’t work – hit a big enough rock and the thing could throw you off your feet. We assumed the pros would use an auger mounted on a tractor, but our guys showed up with this nifty post-pounding attachment.

This made quick work of installing posts – no holes to be dug! – and allowed for the operator to adjust for level as the posts were going in. It was for this reason that we decided to have him install posts for us along the other three sides of the pig pasture: we got the posts at the contractor’s cost and it was only $5 more to have them pounded in.

As someone who has personal experience with digging in our rocky soil, this was as sweet a bargain as I could behold, and *definitely* worth the hours and hours of hard labour it would cost us to do it ourselves. It also looks much nicer than the cheap plastic posts we used for last year’s electric fence. To top it off, when the fence guy heard we would be running electric tape along the posts he suggested we double-space them. This cut the cost in half, it’s fully sufficient for electric tape fencing, and when we are ready to do a proper woven wire fence we merely need to put posts in-between and they’d all be the right distance apart. We really appreciated this advice.

The top half of the pasture is almost a right triangle, with a very short top section joining the two long sides. The long side that isn’t on the property boundary follows the curve of our driveway. We chose this because we thought it would look nice to have fencing running alongside the driveway, but mostly because this required no clearing (other than moving aside the logs I so diligently rolled into place by hand last year!). It will allow the pigs access to the wooded area within, which we think will make them happy (pigs are forest creatures, after all). After following the driveway the line then continues alongside the “roadway” that leads down into the undeveloped part of the property and was rather loosely defined until the posts went up.


The total area of the pasture is approximately 1/2 acre, or around 20,000 square feet. There’s still some work to do clearing out the area: our fire pit will have to be moved, as will a large pile of firewood, and my compost bin and some other piles of wood debris (while we had the Bobcat here, we had him move one large pile for us). Husband will be stringing the electric wire some time soon and running a line to the garage for power.  Finally, the pig shelter we built last year is going to be moved uphill a ways and turned towards the southeast so they can get the early sun to warm them in the mornings. We’re going to replace the roof (which was recycled from an old greenhouse on the property) with a metal shed roof from which we will collect rainwater for the pigs to drink. They arrive in about 5 weeks so we’ll definitely be ready by then, and very much looking forward to having critters around again.

Fencing Progress

Spring is in full swing here on the farm. The WesternTrillium is in bloom, bringing brightness and beauty to the woods. Husband and I spent today running string between property markers to mark out fencelines. This is the first step in building a proper pasture for this year’s batch of piglets, who will be arriving next month (we’re doing 3 this year). The pasture will be approximately 400 x 50 feet, giving our pigs about a half-acre of land that is a mix of forest and open brush.

One long side of the pasture lies along the property line, dividing ours from the neighbour next door. She is donating the cedar fence posts and a roll of wire mesh for that part. We’ve decided to hire a guy to do this section, as it runs over uneven ground and we want it to look nice and be durable. The wire mesh gets attached at each end of the fence line to special braces that absorb the tension as the fence is tightened up. It will likely need braces midway as the terrain changes from downhill to uphill, too. Definitely not a job for newbies.

We’ll be watching and taking notes for future reference, however, as we hope to do the rest of the property ourselves when the budget allows. While the pig pasture will run along the first 350 feet or so of the property line, there’s another 400 feet to the bottom of the property. Today we went out with a 1000 ft roll of mason’s twine to see if we could mark the whole fence line.

About halfway down that side of the property somebody put up a farm gate many years back. It sits there looking rather strange – a gate all by itself without a fence. It does, however, have 4 posts that are in a straight line and the question was whether whoever built it ensured it was lying on the property line. If so it would make a very handy reference point. Our plan was to run a line of string from the topmost property pin to the gate (our property runs from North to South, so we designate North as “top” and South as “bottom”), then stand on the other end of the gate and eyeball the four posts to see if it matched the line of string.

So we did this and, as far as we can tell, the gate and its posts are in line with the property markers. Hooray! So using that as a midway point we continued running line from there down to the bottom property marker. We had always assumed there would be trees in the way and that we’d have to do some heavy tree removal before running a line there. To our delight we discovered that it’s a clear line all the way from the gate to the south property marker (we now suspect it may have been cleared for that purpose several years ago). That’s going to make it much easier, and less expensive, to fence when we’re ready to do so.

As for the other 3 sides of the pig paddock, we’re going to do those ourselves. We’ve laid it out so there are no trees in the way, and now the question is simply what sort of fencing we’re going to install on those sides. If we choose to use wooden posts (which look nice) we’ll need someone to dig the post holes since our very rocky ground precludes the use of hand-held power post-hole diggers (apparently if they hit a rock they’re liable to swing you right off your feet). We’re going to ask the fence guy if he would do that for us (presumably he has a tractor or other machine with an auger) and how much it would cost.

Originally I figured we’d just use metal T-posts as they go in the ground quite easily, being smaller and with a sharp point. However, T-posts are almost twice the cost of wooden fence posts, so if the difference is about the same price as getting someone to dig the holes for us, we may be just as well going for wooden posts. While T-posts are much less permanent, we’re pretty certain of where we’re placing the lines. With all that said, the budget is tight these days and we may end up settling for electric fencing along the 3 other sides of the pig pasture. It’s by far the cheapest option, and the easiest to install. It just doesn’t look as nice as proper farm fencing.

Spring is here!

Thanks to a recent bought of spring weather, my trailmaking project is coming along nicely. I’ve added several more trails to the one that was already present when we moved here last year (and now that one will stay accessible even when the stinging nettles are full grown). It’s exciting to be able to access areas of the woods that I haven’t been able to observe easily before. I’m noticing which areas are particularly sunny and open, and which are cooler and more damp. I can’t help but feel that we have the foundations of a bountiful food forest in here, with lots of diversity in both microclimate and soil type.

As a reward for my hard work, I take the dog for daily walks through the trail network. Once or twice I’ve brought along a small colinear hoe to sweep away any stinging nettles growing on the paths (these innocuous-looking small shoots will, I’ve now learned from experience, grow to about 5 feet tall by summer). As we go along, I’m looking out for species of plants that I haven’t yet identified.

One small tree had me puzzled for a while. It caught my attention a couple of weeks ago when I noticed it was already budding leaves when all the other plants had buds shut up tight. Soon small sprays of flowers could be seen. It looks so pretty – a sign of all the delights of spring to come. I took a sample branch and spent quite some time thumbing through my Trees in Canada book trying to identify it, to no avail.

Finally I decided to check my other reference, Plants of Coastal BC. I then learned why I was having so much trouble – my little tree was not, in fact, a Tree but a Shrub. And it’s an Indian Plum (Oemleria cerasiformis), a classic herald of spring in our coastal climate (see photo above).

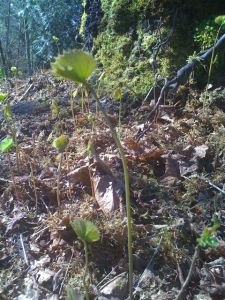
I’m really enjoying the process of getting to know the flora and fauna of our place. It brings a sense of familiarity. This spring I’ve been watching the Vanilla Leaf come up, and remembering how astonished I was to see them for the first time shortly after moving here last year. They seemed so strange at first, these tall, thin green stalks rising up out of the ground, with nothing but a fan-shaped green tip. They came up in great swaths, looking almost alien in appearance. Now when I see the new crop coming up I remember how it felt to “meet” them last year.

Over the last few days I’ve been noticing Western Trillium (Trillium ovatum) appearing, and today I saw one in flower. The Pacific Bleeding Heart (Dicentra formosa) is coming up, though no flowers just yet. And today I discovered Menzies’ Red-Mouthed Mnium (Mnium spinulosum), a type of moss that is relatively easy to identify because of the red rings around the tip of the sporophyte. My daily walks through our woodland trails will allow me to watch the changes unfolding on a much smaller scale than I was able to last year. It’s a new show every week!