Archive for the ‘building things’ Category

Planning for the New Home Has Begun!

Back at the beginning of this year I wrote about my forays into house planning. It has taken me over 7 months and many, many edits but I have finally come up with a layout that I like, that gives me what I want, and that puts the house size at under 2500 square feet. In fact, this only just happened two days ago! It was one of those Eureka moments where I was hit with inspiration, ran to get a pencil and some graph paper, and realized I’d finally solved many of the issues I was struggling with.

The timing was perfect, too. Today we interview two design/build firms. The first is the EcoNest company, run by Paula and Robert LaPorte. These guys are well-known in the natural building community, and we are fortunate that they are in the area this month giving a series of workshops. They are stopping by this evening with their local certified builder (there are not many builders in North America trained in this procedure and we are so fortunate that one of them is located just 30 minutes away!). I am really excited about meeting with them and hope they can reassure my husband that this isn’t some freaky hippie experiment in building that could cost us a fortune down the road!

In my previous house-planning post I wrote that I was looking at strawbale and cob for the infill material. Then I discovered “light clay”, which is also called straw-slip or chip-slip depending on the fibre ingredient. This is what the EcoNest folks specialize in. Both use a clay slip as a base (a light, watery mixture of clay and water) in which either straw or wood fibre is mixed so that the fibres are coated evenly with the slip. The beauty of this stuff is that you can pack it into forms and thus reduce time and labour costs considerably. Apparently, it also has a higher R-value for insulation than either strawbale or cob. It does not require a netting or base coat to “rough up the surface” so that plaster can be applied. What really appeals to me is that we could supply the wood chips from our own property. However, we need to compare the cost of purchasing enough straw for the project versus time to gather and chip the wood plus cost of renting an industrial-strength chipping machine.

The other company we are interviewing is a local design/build outfit that has done several projects in the area that we like. They claim to be able to do “green building” but this may turn out to mean conventional stick-framing and house-wrapping with simply using less harmful and lower embodied-energy materials. Nevertheless, I’m open to hearing what they have to say, and seeing how this option compares with the above.

From these interviews I hope to settle on 1) what infill material will be used, 2) how big the house will be, and 3) how much it will cost. The latter two are obviously related quite closely, while the first point will determine the nature of that relationship. My understanding is that building green is no more costly than any other quality timber-frame home but hopefully we’ll find out soon. We know roughly what we want to spend, but whether that is realistic based on our desires remains to be confirmed. We may need to increase our budget. Alternatively, we may decide to do some inexpensive finishing to bring down the budget, with the aim to remodel later when we have more cash-in-hand. Given what we are living in now, anything without mould or rodents is an improvement!

House Planning

Winter months are a great time for indoor activities like crafting, reading, garden planning, and other endeavours that can take place from a comfortable chair. Besides doing a fair amount of knitting and crocheting myself this season, I also embarked on another hobby/task: planning our future house. When we bought this property, the plan from the start was to build a house within 5 years. Our small mobile home is serving us well at the moment, but it is old and is likely not going to last too much longer. Moisture problems top the list of issues, and we have a noticeable mouse population sharing our home (despite having a cat). If things continue to go according to plan on the financial front (we should know by summer) we’re hoping by the end of this year to start the initial work (engineering, soil testing, hiring the architect, etc). But even though we are still a ways from breaking ground, I’ve already learned a lot. In today’s post I’m going to share some of this process with you.


Step #1: Know Your Land.

When we were first looking at land, many resources I consulted said the same thing: if you are planning to build try to live on the property for at least a year, if not longer, before breaking ground on your new home. One of the great features of this property was the mobile home. Old enough (and ugly enough!) that we would happily get rid of it when the time came, but sturdy enough to house us until such time as we were ready to build. Having spent almost two years here I can appreciate how valuable that advice is. I know our land pretty well now. I know where the rarer species grow, where water likes to accumulate, where it flows during the wet season, and where it dries out first. I know where the frost accumulates, where the wind blows from in winter. I know the path of the sun year-round, what obstacles cast significant shadows on growing areas, what animals visit our property at night, where the birds like to hang out, etc. This is all very helpful information when it comes to the next step.

Step #2: Choose Your Building Site.


In our case, there wasn’t a huge choice of locations despite having 4 acres. Our property is long and narrow and there is a residential power line cutting diagonally across the top third of the property with a right-of-way underneath that precludes any permanent buildings. To build below that line would mean a very long walk from the curb on garbage day. Unless we wanted 2 acres of land between us and the street we’d have to build in a gully between hills and that is a bad site for any house – frost collects there, as does water. We also didn’t want to build on the same spot as our current house so that we could remain living comfortably for however long it takes to build. Moving the house and its connections to another spot on the property would be expensive.

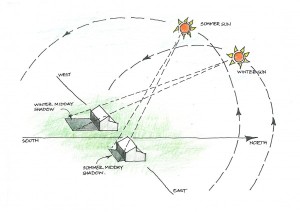
In some ways, having limits can be good. There was really only one logical place to build and fortunately it is not where our mobile home is located. The site we’ve chosen is in the northwest corner of the property, on the highest point and furthest away from roads and neighbours (shown in the photo above). There are some lovely views from there, and its southern exposure will allow us to incorporate passive solar heating into the home design. The north side of the site is part of a large forested area, which will be great for insulating against cold winter winds that blow from the small mountains and hills to the north of us. Unfortunately, the entire west side of the property is lined with a tall forest of Douglas Fir trees so we lose the sun early in the day. However, having consulted my bible of solar home design – The Solar House by Dan Chiras – it is just sufficient to be suitable for the job (more on solar design later).
The site is the top portion of the area we had cleared two years ago when we first moved here, but we didn’t clear all the way to the north property line. There is a large Western Redcedar tree there surrounded by a few smaller ones and I did not want to have to remove them if possible. They provide a dense shield against wind (and block the view from the hiking trail that goes past that northern border) plus we don’t have too many cedars in our neighbourhood (it was logged about a century ago and replanted with Douglas Firs). So that limited how far we could extend the house northwards. Westwards we are right up against the property line, so the minimum clearance sets that limit. Eastwards it’s pretty wide open, but the further east we go the more exposed we are to the street (it ends about halfway along our northern border) and the neighbours’ homes. Southwards we are limited by the powerline right-of-way. But there was one other limiting factor.

This high point on the property was dug into when the original owners placed the mobile home, and then cut into some more when a small detached garage was added (see photo above). Thus there is a chunk of land cut out of the southeast corner of the house site. Originally I assumed this meant we’d have to build an L-shaped house and most of my plans were based on that design. Due to the limitations described above I wasn’t getting anywhere with floor plans (I should point out here that we are adamantly opposed to having more than one storey of living space, for reasons too lengthy to get into just now).

And then one day it hit me that if we built out over the cut-out section we could free ourselves up enormously in terms of size and layout. Essentially we’d build out over the current garage, whose roof is practically level with the top of the hill, and it would become a walk-out half-basement. It would house what it currently houses: tools, three freezers full of meat, and Husband’s drum kit among other garage-type items. And virtually none of it would be buried, allowing sufficient light inside that it doesn’t feel like a dungeon. Why it took me months of pacing around at the top of that hill to figure this out I don’t know. But it’s just one reason why I’m glad I have so much time to work on this planning thing!

Step #3: The Layout.
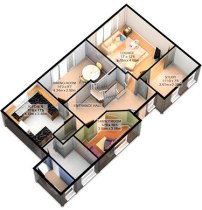
The truth is that we are going to need an architect to design the floor plan and layout of the house. I have zero training in this area and I can’t seem to break outside the box. Literally. I’m using graph paper to work on design plans and I seem to be stuck in this rectangular, stick-to-the-lines thinking that suggests we need a 3000 sq. foot house in order to fulfill our requirements. That is more than double the size I’m interested in. So mostly, drawing floor plans has been an exercise in thinking about the spaces and coming up with a few good ideas here and there. There is no way I could do this in earnest.


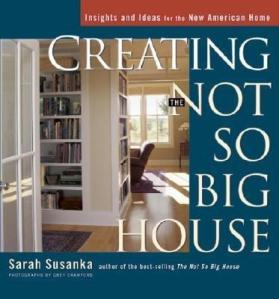
Thankfully, there are some great resources out there and my current bible of home design is from Sarah Susanka’s Not So Big House empire. Specifically, her book Creating the Not So Big House has been an excellent source of ideas, as well as providing me with the language to convey to our future architect what we’re looking for. Finding a book like this which encapsulates your own desires for house design can really help with the whole process. I’m pretty sure that an architect will be able to come up with far more efficient uses of space, and far better workflow patterns, than I’ve been able to come up with during my forays into cubist floor-planning.
Another important consideration is that we wish to incorporate passive solar design principles into our home. This means orienting the long side of the house to the south, placing most of the windows there, and incorporating thermal mass into areas of the home to retain and release heat when the sun goes down. Without going into too much detail about passive solar design right now, it does place some limitations on layout. But now that I know we’re not limited to an L-shaped site it’s not really an issue anymore.

Step #4: The Materials.
It won’t come as a surprise to anyone who has been reading my blog for a while to learn that I want to build our home from natural materials, locally sourced wherever possible. The choices boil down to cordwood, rammed earth, cob, and straw bale. While rammed earth construction has been done here (music legend David Crosby has a rammed earth home on nearby Salt Spring Island that was featured in an episode of David Suzuki’s The Nature of Things) and it is beautiful, it’s not really my style. Cordwood is problematic in climates with high moisture like ours, and while I think it looks pretty I don’t want a whole house made out of it. I’d had it in my head for some time that cob would be our best choice because I thought strawbale wasn’t suited to our damp climate. I’ve since learned that this may not be the case. And I’m concerned about the fact that cob is a relatively poor insulator. So right now I’m leaning toward strawbale.

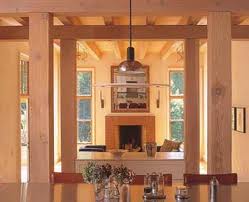
We will, however, be using timber-framing for the skeleton of the house. The strawbales (or whatever we choose) will be infill rather than supporting walls. Timber frame simply looks incredibly beautiful, there are several very skilled companies locally that do timber-framing, and the lumber can be sourced right here on the Island (and some of it probably from our own property).
 

Step #5: The Idea Book.

I started this as a Word document some time ago. Any thoughts or observations I have go here. It could be anything from noting that I spend a great deal of time during the day in the kitchen, to wish-lists requesting, for example, a covered outdoor area for hanging laundry when it is raining. I’ve put a huge amount of thought into all the details and recording them in one place makes for a handy reference.

My tip would be to spend a day thinking about where you go in your home at various times of day, what areas are used the most, and which are not used much at all. What items do you have lying around that need a home of their own – plastic shopping bins for groceries before they get taken back out to the car, recycling, mail that needs to be sorted, clothes going to goodwill, etc. Think about what you like about your current home, or what wish you had – for example, when you are taking a shower do you love that there is a window there? Do you wish the shower were wider? And of course there is my favorite topic: how easy is this to clean? I’m amazed at how many design features I see in magazines and websites that look beautiful but I know from experience would be magnets for dust and cobwebs, or be a pain to vaccuum around.

I also wanted to share a great website I found called Houzz.com. Here are hundreds of thousands of images of room design, including exteriors, that you can browse through and add to your own personal Ideabook. My one complaint with the site is that most of these homes are quite ostentatious, much too over-the-top for my liking. I’m looking for something simpler and more humbler than most of the homes shown here, but there are so many great ideas that I continue to build up Ideabooks for various rooms in my future home. The best part will be sharing these books with our future architect, who can then get a very good idea of our taste and style without having to conduct extensive interviews with people lacking the language to describe what they like (that would be me: “Um, I like kind of a rustic look but not messy-looking, sort of traditional but not uppity, something between country and west coast luxury home…but small”…???).

So that’s where I am now. Building up my Ideabooks, having fun with graph paper, and making notes of things that will be important when it comes time to sit down with an architect. Of course there is much that needs to take place in-between, but there’s nothing I like more than immersing myself in some project that leads to the fulfillment of a Dream. Sometimes it doesn’t even matter if the dream ever comes true; I enjoy the process that much.
 

I built a Chicken Tractor!

I am so darned proud! Before this the biggest construction project I ever undertook was when I made my square-foot garden beds. This (the photo above) is my chicken tractor (I’ve since covered one end with a tarp to provide shelter from the rain). You can see the handles at the near end; at the far end are a pair of lawnmower wheels. It has no floor, but is covered on all sides with 1×1 chicken wire, with an added skirt (which I later weighed down with some rocks) to deter the digging predators. The back half of the top is actually a hinged lid, secured with slide locks. This allows me to get inside to change water, etc. The chickens have access to green stuff, bugs and worms, and within minutes of being moved into their new home they were scratching and pecking and running around with bugs in their beaks while their littermates tried to snatch them away. It feels really good to see the chickens outside in Nature, doing what chickens are supposed to do!

The idea is to move the tractor every couple of days (daily when they get bigger) so they always have access to fresh food and their manure fertilizes the ground they left rather than becoming a waste product that needs to be dealt with. They still get their pelleted feed, and I did move the heat lamp in there as it’s a bit cool in the evenings right now, but now they can have fresh air, sunshine, and some variety to their diet. The handles and wheels make it relatively easy to move, but I’m glad Hubby is coming home tonight as it’s a bit of a walk from the patch of grass they are on right now and the big pasture and I could use some help moving the tractor over there (and making sure nobody gets squished or escapes!). After that it will be easy for me to move it myself a few feet to a new patch of greens.

The chickens have been growing at a (frankly) freakish rate. They must be at least 3 times their size after only 2 weeks. The brooder was moved into the garage last week after I felt sure they were all doing fine (and the smell got too much for me). I’ve never had chickens before but I’ve heard these meat birds make quite a mess (they eat and drink copious amounts, so I guess that makes sense) and these guys were clearly out-pooping their brooder’s capacity! Tonight is their first night outdoors and I keep checking on them, worried they’ll be cold. They are about half-feathered right now but between the heat lamp and the company of others I am hoping they’ll be fine.

We have Chickens!

Today I went to the feed store to pick up our chicks. I was cursing myself for having turned down a perfect-sized box the last time I was there, certain I would have no trouble finding another. But I forgot that Husband would be away for business, and that my kids were scheduled to come down with chicken pox (due to us having attended a Pox Playdate two weeks prior). I had little opportunity to run any errands, as bundling unwell kids into the car was something I wished to avoid. Consequently I found myself heading to pick up 25 chicks with nothing to house them in.

However, it wasn’t a big deal. We had a few bits of scrap lumber and plywood around and I made myself proud by grabbing a drill, some screws, and a circular saw and fashioning a pretty decent abode for the little peepers. The floor is plywood, approximately 5′ by 3′. Two thin pieces of composite board made the long side walls. I attached them to the floor via some 2 x 2’s I had attached along the bottom, then joined them across the width at each end with some a 2 x 4 that I cut in half lengthwise. Out of plywood I found some pieces of flooring leftover from when previous owners had done one of the rooms. These were the kind that lock into each other, and I was able to cut and stack them to cover the ends. When it was finished I had a very functional, if not elegant, brooder box. The chicks seem really happy in it, too.

As I walked around the property this afternoon, on a gorgeous summer-like day, I was feeling a bit frustrated with the overall look of the place. It’s not what you would call “attractive”. The fencing in the back yard for the dog looks shabby, our mobile home is ugly, and I have zero time to do any aesthetic gardening. The little lawn out front needs mowing (which irks me: I don’t want to have to mow grass – it’s a waste of time and fossil fuels) and the edges of our field are indistinct, given the area an untidy, overgrown feeling. The pig’s enclosure has stacks of logs and other debris in it (not enough to bother the pigs, but it makes the place look untidy). And of course there are other debris piles around the property. In other words, as Husband put it, it’s looking a bit “hillbilly” around here now that everything is growing like crazy.

And then I saw the piglets. They came running out from the bushes to see if I had brought any food. I looked at them and was struck by the thought that our place may not look attractive, but it was pretty darned productive right now. Four pigs’ worth of pork, twenty-five meat birds, and a vegetable garden that is steadily growing. The truth is, you don’t need a picture-perfect homestead to provide your family with the best quality food you can grow. There will be plenty of time for landscaping, earthmoving, and building a new home in the years to come. For now, I thought, at least we have our priorities straight.

We have Fences!

It was an exciting couple of days here this past week when the fencing guys showed up to install our new fencing. After going over many possibilities we decided to have professionals come and do the side of the pig pasture that lay along the property line with our neighbour. We chose a woven wire livestock fence, with 6-inch diameter round cedar posts and wire mesh that has smaller (rectangular) holes near the bottom and larger ones near the top. This 300-foot section ran over some uneven ground and, as it turned out, required the removal of a few small trees. We could never have done a proper job of this ourselves, not having any earthmoving equipment. The fencing guys arrived with a nifty little Bobcat – well, actually it’s the biggest Bobcat you can get, so we were told – and we were fully impressed with the strength and versatility of this little machine.

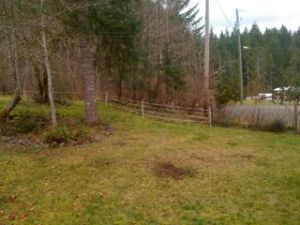
The first thing they did was create a path about 10 feet wide along the property boundary so they could properly sight the line. The fence would go about 4 – 6 inches inside this boundary so that it was “all ours”, legally speaking. Then they smoothed the grade a bit in preparation for the posts. Part of this process required them to fill in a low-lying boggy area. This was a bonus since they used a huge pile of wood debris sitting nearby that was leftover from when the utilities crews came by to clear the right-of-way several years ago. They used it to fill in the low-lying area, then topped it off with dirt and ran over it until it was pretty solid. What a difference! And it was nice to finally be able to reach the gate (which you can’t see in this photo – it’s beside the utility pole) without being ripped apart by nasty thorny bushes.

Ditto with the bottom short side of the pasture, another section that was full of thorny bushes, piles of logs and small poles, and really messy-looking. Hopefully the pigs will take care of the mess on the left side of the photo. We’ll get to the mess on the right when the budget next allows.

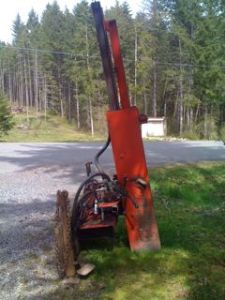
It was neat watching them put the posts in. I’ve done my fair share of digging in our rocky soil and I can tell you it is back-breaking work. Even a brand-new sharpened shovel will go in maybe 2 – 4 inches before hitting a rock. Hand-held post hole scoopers are useless and even hand-held powered augers don’t work – hit a big enough rock and the thing could throw you off your feet. We assumed the pros would use an auger mounted on a tractor, but our guys showed up with this nifty post-pounding attachment.

This made quick work of installing posts – no holes to be dug! – and allowed for the operator to adjust for level as the posts were going in. It was for this reason that we decided to have him install posts for us along the other three sides of the pig pasture: we got the posts at the contractor’s cost and it was only $5 more to have them pounded in.

As someone who has personal experience with digging in our rocky soil, this was as sweet a bargain as I could behold, and *definitely* worth the hours and hours of hard labour it would cost us to do it ourselves. It also looks much nicer than the cheap plastic posts we used for last year’s electric fence. To top it off, when the fence guy heard we would be running electric tape along the posts he suggested we double-space them. This cut the cost in half, it’s fully sufficient for electric tape fencing, and when we are ready to do a proper woven wire fence we merely need to put posts in-between and they’d all be the right distance apart. We really appreciated this advice.

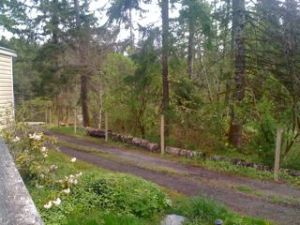
The top half of the pasture is almost a right triangle, with a very short top section joining the two long sides. The long side that isn’t on the property boundary follows the curve of our driveway. We chose this because we thought it would look nice to have fencing running alongside the driveway, but mostly because this required no clearing (other than moving aside the logs I so diligently rolled into place by hand last year!). It will allow the pigs access to the wooded area within, which we think will make them happy (pigs are forest creatures, after all). After following the driveway the line then continues alongside the “roadway” that leads down into the undeveloped part of the property and was rather loosely defined until the posts went up.


The total area of the pasture is approximately 1/2 acre, or around 20,000 square feet. There’s still some work to do clearing out the area: our fire pit will have to be moved, as will a large pile of firewood, and my compost bin and some other piles of wood debris (while we had the Bobcat here, we had him move one large pile for us). Husband will be stringing the electric wire some time soon and running a line to the garage for power.  Finally, the pig shelter we built last year is going to be moved uphill a ways and turned towards the southeast so they can get the early sun to warm them in the mornings. We’re going to replace the roof (which was recycled from an old greenhouse on the property) with a metal shed roof from which we will collect rainwater for the pigs to drink. They arrive in about 5 weeks so we’ll definitely be ready by then, and very much looking forward to having critters around again.

Fencing Progress

Spring is in full swing here on the farm. The WesternTrillium is in bloom, bringing brightness and beauty to the woods. Husband and I spent today running string between property markers to mark out fencelines. This is the first step in building a proper pasture for this year’s batch of piglets, who will be arriving next month (we’re doing 3 this year). The pasture will be approximately 400 x 50 feet, giving our pigs about a half-acre of land that is a mix of forest and open brush.

One long side of the pasture lies along the property line, dividing ours from the neighbour next door. She is donating the cedar fence posts and a roll of wire mesh for that part. We’ve decided to hire a guy to do this section, as it runs over uneven ground and we want it to look nice and be durable. The wire mesh gets attached at each end of the fence line to special braces that absorb the tension as the fence is tightened up. It will likely need braces midway as the terrain changes from downhill to uphill, too. Definitely not a job for newbies.

We’ll be watching and taking notes for future reference, however, as we hope to do the rest of the property ourselves when the budget allows. While the pig pasture will run along the first 350 feet or so of the property line, there’s another 400 feet to the bottom of the property. Today we went out with a 1000 ft roll of mason’s twine to see if we could mark the whole fence line.

About halfway down that side of the property somebody put up a farm gate many years back. It sits there looking rather strange – a gate all by itself without a fence. It does, however, have 4 posts that are in a straight line and the question was whether whoever built it ensured it was lying on the property line. If so it would make a very handy reference point. Our plan was to run a line of string from the topmost property pin to the gate (our property runs from North to South, so we designate North as “top” and South as “bottom”), then stand on the other end of the gate and eyeball the four posts to see if it matched the line of string.

So we did this and, as far as we can tell, the gate and its posts are in line with the property markers. Hooray! So using that as a midway point we continued running line from there down to the bottom property marker. We had always assumed there would be trees in the way and that we’d have to do some heavy tree removal before running a line there. To our delight we discovered that it’s a clear line all the way from the gate to the south property marker (we now suspect it may have been cleared for that purpose several years ago). That’s going to make it much easier, and less expensive, to fence when we’re ready to do so.

As for the other 3 sides of the pig paddock, we’re going to do those ourselves. We’ve laid it out so there are no trees in the way, and now the question is simply what sort of fencing we’re going to install on those sides. If we choose to use wooden posts (which look nice) we’ll need someone to dig the post holes since our very rocky ground precludes the use of hand-held power post-hole diggers (apparently if they hit a rock they’re liable to swing you right off your feet). We’re going to ask the fence guy if he would do that for us (presumably he has a tractor or other machine with an auger) and how much it would cost.

Originally I figured we’d just use metal T-posts as they go in the ground quite easily, being smaller and with a sharp point. However, T-posts are almost twice the cost of wooden fence posts, so if the difference is about the same price as getting someone to dig the holes for us, we may be just as well going for wooden posts. While T-posts are much less permanent, we’re pretty certain of where we’re placing the lines. With all that said, the budget is tight these days and we may end up settling for electric fencing along the 3 other sides of the pig pasture. It’s by far the cheapest option, and the easiest to install. It just doesn’t look as nice as proper farm fencing.

Spring Projects

I hope my last post didn’t seem too depressing. While the major cost projects are on hold for a while, many smaller projects are underway…

The most exciting is that we’re currently in talks with a permaculture design outfit and are expecting a proposal soon to do a Design Review for us. This means they, with their extensive knowledge of permaculture (I don’t want to reveal names yet, but they are top notch), will come for a site visit then go over our Site Plan to see how we can improve it, or if there are any glaring errors. I’m sure they’ll have much input there. The other thing they’ll do is provide us with a comprehensive list of plants that we can grow in our climate, including those that can provide food or other uses, and – importantly – how best to grow these plants in polycultures and guilds. By the end of this process we hope to have a Site Plan that includes all the plants we’ll grow here, where on the site they’ll be planted, and with what other plants in what groupings. From this point on it will simply be a matter of time and budget as we implement all the elements in our plan ourselves. It may take years but that’s okay with us. Having the detailed Site Plan is all we need to get started.

With respect to the trails project, that is continuing nicely. I’ve re-worked an old trail from last year, widening and clearing it a bit so it won’t get overgrown this summer. And I’ve added a whole new trail through a previously under-explored section of our woods. I’m thoroughly enjoying this work, as much as it exhausts me physically (though I confess the aching muscles bring a good amount of satisfaction for a day of work well done). I’ve been walking the trails pretty much every day, and will soon be bringing along a colinear hoe to keep the nettles on the paths at bay. There are a few more trails to blaze in order that our woods be broken down in more manageable plots. By manageable I mean small enough for us to really observe the nature of the site, what’s growing there, and the potentials for use. Even in a small woods like ours (about 2 acres) there are noticeable differences in terms of the characteristics of different spots in the woods. Some areas are already showing promise as clearings into which we can plant fruit tree guilds and other things that need sunlight. Other areas have a denser canopy, and there are definite differences in moisture too. Building trails helps us to break the woods up into smaller areas that we can study in more detail. Plus, it’s just lovely to walk amongst one’s own trails!

Finally, a brief project that I finished over the weekend is fencing the “back yard” (which is actually the front yard, but we don’t use it for much) for the dog. I used materials we had lying around, so it’s a combination of plastic-mesh netting held up with a few metal T-posts interspersed with alder logs that I cut into post lengths and buried as deep as I could easily dig. The other half of the fencing is electric fence from our pig paddock last year. The dog got zapped back then and wouldn’t go near it after that. I was hoping she’d have the same respect this time around. When all was done, we tested her by throwing a stick around that “accidentally” went over the electric fence. Well, she jumped right through a gap in the wires and didn’t appear to get shocked at all. So I added another round of wire (it’s actually electric tape, which is thick, flat, and white) to reduce the gaps between lines. She hasn’t tried to go through it since, but she hasn’t had the ultimate test (a strange dog walking past our house, or a squirrel on the other side of the fence), so I don’t know if this is truly going to deter her. I’m hoping with the lines closer together, any attempts to break through will result in enough of a slow-down to receive a good zap. I hope it will be enough. Meanwhile, I thought this fence would look really ugly but it actually isn’t too bad. Sometimes you have to choose between Pretty and Affordable. This time Affordable wasn’t too bad.

Milling our Logs

Having realized in a recent post that I had neglected to write about our log milling experience, I’m catching up with this post today.

Back in April we cleared a small section of land on our property. This left us with two large piles of logs, one of which were those deemed straight enough to be milled into lumber. It wasn’t until fall that we got around to having it milled; we didn’t want the stuff to rot over winter (winters are very wet here) and see it all go to waste. Most of the logs were Douglas Fir, which grow like weeds around here and are apparently the best wood for stick-framing, with a handful of Amabalis Fir and Western Redcedar thrown in. Here’s a picture of the log pile not long after they started:

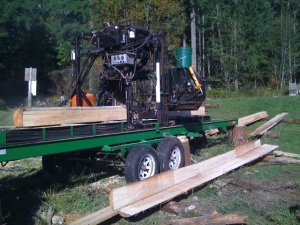
We used the same tree service company that had originally cut these logs: we like the owner and, importantly, we trust him. He sent over two of his guys with a small Bobcat (with a fork on the front to lift and move the logs to the sawmill) and a portable sawmill (it’s bascially on a long, flatbed trailer, thus the “portable” aspect). I’d never seen a sawmill before and it wasn’t what I’d imagined. Instead of feeding logs through a saw, the saw parts travel along the length of the machine. There are spikey bits that poke up from underneath to turn the logs around as they are being cut, and to hold them in place. It was quite fun to watch, and obviously required some skill to use properly.

Because at the time we weren’t sure what exactly we’d be building, we had them cut us a variety of lumber sizes. We asked for 2×6’s, 2×4’s, and 6×6’s. It took the guys about 2 and a half days to mill our pile of logs (plus they managed to pull a couple out of the firewood pile that turned out to be usable). We paid about half of what we would pay to buy the lumber at the local big box hardware store, plus we had the satisfaction of knowing the wood came from trees grown right here on our land.

We’re planning to use the wood for a new barn we’ll be building this Spring (if all goes as planned). Meanwhile the piles of wood, which are raised off the ground and have spacers separating the stack levels, are sitting under giant tarps weighed down with rocks. I’m looking forward to seeing them put to good use!