Archive for the ‘learning’ Category

Free Motion Quilting

A few years ago after I learned to knit and discovered that I was, in fact, somewhat creative I became interested in quilting. I loved the look of quilts and the creativity involved in putting them together. I grabbed a couple of books from the library and got rather excited looking at all the patterns. Then I read about how one actually quilts and decided that hour upon hour of hand-sewing was not something I was interested in doing.

More recently, when I began planning in earnest for our new home, I thought about how moving to a bigger house often means having to fill that extra space with Stuff, and I wrote a post about how I didn’t want to get sucked into buying things that had no meaning or would fall apart after a while. I imagined crafting the things that would fill my new home and that brought my thoughts back to quilting. The kids would have their own rooms and I thought how wonderful it would be to have a lovely hand-made quilt for each of them, not to mention one for the grownups’ bed. So I decided to look into it again.

At the library I found a book about something called machine quilting and I got very excited. You could do this on a sewing machine? Way cool. The book was brief but it got me Googling. I found the Missouri Star Quilt Company, which has great video tutorials on its site. And then I found my epiphany, my golden muse, the inspiration that moved me to action: The Free Motion Quilt Project. This blog was started by a young quilter named Leah Day, a petite soft-spoken gal from North Carolina with an adorable American accent. Frustrated by the lack of options out there for free motion quilting (FMQ) she set out to create one new pattern each day for a year. From there her website grew to include all sorts of wonderful articles and videos to guide one through machine quilting. I was hooked!

But I didn’t have a sewing machine.

Thanks to Leah’s website I had a good idea what to look for in a machine for FMQ. I’d been scouring Craigslist and UsedEverywhere but none of the machines offered had what I was looking for. Plus I knew I really needed to try these machines out before buying and that would be very difficult if I was trucking around all over town, dragging the kids with me, sitting in someone else’s home begging for fabric scraps!

I was getting impatient with just watching all Leah’s great videos: I was ready to get started! Luckily, over the last couple of months my consulting business suddenly got very busy and I was able to bring in a nice chunk of extra money for our family. I decided to treat myself and buy a new machine. I could certainly think of many uses for it besides quilting, like mending clothes, making cloth napkins and placemats and other things for the home. We don’t have a sewing machine store here in town so last week, when I had to head to the Big City for an appointment, I dropped by their main sewing store.

I “test drove” a few machines, using quilted samples the store had available. I didn’t tell the salesgirl that this was the first time I had ever FMQ’d before! I ended up falling in love with a model that was, of course, much more expensive than what I had planned to spend. But it was on sale and came with a quilter’s kit (FMQ foot, table extension, etc.) and had a nice large harp space for quilting. Not to mention a great work light (I had the sobering middle-aged lady experience of realizing that my eyes aren’t what they used to be). Mostly I just found sewing on this machine to be smooth and easy and it didn’t scare me! So I took the plunge and purchased my first sewing machine: a Pfaff Ambition 1.0.

I couldn’t wait to get started on it, and thankfully I had saved an old bed sheet that had a big hole in it, so I had plenty of fabric to play with. I also had a sewing kit I’d picked up from a friend’s yard sale years ago full of notions and scissors and thread. After reading the manual carefully and learning how to thread the machine and wind a bobbin, I was all set. I did a few runs of straight stitching before getting impatient and switching to the FMQ foot. I folded a swath of fabric four times over, sewed around the edges to form a rectangle, and then began to practice FMQ as per Leah’s instructions.

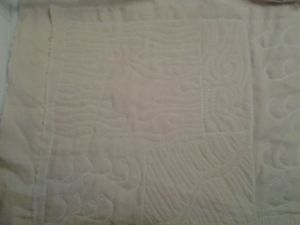
Not only was it as easy as she made it look (which confirms to me that I made a good choice in machines) but it was also just as fun as it looked, too! I am hooked. I had so much fun practising different designs. Here are a couple of my test swatches (I apologize for the photos being hard to see clearly: I only had this fabric and white thread, not a great combination for contrast):

My first attempt. Learning the basic motion of the Stippling design, the most common FMQ pattern.

Moving up to more varied Stippling shapes.

Then I tried some other beginner designs from Leah’s website.

My first attempts at Flowing Glass, Sea Oats, Rainforest Leaf, and Trailing Spirals. Too much fun!

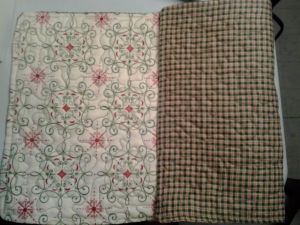
After several samples I was itching to make something “real”. Next chance I got I headed to the local FabricLand store and got myself a membership (my mother has had her membership since I was a wee child so it felt good to join) and came home with some “fat quarters” and a “charm pack”. I decided to use the fat quarters to make placemats that I would just FMQ without any piecing. The truth is, I don’t even own an iron let alone a rotary cutter, cutting board, or quilter’s ruler. It was rather slapdash, but turns out you don’t need much perfection to make a simple placemat. I was really pleased with how they came out (the colours of the plaid are much bolder in reality; not sure if you can see the stippling well either).

Double sided placemat with Stipple quilting.

I’m planning on making some more placemats. Until I get an iron and some proper cutting tools that’s all I can do, but it will allow me to practice my FMQ while still producing something useful. There is an exception, however: I’m getting this quilting set from appleturnover‘s Etsy Store. The owner of the shop is a friend of mine from back in our mum-and-baby-group days. She asked me to be a tester for her quilting kit: the pieces are already cut and I will be quilting along with videos she shot on her lovely antique hand-crank machine. I’ll still need to get an iron, but the cutting tools can hold off for a while longer.

Stay tuned for more quilting projects!

The Joy of Riding

Hubby and I are several months into our weekly riding lessons now, and it has been everything I hoped it would be and more. Those of you who aren’t into horses or riding will have to indulge me with this post. Bringing riding into our lives has been a big deal around here.

There’s something about riding that is like meditation. I suppose there are many hobbies or pursuits that leave one with this feeling, but for me nothing comes close to it like riding. No matter how bad your day, no matter how sour your mood, getting up on a horse results in your mind clearing of everything. For one blissful hour I am focussed on my body and my equine partner, working together, with constant back-and-forth communication. It is really an honour to engage in such a conversation with another creature, one who is so strong and powerful and yet willingly submits to carrying me on his back.

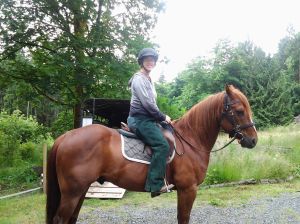
My lesson horse is named Boomer and he’s a Quarter Horse. My trainer is working on getting her official Equine Canada certification and Boomer is the horse she is using, so she is schooling him in dressage and jumping. I’m so impressed with him – he looks lovely under saddle whether he is doing a cowboy-ish lope, flying changes in a lovely dressage frame, or hopping over jumps with controlled enthusiasm. I have to confess, Quarter Horses have never been my favourite breed. I’ve always thought of them as the workhorses they are, not as elegant and light movers. But our trainer’s two lesson horses have really won me over. I’m sure a lot of it has to do with her skills in horsemanship – she understands horses on a level few people do, and her skill is reflected in her horses. Her little “cow pony” is turning into a lovely little dressage horse (he recently won Training Level Champion at a local dressage show!), and since Dressage is my favourite equestrian pursuit I am very pleased to have a well-schooled horse on which to practice.

Meanwhile my husband has discovered the magical, meditative powers of riding. He seems to really enjoy the relationship he’s developing with his horse, Partner. My husband is not known for being effusive, so seeing his face light up as he excitedly talks about his lesson is truly amazing. I couldn’t be more thrilled that he is enjoying it so much. Riding with him is a real treat.

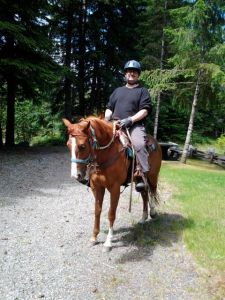
My husband on his very first trail ride.

I can’t believe I survived for 10 years without riding in my life. Now that it’s back I am so very grateful. Horses will be in my life from now on, I’m certain!

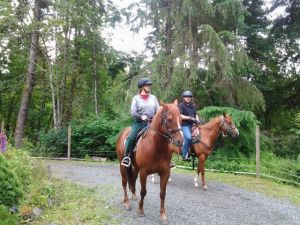
This was an exciting day: our trainer came to our property and we set out on a trail ride from our own driveway.

House Planning

Winter months are a great time for indoor activities like crafting, reading, garden planning, and other endeavours that can take place from a comfortable chair. Besides doing a fair amount of knitting and crocheting myself this season, I also embarked on another hobby/task: planning our future house. When we bought this property, the plan from the start was to build a house within 5 years. Our small mobile home is serving us well at the moment, but it is old and is likely not going to last too much longer. Moisture problems top the list of issues, and we have a noticeable mouse population sharing our home (despite having a cat). If things continue to go according to plan on the financial front (we should know by summer) we’re hoping by the end of this year to start the initial work (engineering, soil testing, hiring the architect, etc). But even though we are still a ways from breaking ground, I’ve already learned a lot. In today’s post I’m going to share some of this process with you.


Step #1: Know Your Land.

When we were first looking at land, many resources I consulted said the same thing: if you are planning to build try to live on the property for at least a year, if not longer, before breaking ground on your new home. One of the great features of this property was the mobile home. Old enough (and ugly enough!) that we would happily get rid of it when the time came, but sturdy enough to house us until such time as we were ready to build. Having spent almost two years here I can appreciate how valuable that advice is. I know our land pretty well now. I know where the rarer species grow, where water likes to accumulate, where it flows during the wet season, and where it dries out first. I know where the frost accumulates, where the wind blows from in winter. I know the path of the sun year-round, what obstacles cast significant shadows on growing areas, what animals visit our property at night, where the birds like to hang out, etc. This is all very helpful information when it comes to the next step.

Step #2: Choose Your Building Site.


In our case, there wasn’t a huge choice of locations despite having 4 acres. Our property is long and narrow and there is a residential power line cutting diagonally across the top third of the property with a right-of-way underneath that precludes any permanent buildings. To build below that line would mean a very long walk from the curb on garbage day. Unless we wanted 2 acres of land between us and the street we’d have to build in a gully between hills and that is a bad site for any house – frost collects there, as does water. We also didn’t want to build on the same spot as our current house so that we could remain living comfortably for however long it takes to build. Moving the house and its connections to another spot on the property would be expensive.

In some ways, having limits can be good. There was really only one logical place to build and fortunately it is not where our mobile home is located. The site we’ve chosen is in the northwest corner of the property, on the highest point and furthest away from roads and neighbours (shown in the photo above). There are some lovely views from there, and its southern exposure will allow us to incorporate passive solar heating into the home design. The north side of the site is part of a large forested area, which will be great for insulating against cold winter winds that blow from the small mountains and hills to the north of us. Unfortunately, the entire west side of the property is lined with a tall forest of Douglas Fir trees so we lose the sun early in the day. However, having consulted my bible of solar home design – The Solar House by Dan Chiras – it is just sufficient to be suitable for the job (more on solar design later).

The site is the top portion of the area we had cleared two years ago when we first moved here, but we didn’t clear all the way to the north property line. There is a large Western Redcedar tree there surrounded by a few smaller ones and I did not want to have to remove them if possible. They provide a dense shield against wind (and block the view from the hiking trail that goes past that northern border) plus we don’t have too many cedars in our neighbourhood (it was logged about a century ago and replanted with Douglas Firs). So that limited how far we could extend the house northwards. Westwards we are right up against the property line, so the minimum clearance sets that limit. Eastwards it’s pretty wide open, but the further east we go the more exposed we are to the street (it ends about halfway along our northern border) and the neighbours’ homes. Southwards we are limited by the powerline right-of-way. But there was one other limiting factor.

This high point on the property was dug into when the original owners placed the mobile home, and then cut into some more when a small detached garage was added (see photo above). Thus there is a chunk of land cut out of the southeast corner of the house site. Originally I assumed this meant we’d have to build an L-shaped house and most of my plans were based on that design. Due to the limitations described above I wasn’t getting anywhere with floor plans (I should point out here that we are adamantly opposed to having more than one storey of living space, for reasons too lengthy to get into just now).

And then one day it hit me that if we built out over the cut-out section we could free ourselves up enormously in terms of size and layout. Essentially we’d build out over the current garage, whose roof is practically level with the top of the hill, and it would become a walk-out half-basement. It would house what it currently houses: tools, three freezers full of meat, and Husband’s drum kit among other garage-type items. And virtually none of it would be buried, allowing sufficient light inside that it doesn’t feel like a dungeon. Why it took me months of pacing around at the top of that hill to figure this out I don’t know. But it’s just one reason why I’m glad I have so much time to work on this planning thing!

Step #3: The Layout.

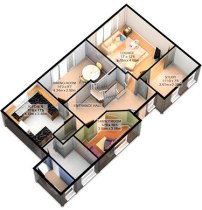
The truth is that we are going to need an architect to design the floor plan and layout of the house. I have zero training in this area and I can’t seem to break outside the box. Literally. I’m using graph paper to work on design plans and I seem to be stuck in this rectangular, stick-to-the-lines thinking that suggests we need a 3000 sq. foot house in order to fulfill our requirements. That is more than double the size I’m interested in. So mostly, drawing floor plans has been an exercise in thinking about the spaces and coming up with a few good ideas here and there. There is no way I could do this in earnest.


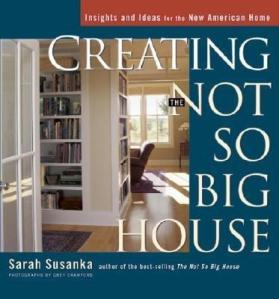
Thankfully, there are some great resources out there and my current bible of home design is from Sarah Susanka’s Not So Big House empire. Specifically, her book Creating the Not So Big House has been an excellent source of ideas, as well as providing me with the language to convey to our future architect what we’re looking for. Finding a book like this which encapsulates your own desires for house design can really help with the whole process. I’m pretty sure that an architect will be able to come up with far more efficient uses of space, and far better workflow patterns, than I’ve been able to come up with during my forays into cubist floor-planning.

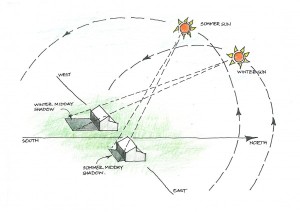
Another important consideration is that we wish to incorporate passive solar design principles into our home. This means orienting the long side of the house to the south, placing most of the windows there, and incorporating thermal mass into areas of the home to retain and release heat when the sun goes down. Without going into too much detail about passive solar design right now, it does place some limitations on layout. But now that I know we’re not limited to an L-shaped site it’s not really an issue anymore.

Step #4: The Materials.

It won’t come as a surprise to anyone who has been reading my blog for a while to learn that I want to build our home from natural materials, locally sourced wherever possible. The choices boil down to cordwood, rammed earth, cob, and straw bale. While rammed earth construction has been done here (music legend David Crosby has a rammed earth home on nearby Salt Spring Island that was featured in an episode of David Suzuki’s The Nature of Things) and it is beautiful, it’s not really my style. Cordwood is problematic in climates with high moisture like ours, and while I think it looks pretty I don’t want a whole house made out of it. I’d had it in my head for some time that cob would be our best choice because I thought strawbale wasn’t suited to our damp climate. I’ve since learned that this may not be the case. And I’m concerned about the fact that cob is a relatively poor insulator. So right now I’m leaning toward strawbale.

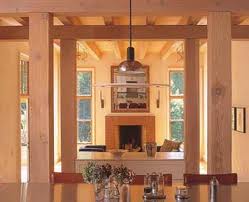
We will, however, be using timber-framing for the skeleton of the house. The strawbales (or whatever we choose) will be infill rather than supporting walls. Timber frame simply looks incredibly beautiful, there are several very skilled companies locally that do timber-framing, and the lumber can be sourced right here on the Island (and some of it probably from our own property).


Step #5: The Idea Book.

I started this as a Word document some time ago. Any thoughts or observations I have go here. It could be anything from noting that I spend a great deal of time during the day in the kitchen, to wish-lists requesting, for example, a covered outdoor area for hanging laundry when it is raining. I’ve put a huge amount of thought into all the details and recording them in one place makes for a handy reference.

My tip would be to spend a day thinking about where you go in your home at various times of day, what areas are used the most, and which are not used much at all. What items do you have lying around that need a home of their own – plastic shopping bins for groceries before they get taken back out to the car, recycling, mail that needs to be sorted, clothes going to goodwill, etc. Think about what you like about your current home, or what wish you had – for example, when you are taking a shower do you love that there is a window there? Do you wish the shower were wider? And of course there is my favorite topic: how easy is this to clean? I’m amazed at how many design features I see in magazines and websites that look beautiful but I know from experience would be magnets for dust and cobwebs, or be a pain to vaccuum around.

I also wanted to share a great website I found called Houzz.com. Here are hundreds of thousands of images of room design, including exteriors, that you can browse through and add to your own personal Ideabook. My one complaint with the site is that most of these homes are quite ostentatious, much too over-the-top for my liking. I’m looking for something simpler and more humbler than most of the homes shown here, but there are so many great ideas that I continue to build up Ideabooks for various rooms in my future home. The best part will be sharing these books with our future architect, who can then get a very good idea of our taste and style without having to conduct extensive interviews with people lacking the language to describe what they like (that would be me: “Um, I like kind of a rustic look but not messy-looking, sort of traditional but not uppity, something between country and west coast luxury home…but small”…???).

So that’s where I am now. Building up my Ideabooks, having fun with graph paper, and making notes of things that will be important when it comes time to sit down with an architect. Of course there is much that needs to take place in-between, but there’s nothing I like more than immersing myself in some project that leads to the fulfillment of a Dream. Sometimes it doesn’t even matter if the dream ever comes true; I enjoy the process that much.


Our first year of raising meat birds: what we’ve learned

Today I picked up our last batch of chickens from the processor: twenty-four yummy whole chickens have been added to our freezer stash. In looking back on this, our first summer of raising meat birds (or any kind of bird, for that matter), we’ve learned a few things about what we like and don’t like, and gained ideas about what to try next year.

We raised Cornish Rock Giants, which are basically the same type of bird used in mass-production factory farms. Ours actually got to see the outdoors, however. In fact they lived outdoors and enjoyed fresh air, sunshine, tasty grass and bugs. But the truth is they are, as many backyard chicken types will tell you, freaks of nature. They have been intensively bred for maximum meat production in minimum time. We got them as tiny, day-old chicks and by 8 weeks they were ready for harvest. This is good in terms of cost: a shorter duration to harvest means spending less money on feed. But I don’t think it’s very good for the chickens.

As many other people have reported, we noticed that our chickens didn’t seem to want to move around much. I’d often see them take a few clumsy steps as they attempted to balance their rapidly-growing bodies on legs whose bones couldn’t possibly keep up with those demands, only to drop to the ground as if they had just run a marathon. This most recent batch of birds went 9 weeks (because I didn’t make an appointment early enough) and by that time I noticed that some of them appeared to be having difficulty walking and one hen had what looked like a broken wing and perhaps a broken leg, too (she could not walk at all). She was perky and had less then 24 hrs to live so I just brought some feed to her and some water and told her it would all be over soon. I don’t like having injured birds: it may not affect the meat quality but that’s not the kind of farming I want to do. I couldn’t  help but think of the scene in the movie Food Inc. when the chickens were collected for processing and many of them could not walk. I want no part of that kind of “farming”.

I’d also heard that the mortality rate for these birds is high. We did lose 7 of our first batch of 20 chicks, all within the first week of life. I suspect it was a management and inexperience issue because we didn’t lose a single chick in our second batch. However, one of that second batch did die at around 7 weeks, apparently from a heart attack which is common for this breed. This sort of thing kind of makes you ponder the meaning of the word “healthy” – yes our birds were disease-free, but how healthy is an animal that can barely walk?

Another thing we noticed is that raising these birds the usual way (with a chicken tractor) is still really messy, despite the fact that they are outdoors. They eat huge amounts of food and thus generate great quantities of excrement. Despite having their tractor moved every 24 hours, within that time they would manage to coat the ground with waste, which then got all over their feathers on the underside. And my tractor was big compared to the recommended size for that many birds. They didn’t seem crowded in terms of space, but the tractor should probably have been moved twice a day towards the end to keep up with the poop – by that time all of them had wet, dirty undersides. But moving the tractor is a bit of a chore – I could tweak the design a bit to make it easier, but I keep thinking there has got to be a better way. Finally, because of the copious amounts of waste, the area around the tractor smelled pretty bad, and you could smell it wafting on the air all around the farm depending on which way the wind was blowing. Not pleasant.

Overall, we were left feeling like the chicken tractor was really just a step up from confinement operations. When I first looked into raising meat birds I asked people (on BackyardChickens.com, which is THE place to learn about such things) why meat birds weren’t raised like layers – able to strut around a farmyard at their leisure during the day. Some people said there was no point because the things are so poorly designed for mobility that they don’t really bother ranging, even if given the space to do so. We would like to at least give it a try ourselves, as others had a better experience.

The bigger issue is predation. When the birds are small they are perfect prey for raptors, and we have several species of such hunting birds in our neighbourhood. How to keep them safe from overhead ambush is one issue we still have to think about. Normally chicks would be raised with adult hens and roosters, the latter serving as guards for the flock, warning others of approaching marauders and herding the women and children into the brush. Not only do the meat birds not have any experienced chickens around to protect them, but it’s doubtful to me how well they would respond to an alarm scenario anyway. They have had most of the “chicken” bred out of them, perhaps to make them more amenable to a life of confinement. I wouldn’t be surprised if they all just stood around staring stupidly at any rooster trying to warn them of impending predatory doom.

So one of my projects this winter will be to come up with a new management scheme for next year’s meat birds. I’d also like to try a few heritage meat breeds to see if we can find something a little less freakish. Growing them longer will mean increased feed costs, but perhaps that can be mitigated somewhat by allowing them greater access to forage. The chicks themselves are about twice the price of the commercial breeds, too. I don’t mind paying more for good chicken, however, so we’ll just have to do the experiment and see. Most people will tell you that the taste of the commercial breeds makes all the freakishness worth it, and perhaps we’ll find that to be the case (though we still believe there is much room for improvement). This is one of the things I’m really enjoying about our “back to the land” experience: you can read all you want but really you need to go out there and just do it yourself. That’s the only way to determine what works best for you, and as a bonus you learn a lot in the meantime.

Spring is here!

Thanks to a recent bought of spring weather, my trailmaking project is coming along nicely. I’ve added several more trails to the one that was already present when we moved here last year (and now that one will stay accessible even when the stinging nettles are full grown). It’s exciting to be able to access areas of the woods that I haven’t been able to observe easily before. I’m noticing which areas are particularly sunny and open, and which are cooler and more damp. I can’t help but feel that we have the foundations of a bountiful food forest in here, with lots of diversity in both microclimate and soil type.

As a reward for my hard work, I take the dog for daily walks through the trail network. Once or twice I’ve brought along a small colinear hoe to sweep away any stinging nettles growing on the paths (these innocuous-looking small shoots will, I’ve now learned from experience, grow to about 5 feet tall by summer). As we go along, I’m looking out for species of plants that I haven’t yet identified.

One small tree had me puzzled for a while. It caught my attention a couple of weeks ago when I noticed it was already budding leaves when all the other plants had buds shut up tight. Soon small sprays of flowers could be seen. It looks so pretty – a sign of all the delights of spring to come. I took a sample branch and spent quite some time thumbing through my Trees in Canada book trying to identify it, to no avail.

Finally I decided to check my other reference, Plants of Coastal BC. I then learned why I was having so much trouble – my little tree was not, in fact, a Tree but a Shrub. And it’s an Indian Plum (Oemleria cerasiformis), a classic herald of spring in our coastal climate (see photo above).

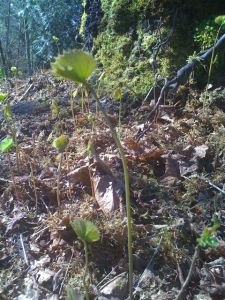
I’m really enjoying the process of getting to know the flora and fauna of our place. It brings a sense of familiarity. This spring I’ve been watching the Vanilla Leaf come up, and remembering how astonished I was to see them for the first time shortly after moving here last year. They seemed so strange at first, these tall, thin green stalks rising up out of the ground, with nothing but a fan-shaped green tip. They came up in great swaths, looking almost alien in appearance. Now when I see the new crop coming up I remember how it felt to “meet” them last year.

Over the last few days I’ve been noticing Western Trillium (Trillium ovatum) appearing, and today I saw one in flower. The Pacific Bleeding Heart (Dicentra formosa) is coming up, though no flowers just yet. And today I discovered Menzies’ Red-Mouthed Mnium (Mnium spinulosum), a type of moss that is relatively easy to identify because of the red rings around the tip of the sporophyte. My daily walks through our woodland trails will allow me to watch the changes unfolding on a much smaller scale than I was able to last year. It’s a new show every week!


Permaculture Site Plan: 1st Draft

I’ve been very busy these past few weeks: on any given sunny day, and on several slightly rainy ones, I could be found outside with my 100 ft tape measure, a stake and a mallet, and a sheaf of paper (sometimes wrapped in a clear plastic bag). I was using triangulation to create an accurate map of our property and the major features on it: driveway, house, shed, etc. It took me a few days to get all the measurements, and parts were tricky. In order to use triangulation to locate a specific object in space you must start with two known points that, together with the object, form a triangle. Our property is large and does not contain many two-point features, so often I had to work my way out to a desired object, by locating two trees I could use, or even by planting stakes in the ground.

The result of all this hard work (and a bit of fun with a compass and square-ruler that took me back to grade-school geometry class) was this:

This shows the complete North boundary (North is Up), and the east and west boundaries. The southern boundary is not shown, as it lies way down the page. What you see is approximately half the true length of our property. The Northern boundary lies some distance from our street, which runs west to east, ending at a dead end about halfway along the length of our northern boundary. East from there one enters the forest through a hiking trail. So while it looks as though the house is practically on the street edge, in fact we have a fair amount of yard that extends northwards past the true property boundary to the street.

The dotted lines show the Right of Way (ROW) for the local utility company. A pair of residential power lines runs through this corridor (the poles are not on our property) and there are restrictions on building within this area.

Our driveway begins in the northeast corner and wraps around the house so that the area marked by solid lines including the house, garage, and shed is all gravel save for the tear-drop shaped garden area in front of the deck. This area, enclosed by the solid lines, is flat, having been dug into a hillside. Thus the shaded area behind the garage and part of the house, which is a steep grade of earth that rises abruptly to the high point on our property – the northwest corner. Standing at the northwest corner of the garage the earth rises about 8 feet almost straight up, but quickly comes down as one walks southwards, so that at the site of the shed the land is only a couple of feet higher than the grade around the buildings.

The roadway that extends downwards from the main living area is, as of right now, dirt and rather loosely defined. It wanders southwards until, within the ROW it turns to the west and leads out of the property through a gate, and into the forest next door.

Using this map I was able to play with siting our future cob house. I cut out a square whose dimensions corresponded to 33 x 60 ‘ (2000 sq ft) and moved it around to see where it would fit. I wanted the parking area to be north of the house so that the southern views were not marred by cars, which also renders the south yard area quite unusable. I wanted to avoid doing any more grading and earth moving if possible (I hate the fact that they dug into the hillside in the first place: it looks like a wound on the earth having that great wall of earth rising up behind the buildings). And we could not have the building anywhere within the ROW. Since there is a neighbour to the east with a house close to the property boundary we wanted to avoid building along the east side. I eventually settled on a site for the future house, though mostly for the purposes of moving forward with the design process: I’m not certain this is where it will end up, but it gave us a starting place.

It then took some time and many false starts to finally come up with a plan for how to divide up the property into the various Zones of permaculture.

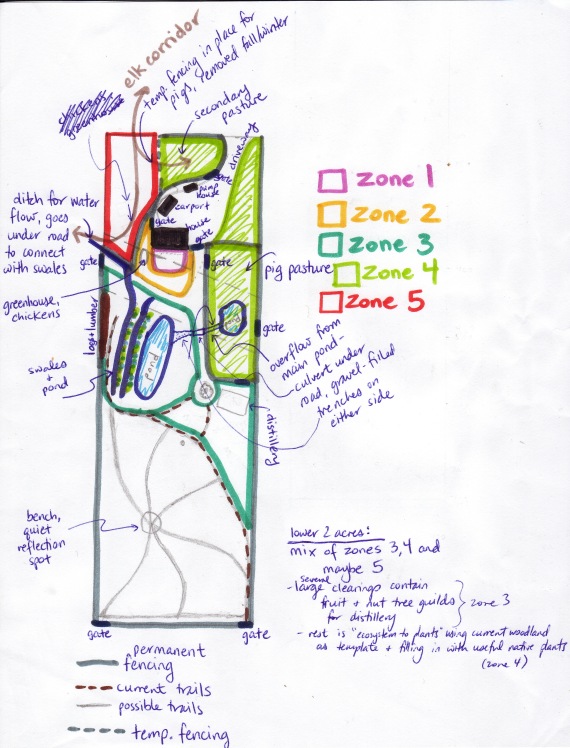
This map is almost the entire property; it should actually extend a bit further down but I decided not to be accurate there for the sake of having a manageable paper size. The living area shows the future house (largest black rectangle). Zone 1 is outlined in pink and will contain the kitchen garden, patio and other outdoor living areas. Zone 2 is outlined in yellow and will include more kitchen garden plants, including some dwarf fruit trees and berries, a greenhouse, chicken coop, greywater ponds, rainwater harvesting barrels and cisterns.

Zone 3 will contain most of our polyculture guilds: fruit and nut trees around which guilds are built. These will form our Food Forest. It also contains a spot for drying out logs and milled lumber (brown area on west side). Finally, this Zone contains our water harvesting system, which I’ll now describe in detail.

When it rains, a small stream forms that runs into our property through the West Gate. This is water that comes out of the forest and collects along the power line roadway (which forms a natural ditch that directs water onto our site). A substantial amount of water flows through here during the wet season and we wish to capture and store it and use it to our advantage. So the dark blue line starting at the West gate shows my idea for digging a proper ditch that would then have to run under the road (a simple culvert would do) to get to our Zone 3. This ditch would feed into a system of swales – ditches that run on contour, on the downward side of which are mounds of earth (berms) that are planted with polyculture guilds. The swales capture the water, spread it out over a long stretch, where it slowly sinks into the berms and irrigates the plantings on the berms. Each swale has an overflow area that feeds into the swale below. I’ve only drawn two swales here but probably we have room for 3 or more (this area slopes rather steeply to where I’ve drawn the larger pond). The final swale feeds into the pond. Right now this area is a seasonal “giant puddle” that is overgrown with salmonberry bushes. We’d like to dig it deeper and turn it into a true pond, create a wetland garden around it, and figure out how to make it less permeable so it holds the water year-round. This area will then be home to some geese and ducks, who will do double-duty providing eggs and meat as well as patrolling the food forest for slugs. There will be an overflow for the large pond – a gravel-filled trench, that will lead eastwards under the roadway (culvert) to a smaller, secondary pond. This is currently another seasonal “large puddle” where salmonberries abound. We may try to fix it so it is still wet when the pigs are here, providing them with a place to cool off. But the main source of water for the pigs will be a rainwater harvesting system on the distillery building.

The “roundabout”-looking thing in Zone 3 is a large bigleaf maple tree that sits atop a hill, near the centre. We plan to extend the dirt road and make it go around the tree. From this point southwards the property is all woodland. The brown dotted lines are current trails through the forest. The future Distillery building will go east of the maple tree; an area will be cleared to the south of the building to allow solar access, and within that part of Zone 3 will be more fruit and nut guilds with which my husband hopes to create some interesting spirits.

The light green areas are Zone 4, which can be divided into 3 sections. The first lies along the east side of the driveway and is currently full of trees and shrubs. We’re going to leave this as is for now, as it provides a nice privacy screen to the neighbour’s house. South of that area is a roughly 1/4 acre pasture which will house our pigs each spring/summer. We’re hoping there is enough land in there for them to graze without completely digging up the place, but if necessary we can divide it up into 2 or 3 sections and rotate them through it. The third section of Zone 4 is north of the house. This will be a reserve grazing area for the pigs should the other pasture not be sufficient in size to prevent them overgrazing it.

The grey lines show where we plan to install permanent fencing. The entire area from the house to at least the southern edge of Zone 3 will be perimeter fenced so that deer and elk cannot get into the food forests (I’ve shown it extending around the entire southern half of our property, but am no longer sure if we need to do that). However, I wanted to include in our plans a way for the local elk herd to continue visiting our property. It has been such a wonderful and meaningful experience to wake up to the sight of these gorgeous animals grazing so close to our house, and I wanted to include them in our design plan. So you’ll note that, in the northern section of Zone 4, the permanent fencing ends about halfway along the northern boundary as you approach from east to west. This is so we can leave it open when not in use by the pigs. The elk have been accessing the property through the northwest corner (which is forested) and grazing along the western strip of pasture, then leaving through the West Gate. So by leaving that part unfenced we retain their access. The bit of permanent fencing can easily be closed off by running a short length of temporary fencing (dotted grey lines) for when the pigs need to use it. Removing the temporary fence will open up that part to the elk when the pigs are not using it. Thus, the area in red denotes Zone 5: the wild, untouched zone.

This leaves the bottom 2 acres below Zone 3 to design. I scribbled some notes in there, but have since changed my mind. In wandering through the woodland this winter I’ve fallen in love with it again and am increasingly distressed at the thought of disturbing it much further. I’m hoping that the area already set aside for Zone 3 will provide enough fruit and nut trees to keep my husband happy. Then I could leave the rest as is, though I have some ideas to experiment with what is called “ecosystem to plants” design, basically starting with the current woodland as a template and adding or replacing certain other plants to increase ecosystem health, restore at-risk native species, or just experiment with new polyculture blends. I’ll talk more of this in a future post about my upcoming farm project, which involves this area. For now, I’m hoping to leave this area “as is” and see what we can do with it while preserving its unique beauty.

Well, if you’ve followed me thus far I hope I’ve kept you interested. The process of permaculture design is fascinating to me and I’ve really enjoyed the process so far.

Lessons from our first winter

Winter has arrived here on Vancouver Island. Even Vancouver got a dusting of snow, but around our place – which is about 300 feet above sea level – we got a nice big dump of snow. It’s rather unusual for this part of the country to get snow so early, and the temperatures have also been unseasonally cold. We’d been thinking about this for a while, how we would prepare and cope with winter in the country, but it all happened upon us rather unexpectedly and we’ve had a few hiccups already.

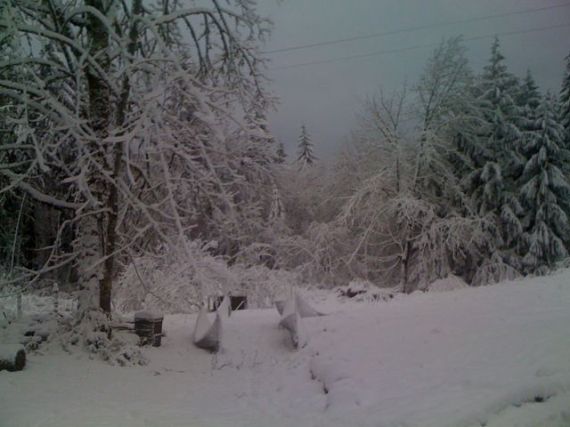
It all started rather blissfully. On Friday evening I went to bed with a dusting of snow already on the ground and we woke to a winter wonderland. the photo at the top is the view from our deck, which is pretty much the same view from our bedroom window. That morning I drank my usual cup of tea, but this time I was perched on the dresser staring out the window at the magic around us…I couldn’t get enough of how amazing it all looked, and counted my blessings for the umpteenth time since moving here.

But the blissful moment was interrupted by discovering that the pigs had escaped and were getting into the garbage cans. Husband and I put on our snow gear. After I dug it all out of storage and dusted off the cobwebs, that is. A mouse had built a cozy little nest in one of Daughter’s snow boots; note to self – don’t store boots in the garage! It was actually a very enjoyable task to go out and repair the electric fence around the pig paddock. Since they were due to leave us the next day we took the whole thing apart and rigged up a much smaller paddock that linked to the “livestock chute” Husband had fabricated from various materials (that’s it sinking under the snow in the foreground of the above photo). Then the kids got themselves bundled up and we searched the property for a suitable hill. It was very cool being able to toboggan on our own property! The dog was having a blast running around in the snow. Later we went inside and I made a yummy homemade soup and all was right with the winter world.

Things started going wrong the next day. As you may recall, the pigs were supposed to be long gone before this kind of weather hit and we couldn’t get another appointment until this past Sunday. That morning the processing guy called to say the livestock hauler couldn’t get his trailer to the processor’s facility so everybody was rescheduled for the following weekend. I’ve been worried about the pigs as they only have a 3-sided shelter and I honestly don’t know if they can handle this sort of cold. Some of the books say you should build a winter shelter for them, others say they are hardy and will handle a bit of cold (and this from a guy who lived in Virginia where the temps went down to minus 28 C!). So far they don’t show any signs of distress, but at this point there’s not much to do except keep them fed and watered and hope that next weekend’s appointment goes as planned. Meanwhile it’s about – 10 C here; thank goodness they have each other to snuggle up against.

Our big concern when thinking about the approaching winter was losing power. We were told by the neighbours that it’s a given, and we did experience several power outages in the summer though they all resolved themselves within minutes. The issue was heat since our propane-powered central heating (forced air) system relies on electricity to run the fan. We’d talked about getting a wood stove or a gas stove hooked up to our propane tank, but this place is so small and already crowded I just don’t know where we’d put it. Husband argued that, for the same price, we could get a kick-ass generator that would not only give us power for heat in case of an outage, but power for the stove and our computers, etc. Kind of hard to argue with that logic. Well yesterday in the midst of this cold-spell the heater breaks down. We still have power, but no heat (the fan motor has died). Hopefully tomorrow we’ll get someone out to fix it, but in the meantime it’s rather chilly in here! We’ve all got extra wool blankets on the beds, I’m bundled up and drinking hot tea, but this is not something I’ll want to go through regularly. I guess we’ll be shopping for generators this week (when everybody else is, too; oh the joys of being a procrastinator!).

On the water front, we assumed the pump house and well head were already weather-proofed as it’s not like nobody was living here before us. However it appears that the only thing keeping the pump from freezing was a light bulb in the pump house, which blew out back in the summer and never got replaced. So today we lost our water. Husband put a space heater in the pump house, which appeared to fix the problem for a while, but then later on we lost our water again. So looks like we’ll be calling a guy in tomorrow for that, too!

Of course all this happens while I’m out of town for two days with Daughter, and Husband is home with Son, both of whom are sick with colds. In true Kid Fashion, Son recovered almost immediately and has been bouncing off the walls while Husband has had to tend to an electric fence malfunction (the pigs rooted up the power line – that’s what happens when you move the paddock in deep snow and forget where the line is buried!), the pump issue, take apart the heater, and try to cook for himself and Son…On the way home from the ferry terminal I get a pleading text message asking us to bring pizza and lots of water. We have water for drinking and cooking now, but not for flushing the toilet – now who’s crazy for stocking up on family cloth, huh??

Amidst all the craziness I have to laugh and love it all. A bunch of suburbanites spending their first real winter out in the country – lots to learn! But we will learn and figure it out, and in the meantime it’s hard to complain with all that frozen beauty out there.

In Search of Homemade Bread

For many years now I have been trying to provide my family with homemade bread. The stuff from the grocery store is full of preservatives and highly processed ingredients, and wholesome artisan bread is too expensive for the amount we go through each week. Years ago I purchased a breadmaking machine and enjoyed using that for some time. The down side was that it took 3.5 to 4 hours to make a small loaf of bread. Theoretically I’d set it up at night before going to bed, but that didn’t always work out as planned. I’d be too tired and forget. Or, I’d get woken up in the early morning hours by the grinding noise of the breadmaker (life in a small home). Several months ago my breadmaker finally broke when I attempted to make spelt bread. The recipe I was using was obviously faulty and the resulting dough was more like cement. It was so hard to churn that the metal spokes that turned the rotor of the bread machine actually tore off! I decided it was time to try my hand at making it myself.

My next venture was into the Five Minutes a Day breadmaking made popular by the authors’ two books. I tried a basic recipe of theirs from an article in Mother Earth News and decided this was the answer I needed, so I ordered the two books and went out to buy loaf pans. At first I was really happy with the technique: it was easy to mix up a big batch and it didn’t take too long to make bread. I assumed I’d get better with practice, and so tolerated the frequent mistakes. But it didn’t seem to get any easier and eventually the list of “cons” outweighed the “pros”. My kids complained that the bread “tasted funny” and refused to eat it. Even I grew tired of the yeasty smell and taste. The whole schtick behind these books is you get that “sourdough” type flavour with this technique. I like sourdough bread, but not in every loaf I make, and I found the flavour overwhelming in these recipes. I eventually found out that I could cut the yeast way down, which went a long way to getting rid of the taste, but then it also took a lot longer to make the initial batch of bread. Then there was the fact that I didn’t have enough room in my fridge to store the dough (which you make in large batches). I also could not get consistent loaves no matter how often I practiced. One day the loaf would have a good “crumb” (the texture of the inside of the loaf) and the next it would be gooey, hard, or unevenly cooked. The crusts were never soft, even in the soft-crust recipes, and the loaves cooked unevenly. This latter issue is definitely a problem with my ancient oven, but that’s what I’m stuck with right now. I got tired of the kids rejecting my loaves, and of wasting so much good organic flour (the pigs enjoyed it all very much, of course). I stopped trying and we went back to cheap, store-bought bread.

After taking a suitable break from my Five Minutes a Day failure, I felt ready to try my hand at real, old-fashioned breadmaking. The kind where you actually knead the dough. In all my years of making bread I’d never actually done this before, and felt it was time to give it a try. I surfed through YouTube to get some ideas and inspiration. It felt a lot like Googling “gardening” – way too much information and everybody seems to do it differently. I found it rather confusing and overwhelming. One person swore by using a yeast “sponge” rather than proofing yeast, others claim that yeast won’t work without sugar and yet they proof their yeast with just water. Rising times seemed to vary considerably, and when it came to whole grain breads some people didn’t use gluten, which I’ve been told is essential to get any rise from these heavier flours. There were those who knead by hand and those who knead with a mixer (I have a KitchenAid with Dough Hook, but have yet to try it on bread). I decided to start simple.

I found a beginner’s bread recipe in an old copy of Hobby Farm Home I had lying around. I followed the instructions and was very pleased to see things rising as they should, with the correct texture, etc. I was also rather surprised at how little time it took – the first rise was only 1 hour and the second 30 minutes. The bread baked for 30 minutes, so in just over 2 hours I had bread. That’s half the time of machine bread, and the same time as the Five Minutes a Day technique (when you pinch off some ready-made dough you still need to let it rest and rise for 90 minutes before shaping). For a first effort I was pretty pleased with the results. The loaves were on the small side, but the crumb was not bad (could still be fluffier, IMO). It had baked evenly and I had 2 loaves with relatively little effort. Even kneading the dough was not half as hard as I thought it would be.

However, to my surprise the bread still had a yeasty, sour sort of flavour to it and the kids rejected it. I’m not sure what the problem is, but I suspect water may be an issue – we have sulfur in our well water and though I thought I’d used spring water from the store there may have been some well water in the kettle I used to heat the water (I did this meticulously with the Five Minutes recipes but cutting down on the yeast had a much greater effect on taste). I’m going to try the recipe one more time, being careful about the water source and see if that’s the problem. And I may look for recipes that call for less yeast (I use Fleischmann’s, nothing unusual). Otherwise I’m not sure what to do except keep trying recipes until I find one, or a technique, that works for us. Rhonda Jean over at Down to Earth has some great articles about homemade bread so I think I’ll try her recipes next. I’m determined not to be dependent on store-bought bread, especially since my kids eat it by the ton and I want their food to be wholesome and healthy (plus I suspect that they eat so much of it because it contains ingredients that folks crave but that don’t provide much in the way of nutrition). I’ll keep you all posted on my progress.

Connecting with Home

[cross-posted to my other blog]

I’ve been on quite a reading kick lately, devouring books over my morning tea – which I enjoy out on the deck during these lovely summer days – and in bed after the kids have gone to sleep. My tastes are varied but from the initially random selection of books a theme has emerged. I have found a new interest…dare I say it may become a passion? I’m finding myself drawn to stories and books about my home and native province, British Columbia.

I was born and raised in Vancouver and spent all but a few short years living there. While I traveled somewhat around the province while growing up nothing really stuck with me in terms of places or names. It wasn’t until I moved back here with my new family and we took our first camping trips together that I began to really learn the geography of BC. We explored the Okanagan north and south, and traveled through Cariboo country on our way to visit the mother-in-law. When we began house-hunting on Vancouver Island I learned the major place names and regions. Slowly I’m getting a feel for southern BC, getting to know it. And as I’ve gotten to know it I’ve become more curious about it: the geography and natural history in particular.

One of the books I picked up recently was In Search of Ancient British Columbia, Volume I.

I was riveted – especially the parts about Vancouver Island. As I read through the book I thought about the concept of the Staycation, made popular when gasoline prices shot up a while back. The idea is to explore one’s own backyard, one’s home region. I couldn’t ask to be in a better part of the world for that. BC is vast and filled with wilderness; with so many different bioregions it’s like visiting a different part of the world each trip. There are so many wonderful places (many I learned about in the aforementioned book) that I began to feel I could spend my whole life just choosing camping spots in BC and never run out of amazing experiences. While I value the experience of traveling abroad, it’s not something practical for our family as more than a once-or-twice in a lifetime opportunity. Meanwhile, our lifestyle lends itself to short, impromptu trips during the week when the rest of the world is working or during the “shoulder season” when families are still tied to their schools. Perfect for a staycation.

The next book I picked up was a history of Burrard Inlet. I grew up in an old one-story house up on the hills of West Vancouver, with a to-die-for view of the western half of the inlet (something modest families could afford back in the sixties), so the book was particularly interesting and meaningful to me. I began to see that while all the books I had picked up from the library were interesting in their own right (the story of Emilie du Chatelet, a female scientist before there were such things and Voltaire’s long-time mistress, was wonderful) there was something different about the books on BC. Their meaning went deeper for me because this place was home. And I began to think about that concept more.

My current book is called Writing the West Coast: In Love with Place. I wasn’t sure I would like it, but I felt drawn to it all the same. Most of my reading had been technical in nature and here I was going to take a side trip to the more abstract world of creative writing. I’m only partway through the book, but it has taken the kindling feelings from the first few books and stoked them into a burning fire. The stories are about the concept of Home, about belonging, and the role of a place’s natural surroundings in finding that connection. I read with great interest an essay by a young woman, a member of the Nuu-chah-nulth First Nations. She wrote of her home on the west coast of Vancouver Island and how she felt connected to it through her culture and its history. I had just recently learned some of that history in the previous books I’d read and was really touched by her writing. In fact, the best way to describe it is I was envious. To have a sense of place like that, to be able to feel connection through elders and ancestors, through stories and legends and to know that your people had lived and sustained themselves there for thousands of years…that must be something really special. It was the role of Nature and the natural surroundings of the places in these stories that really resonated with me, because I too feel this deep sense of connection when I’m out in Nature. Not being much of a writer I haven’t been able to find voice to this feeling, not in a way that does it justice. These stories are giving me words.

And in reading I’m feeling the stirrings of something deep within me. Perhaps it is my stage of life, who knows. But I’m feeling an urge to explore this place, and to find new ways to connect with my surroundings. Besides a strong desire to start heading off on small camping trips again, something else has started bouncing around in my head and it won’t go away: kayaking.

I don’t know why it has suddenly been buzzing around in my head, but I’ve been thinking that I’d like to learn to kayak. There’s something about being so close to the water that appeals to me. Then I began reading of the tours offered by our local kayaking outfitters, and I pestered my Dad and Stepmum with questions about their sea kayaking trip around Haida Gwaii some years ago. I was excited by their stories of wildlife encounters, even just paddling over a shallow section of reef studded with a rainbow of sea stars, rays, fish, and other creatures. Of camping on sandy beaches in isolated island coves with nobody else for miles around. The solitude, the quiet, the closeness to nature. This is something that really, really appeals to me. And what a way to find that connection to Home that I am suddenly seeking with such intensity.

Meet the Neighbourhood Residents

Every morning after I wake up I slip into some sweats, pull on my rubber boots, and take the dog for a walk. Sometimes we meander through the property before heading onto the Trans Canada Trail, a section of which runs alongside the bottom edge of our property. Other times we head to the forest next door. I’ve taken a keen interest in learning about the native plants and trees in this region, and on my walks I mentally identify those I’ve come to recognize, while taking samples of those I haven’t. In winter, when we first arrived, it was harder to identify those without leaves. But now that spring is in full force they are making themselves known. I also like watching the cycle of the seasons begin anew – it’s my first time, too, in this place.

I enjoy reading about the plants and animals other would-be farmers are dealing with on their new properties. Chile chews about life in Arizona, a climate vastly different from my own temperate rainforest. While she is dealing with foxtail on her new acre, Jenna and Jer at No Name Farm have been tackling mesquite and cactus since they bought their 15 acre plot. So I thought some of you might be interested to see what lives in my neighbourhood.

One of the first plants to rear its head in early spring were the Stinging Nettles, which I soon harvested. Next came these interesting subjects:

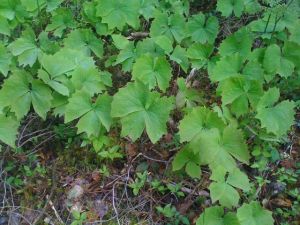
These are Vanilla Leaf, also known as Deer Foot. Each cluster of three leaves grows on a single tall stalk that rises about 1.5 ft above the ground. They are a lovely pale green and grow in carpets-like patches. When dried, they smell somewhat of vanilla and apparently will repel flies if hung in doorways, etc. I have dried a clump of them, to me they smell not half as lovely as real vanilla, and we’ll see how well they keep the flies away when it’s warm enough for open doors and windows. But they do look very pretty in the ground.

Around this time I also began to notice some flowering plants. This is a Western Trillium, so named because of its three leaves topped by a three-petal flower. They are quite large and, I think, have a primordial look about them:

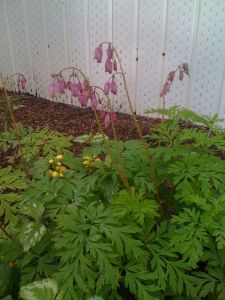
Another flowering plant that showed itself at this time is Pacific Bleeding Heart. The flowers are interesting in that they form a sort of bubble (the petals spread apart then come together at the tip) which is heart shaped. This specimen is growing up against the skirt of our home, but it is abundant in our woods as well:

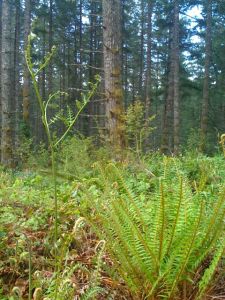
We have lots of ferns here. Many are evergreen species but lately I’ve noticed a different kind of fern sprouting from the ground. Here’s a shot of two different species:

The one on the right is a Sword Fern, an evergreen. The fronds grow from ground level. On the left is a Bracken Fern, a deciduous plant. These begin growth as a single stalk that reaches upward from the ground while side branches begin to unfurl. I’ve noticed these for a couple of weeks now and they are getting taller and taller. I read they can reach upwards of 3 – 5 metres!

Also in the last couple of weeks, the Pacific Dogwoods have begun blooming. It is strange to me to see flowering trees here even though I know they are native (the dogwood is the official flower of British Columbia); I’m used to evergreens. They are gorgeous trees when in bloom; we have several in our yard but they are also growing abundantly in our woods. I snapped this photo from a tree that was growing sideways, presumably to catch the sun, but they can grow quite tall:

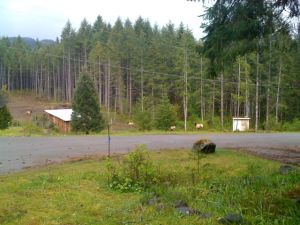
I’ll finish up with a picture of some of the more mobile residents of our neighbourhood. The elk have returned and are staying longer to feast on the new grass. I snapped this photo yesterday from the end of our driveway: