New Blog…

This is going to be the last post here at Rural Aspirations, for a variety of reasons.

With family life getting busier and new interests competing for my free time I no longer have time to blog regularly, and certainly not to maintain several blogs as I have off and on over the years. Each focussed on specific topics so as to attract readers from specific online/blogging communities. But my new blog will be one place that holds everything. Instead of being a representation of our family and lifestyle as a whole, it will be more personal: a place for me to reflect, process my thoughts through writing, and document the process of raising children with autism and building a homestead. I’m not even sure what I mean anymore when I use the word “homestead”, but I’ll explore that too.

My new blog is called Hideaway Farm, which is the name I’ve chosen for our little piece of paradise-in-the-rough. It isn’t necessarily the official farm name, but it’s my name for the farm and that makes the blog somehow more personal to me. I thank you for following along with the story of how we ended up fulfilling our “rural aspirations”. Maybe I’ll see you around the new place some time.


Free Motion Quilting

A few years ago after I learned to knit and discovered that I was, in fact, somewhat creative I became interested in quilting. I loved the look of quilts and the creativity involved in putting them together. I grabbed a couple of books from the library and got rather excited looking at all the patterns. Then I read about how one actually quilts and decided that hour upon hour of hand-sewing was not something I was interested in doing.

More recently, when I began planning in earnest for our new home, I thought about how moving to a bigger house often means having to fill that extra space with Stuff, and I wrote a post about how I didn’t want to get sucked into buying things that had no meaning or would fall apart after a while. I imagined crafting the things that would fill my new home and that brought my thoughts back to quilting. The kids would have their own rooms and I thought how wonderful it would be to have a lovely hand-made quilt for each of them, not to mention one for the grownups’ bed. So I decided to look into it again.

At the library I found a book about something called machine quilting and I got very excited. You could do this on a sewing machine? Way cool. The book was brief but it got me Googling. I found the Missouri Star Quilt Company, which has great video tutorials on its site. And then I found my epiphany, my golden muse, the inspiration that moved me to action: The Free Motion Quilt Project. This blog was started by a young quilter named Leah Day, a petite soft-spoken gal from North Carolina with an adorable American accent. Frustrated by the lack of options out there for free motion quilting (FMQ) she set out to create one new pattern each day for a year. From there her website grew to include all sorts of wonderful articles and videos to guide one through machine quilting. I was hooked!

But I didn’t have a sewing machine.

Thanks to Leah’s website I had a good idea what to look for in a machine for FMQ. I’d been scouring Craigslist and UsedEverywhere but none of the machines offered had what I was looking for. Plus I knew I really needed to try these machines out before buying and that would be very difficult if I was trucking around all over town, dragging the kids with me, sitting in someone else’s home begging for fabric scraps!

I was getting impatient with just watching all Leah’s great videos: I was ready to get started! Luckily, over the last couple of months my consulting business suddenly got very busy and I was able to bring in a nice chunk of extra money for our family. I decided to treat myself and buy a new machine. I could certainly think of many uses for it besides quilting, like mending clothes, making cloth napkins and placemats and other things for the home. We don’t have a sewing machine store here in town so last week, when I had to head to the Big City for an appointment, I dropped by their main sewing store.

I “test drove” a few machines, using quilted samples the store had available. I didn’t tell the salesgirl that this was the first time I had ever FMQ’d before! I ended up falling in love with a model that was, of course, much more expensive than what I had planned to spend. But it was on sale and came with a quilter’s kit (FMQ foot, table extension, etc.) and had a nice large harp space for quilting. Not to mention a great work light (I had the sobering middle-aged lady experience of realizing that my eyes aren’t what they used to be). Mostly I just found sewing on this machine to be smooth and easy and it didn’t scare me! So I took the plunge and purchased my first sewing machine: a Pfaff Ambition 1.0.

I couldn’t wait to get started on it, and thankfully I had saved an old bed sheet that had a big hole in it, so I had plenty of fabric to play with. I also had a sewing kit I’d picked up from a friend’s yard sale years ago full of notions and scissors and thread. After reading the manual carefully and learning how to thread the machine and wind a bobbin, I was all set. I did a few runs of straight stitching before getting impatient and switching to the FMQ foot. I folded a swath of fabric four times over, sewed around the edges to form a rectangle, and then began to practice FMQ as per Leah’s instructions.

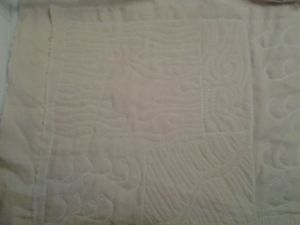
Not only was it as easy as she made it look (which confirms to me that I made a good choice in machines) but it was also just as fun as it looked, too! I am hooked. I had so much fun practising different designs. Here are a couple of my test swatches (I apologize for the photos being hard to see clearly: I only had this fabric and white thread, not a great combination for contrast):

My first attempt. Learning the basic motion of the Stippling design, the most common FMQ pattern.

Moving up to more varied Stippling shapes.

Then I tried some other beginner designs from Leah’s website.

My first attempts at Flowing Glass, Sea Oats, Rainforest Leaf, and Trailing Spirals. Too much fun!

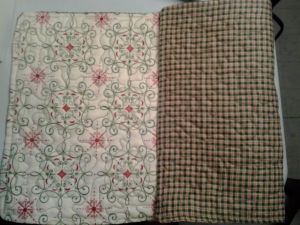
After several samples I was itching to make something “real”. Next chance I got I headed to the local FabricLand store and got myself a membership (my mother has had her membership since I was a wee child so it felt good to join) and came home with some “fat quarters” and a “charm pack”. I decided to use the fat quarters to make placemats that I would just FMQ without any piecing. The truth is, I don’t even own an iron let alone a rotary cutter, cutting board, or quilter’s ruler. It was rather slapdash, but turns out you don’t need much perfection to make a simple placemat. I was really pleased with how they came out (the colours of the plaid are much bolder in reality; not sure if you can see the stippling well either).

Double sided placemat with Stipple quilting.

I’m planning on making some more placemats. Until I get an iron and some proper cutting tools that’s all I can do, but it will allow me to practice my FMQ while still producing something useful. There is an exception, however: I’m getting this quilting set from appleturnover‘s Etsy Store. The owner of the shop is a friend of mine from back in our mum-and-baby-group days. She asked me to be a tester for her quilting kit: the pieces are already cut and I will be quilting along with videos she shot on her lovely antique hand-crank machine. I’ll still need to get an iron, but the cutting tools can hold off for a while longer.

Stay tuned for more quilting projects!

Planning for the New Home Has Begun!

Back at the beginning of this year I wrote about my forays into house planning. It has taken me over 7 months and many, many edits but I have finally come up with a layout that I like, that gives me what I want, and that puts the house size at under 2500 square feet. In fact, this only just happened two days ago! It was one of those Eureka moments where I was hit with inspiration, ran to get a pencil and some graph paper, and realized I’d finally solved many of the issues I was struggling with.

The timing was perfect, too. Today we interview two design/build firms. The first is the EcoNest company, run by Paula and Robert LaPorte. These guys are well-known in the natural building community, and we are fortunate that they are in the area this month giving a series of workshops. They are stopping by this evening with their local certified builder (there are not many builders in North America trained in this procedure and we are so fortunate that one of them is located just 30 minutes away!). I am really excited about meeting with them and hope they can reassure my husband that this isn’t some freaky hippie experiment in building that could cost us a fortune down the road!

In my previous house-planning post I wrote that I was looking at strawbale and cob for the infill material. Then I discovered “light clay”, which is also called straw-slip or chip-slip depending on the fibre ingredient. This is what the EcoNest folks specialize in. Both use a clay slip as a base (a light, watery mixture of clay and water) in which either straw or wood fibre is mixed so that the fibres are coated evenly with the slip. The beauty of this stuff is that you can pack it into forms and thus reduce time and labour costs considerably. Apparently, it also has a higher R-value for insulation than either strawbale or cob. It does not require a netting or base coat to “rough up the surface” so that plaster can be applied. What really appeals to me is that we could supply the wood chips from our own property. However, we need to compare the cost of purchasing enough straw for the project versus time to gather and chip the wood plus cost of renting an industrial-strength chipping machine.

The other company we are interviewing is a local design/build outfit that has done several projects in the area that we like. They claim to be able to do “green building” but this may turn out to mean conventional stick-framing and house-wrapping with simply using less harmful and lower embodied-energy materials. Nevertheless, I’m open to hearing what they have to say, and seeing how this option compares with the above.

From these interviews I hope to settle on 1) what infill material will be used, 2) how big the house will be, and 3) how much it will cost. The latter two are obviously related quite closely, while the first point will determine the nature of that relationship. My understanding is that building green is no more costly than any other quality timber-frame home but hopefully we’ll find out soon. We know roughly what we want to spend, but whether that is realistic based on our desires remains to be confirmed. We may need to increase our budget. Alternatively, we may decide to do some inexpensive finishing to bring down the budget, with the aim to remodel later when we have more cash-in-hand. Given what we are living in now, anything without mould or rodents is an improvement!

The Joy of Riding

Hubby and I are several months into our weekly riding lessons now, and it has been everything I hoped it would be and more. Those of you who aren’t into horses or riding will have to indulge me with this post. Bringing riding into our lives has been a big deal around here.

There’s something about riding that is like meditation. I suppose there are many hobbies or pursuits that leave one with this feeling, but for me nothing comes close to it like riding. No matter how bad your day, no matter how sour your mood, getting up on a horse results in your mind clearing of everything. For one blissful hour I am focussed on my body and my equine partner, working together, with constant back-and-forth communication. It is really an honour to engage in such a conversation with another creature, one who is so strong and powerful and yet willingly submits to carrying me on his back.

My lesson horse is named Boomer and he’s a Quarter Horse. My trainer is working on getting her official Equine Canada certification and Boomer is the horse she is using, so she is schooling him in dressage and jumping. I’m so impressed with him – he looks lovely under saddle whether he is doing a cowboy-ish lope, flying changes in a lovely dressage frame, or hopping over jumps with controlled enthusiasm. I have to confess, Quarter Horses have never been my favourite breed. I’ve always thought of them as the workhorses they are, not as elegant and light movers. But our trainer’s two lesson horses have really won me over. I’m sure a lot of it has to do with her skills in horsemanship – she understands horses on a level few people do, and her skill is reflected in her horses. Her little “cow pony” is turning into a lovely little dressage horse (he recently won Training Level Champion at a local dressage show!), and since Dressage is my favourite equestrian pursuit I am very pleased to have a well-schooled horse on which to practice.

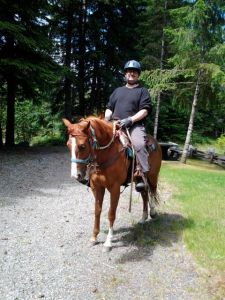
Meanwhile my husband has discovered the magical, meditative powers of riding. He seems to really enjoy the relationship he’s developing with his horse, Partner. My husband is not known for being effusive, so seeing his face light up as he excitedly talks about his lesson is truly amazing. I couldn’t be more thrilled that he is enjoying it so much. Riding with him is a real treat.

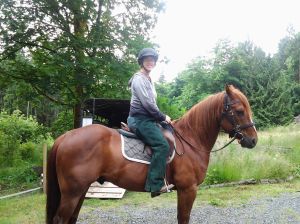
My husband on his very first trail ride.

I can’t believe I survived for 10 years without riding in my life. Now that it’s back I am so very grateful. Horses will be in my life from now on, I’m certain!

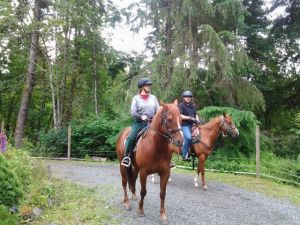
This was an exciting day: our trainer came to our property and we set out on a trail ride from our own driveway.

The 2012 Growing Season has Begun!

This past weekend we finally got some lovely warm spring-like weather, the kind that makes you feel like the last place you want to be is indoors (especially when “indoors” is a small metal box with few windows!). So, after enjoying a fabulous riding lesson on Saturday, on Sunday I left the kids to their own devices and headed out to my garden. I brought with me an old radio that I picked up from a friend a few years ago (it had belonged to her mother) for the express purpose of listening to while gardening, and I hauled out the extension cord from the garage. Rex Murphy, host of CBC’s Cross Country Checkup, kept me company and even though the topic was Canadian politics I couldn’t have been happier given where I was.

You may recall that last season ended with an experiment in soil building. I had tried two different methods of building up my raised (actually sunken) beds: the lasagna method and planting a green cover crop. Unfortunately the cover crop never germinated, which was predictable given the seeds were a year old and had been covered in innoculant all that time. However, I was so thrilled with the results of the lasagna method that I am putting aside thoughts of small seeded fava beans and winter rye and looking forward to piling up a new stash of paper feed bags this summer.

For a brief review, I layered paper feed bags, partially rotted compost, some partially rotted straw, and dried Big Leaf Maple leaves, covering it all up with soil dug up from the walking trails in our woods. As winter progressed it was hard to remember what it had originally looked like (see the post I linked to above) and it seemed to me that not much was going on. I had taken a quick peek a few weeks ago and it seemed that things were okay under there, but it was only Sunday that I headed out with a digging fork to see what I’d really ended up with.

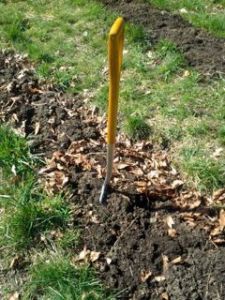
Black gold, it truly was. Not only was there no sign whatsoever of the paper feed bags or the straw, but whatever critters had come to digest the lasagna I’d laid out for them had dug deep down, too. I found myself thrilling to the experience of putting my fork into our soil and seeing it go all the way up to the hilt with no resistance in most parts.

Even in the “shallow” parts I had a good 10 inches of softness. You must understand that I live in an area that was formerly scoured by glaciers, which left behind rocks, rocks, and more rocks. You literally cannot put a shovel into many areas on our property because there are simply too many rocks in the soil. I just about broke my back digging those beds two years ago, but even after that it was difficult to stick a shovel in there more than about 4 – 6 inches; there was little decent growing soil.

Now I was forking up a nice deep layer of rich, black soil (not forking over: I am using a no-till method where you simply “fluff” the soil by sticking in a fork and pulling it back a touch; and this only because the beds are still new). I couldn’t be happier. Last year I dragged home bags of sea soil (at no small cost, either). As I stood there staring at this lovely stuff I’d made from scraps, it astounded me that people would actually pay for what you could get for free and with virtually no effort. It took me one afternoon to make up the lasagnas, and all winter long as I snuggled indoors the bugs and micro-organisms were busy at work, turning our waste into nourishing soil that will feed our family.

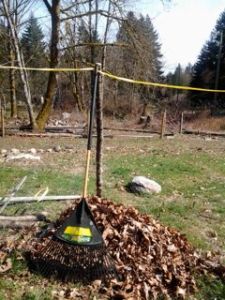
I ended up raking the leaves (I was surprised at how many were still left more or less intact) and piling them in corners of the garden for use later. I sprinkled some complete organic fertilizer on the beds before forking them so that the powdery nutrients would drop down into the crevices. I plucked out a few garlic shoots that had sprung up from cloves tossed in the compost last year, chuckled at the avocado skins I could still see here and there (and the eggshells – they don’t seem to decompose very well), but otherwise the beds are ready for planting. But I was still wanting to hang out in the garden, where I’d ditched my wool hat and fleece sweatshirt only minutes into my efforts (first T-shirt weather of the year!). So I prepared another bed, one that hadn’t been lasagna’d, by running a small hoe through it. Since the area was fenced this year we had no wild animals tromping through and compacting the soil, so even though the soil isn’t as deep as in the other beds at least it was soft and easy to run the hoe through. Not many weeds at this time of year but I wanted to get a good start on things and I do so enjoy using a hoe.

After having done all that I was eager to actually plant something but hadn’t been to the seed store yet, and since I didn’t feel like driving that day I rummaged through what seeds I had left from years prior and picked out anything that said I could plant it now. I ended up with some Pac Choi, Spinach, and red leaf lettuce. Who knows if they will germinate well, since I can’t remember how old they are, but I just had to plant something! I put them in one of the beds I hadn’t “lasagna’d”, just in case they didn’t do well. I’m saving the good beds for the seeds I buy fresh this year (just did that today and got a bunch of great stuff from the West Coast Seeds rack at the local feed and garden store*). I can’t wait for the next warm sunny day to go out and plant some more food!

Unfortunately, the two beds where the soil is great are where I planted my tomatoes last year and I firmly believe in crop rotation, so this year’s tomatoes won’t get the best of the beds. However, last year the tomatoes did pretty well given the state of the soil last year, so even if they only do the same this year I’ll be happy.

And you can best believe that this fall I’ll be doing the lasagna on all five of my raised beds. I’ll save cover cropping for when I have a good deep layer of soil built up. Here’s to sunny days in the garden and growing your own food!


(*am I the only one who looks at flower seeds and thinks “what is the point of spending money on that if you can’t eat it?”; I’m either showing my lack of experience with gardening or I’m just a diehard farm girl who thinks anything we buy for the place should do a job)


The Dream: revisited

Way back at the beginning of this blog I described The Dream. Yesterday one of my favourite bloggers, Jenna of Cold Antler Farm, (who is well on her way to fulfilling her dreams of being a farmer) asked us loyal readers about our own dreams. I figured it was time to revisit that post I made just over four years ago.

The Dream: 3 to 5 acres, under 30 minutes drive to a particular smallish town we have in mind (population ~ 35,000). A small house (< 2500 sq ft), preferably one-level, ranch style. A pasture for horses or perhaps other grazing animals. A barn with resident cats. A dog, or maybe two. A vegetable garden. Husband works at a job he enjoys, no more than 40 hours per week, and retires by age 55.

The smallish town we had in mind turned out to be a different town than the one we settled in, but we couldn’t be happier here in the Cowichan Valley (population 80,000 spread out over a region of ~ 3500 square km. or ~ 1300 sq miles). We are very close to all the things we need to do (10 minutes to “town”; population 5000) and yet out in a quiet rural area surrounded by forest and farmland. The house is hopefully on its way soon and it will be one level and less than 2500 sq ft. More recently added to the wish lists having it built with natural materials such as cob and/or straw bale with a timber frame skeleton.

We have a fenced pasture/paddock area for the pigs we raise each summer (about 1/2 an acre), and we’ll soon be adding a free-ranging area for this summer’s meat birds. We’re considering getting a couple of sheep to mow the lawn, provide fibre for my knitting hobby, and lambs to sell and eat. And if we can ever put a year round pond in here I’d love to have some ducks. We’ve ruled out goats because of their heavy fencing requirements and because I’m not interested in eating them nor milking them – the animals around here have to earn their keep (even if it’s just carting me around on their back, speaking of which….).

A future with horses is nearer than ever; I am riding again, which was always a part of the Dream even if I didn’t state it outright at the beginning, and what’s even better is Husband is learning to ride and loves it. If things continue as they are going I wouldn’t be surprised if we end up buying horses for ourselves within the next couple of years. Of course, as much as I love the idea of having horses at home, they do require a large amount of pasture space and at this point we are undecided as to whether it would be better to just board them nearby. I suspect my romantic side will win out on this one – I really, really want a barn! And we both have visions of saddling up and riding off our property onto any one of the network of forest trails that range for miles.

We did get a dog about a year before we moved here, and we got a cat shortly after. If not for our tiny mobile home and a lack of fencing we’d have more cats and probably another dog already. When there is a fully fenced property and a barn I think both those wishes will come true.

I have the vegetable garden, but it’s a rather half-hearted affair because I’m not entirely sure if the current location will work out after the house is built, so I’m afraid to do much more than grow tomatoes and whatever other veggies I end up tossing in as an afterthought in late spring/early summer. I have big plans for hugelkultur beds, a greenhouse, perennial polyculture gardens, etc. but the house needs to be put up first and then I’ll know where to plant fruit trees and invest in a couple years’ worth of soil building. I don’t mind waiting (the house is really a priority right now) but I would like to grow much more of our own produce in the future and build up a permaculture system here, of which the gardens are an integral part.

Husband got a job he enjoys; he founded a startup company with two partners and things are moving pretty rapidly there. The fact that he is so excited about what he’s doing is truly wonderful. Unfortunately, not only does it require a lot more than 40 hours a week, but it requires him to be living away from us during the work week. The reward for this sacrifice is that it could possibly mean a much earlier retirement than we’d originally hoped for (and building the house earlier than planned, too), so we are making the best of things in the hopes that it will all pay off in the near future. It’s honestly not that bad – one of the many unexpected benefits is missing my husband enough to be really excited when he comes home from work; not bad after 10 years of marriage!

So what are my dreams now? When Jenna asked that question I decided that really, I was already living my dream and the rest would just be gravy. I’m a full time stay home mum to my amazing kids, we are part of a wonderful homeschooling community, we have our own little piece of paradise nestled here at the end of our long country road surrounded by forest and visited by elk herds…sure the property needs work, it looks pretty unkempt most of the time, the mobile home is ugly and a bit too small for us all. But it’s ours and its affordable, and when I step outside in the morning and hear nothing but dozens of varieties of birdsong I feel that really, the Dream is already here.

House Planning

Winter months are a great time for indoor activities like crafting, reading, garden planning, and other endeavours that can take place from a comfortable chair. Besides doing a fair amount of knitting and crocheting myself this season, I also embarked on another hobby/task: planning our future house. When we bought this property, the plan from the start was to build a house within 5 years. Our small mobile home is serving us well at the moment, but it is old and is likely not going to last too much longer. Moisture problems top the list of issues, and we have a noticeable mouse population sharing our home (despite having a cat). If things continue to go according to plan on the financial front (we should know by summer) we’re hoping by the end of this year to start the initial work (engineering, soil testing, hiring the architect, etc). But even though we are still a ways from breaking ground, I’ve already learned a lot. In today’s post I’m going to share some of this process with you.


Step #1: Know Your Land.
When we were first looking at land, many resources I consulted said the same thing: if you are planning to build try to live on the property for at least a year, if not longer, before breaking ground on your new home. One of the great features of this property was the mobile home. Old enough (and ugly enough!) that we would happily get rid of it when the time came, but sturdy enough to house us until such time as we were ready to build. Having spent almost two years here I can appreciate how valuable that advice is. I know our land pretty well now. I know where the rarer species grow, where water likes to accumulate, where it flows during the wet season, and where it dries out first. I know where the frost accumulates, where the wind blows from in winter. I know the path of the sun year-round, what obstacles cast significant shadows on growing areas, what animals visit our property at night, where the birds like to hang out, etc. This is all very helpful information when it comes to the next step.

Step #2: Choose Your Building Site.


In our case, there wasn’t a huge choice of locations despite having 4 acres. Our property is long and narrow and there is a residential power line cutting diagonally across the top third of the property with a right-of-way underneath that precludes any permanent buildings. To build below that line would mean a very long walk from the curb on garbage day. Unless we wanted 2 acres of land between us and the street we’d have to build in a gully between hills and that is a bad site for any house – frost collects there, as does water. We also didn’t want to build on the same spot as our current house so that we could remain living comfortably for however long it takes to build. Moving the house and its connections to another spot on the property would be expensive.

In some ways, having limits can be good. There was really only one logical place to build and fortunately it is not where our mobile home is located. The site we’ve chosen is in the northwest corner of the property, on the highest point and furthest away from roads and neighbours (shown in the photo above). There are some lovely views from there, and its southern exposure will allow us to incorporate passive solar heating into the home design. The north side of the site is part of a large forested area, which will be great for insulating against cold winter winds that blow from the small mountains and hills to the north of us. Unfortunately, the entire west side of the property is lined with a tall forest of Douglas Fir trees so we lose the sun early in the day. However, having consulted my bible of solar home design – The Solar House by Dan Chiras – it is just sufficient to be suitable for the job (more on solar design later).
The site is the top portion of the area we had cleared two years ago when we first moved here, but we didn’t clear all the way to the north property line. There is a large Western Redcedar tree there surrounded by a few smaller ones and I did not want to have to remove them if possible. They provide a dense shield against wind (and block the view from the hiking trail that goes past that northern border) plus we don’t have too many cedars in our neighbourhood (it was logged about a century ago and replanted with Douglas Firs). So that limited how far we could extend the house northwards. Westwards we are right up against the property line, so the minimum clearance sets that limit. Eastwards it’s pretty wide open, but the further east we go the more exposed we are to the street (it ends about halfway along our northern border) and the neighbours’ homes. Southwards we are limited by the powerline right-of-way. But there was one other limiting factor.

This high point on the property was dug into when the original owners placed the mobile home, and then cut into some more when a small detached garage was added (see photo above). Thus there is a chunk of land cut out of the southeast corner of the house site. Originally I assumed this meant we’d have to build an L-shaped house and most of my plans were based on that design. Due to the limitations described above I wasn’t getting anywhere with floor plans (I should point out here that we are adamantly opposed to having more than one storey of living space, for reasons too lengthy to get into just now).

And then one day it hit me that if we built out over the cut-out section we could free ourselves up enormously in terms of size and layout. Essentially we’d build out over the current garage, whose roof is practically level with the top of the hill, and it would become a walk-out half-basement. It would house what it currently houses: tools, three freezers full of meat, and Husband’s drum kit among other garage-type items. And virtually none of it would be buried, allowing sufficient light inside that it doesn’t feel like a dungeon. Why it took me months of pacing around at the top of that hill to figure this out I don’t know. But it’s just one reason why I’m glad I have so much time to work on this planning thing!

Step #3: The Layout.
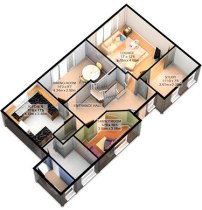
The truth is that we are going to need an architect to design the floor plan and layout of the house. I have zero training in this area and I can’t seem to break outside the box. Literally. I’m using graph paper to work on design plans and I seem to be stuck in this rectangular, stick-to-the-lines thinking that suggests we need a 3000 sq. foot house in order to fulfill our requirements. That is more than double the size I’m interested in. So mostly, drawing floor plans has been an exercise in thinking about the spaces and coming up with a few good ideas here and there. There is no way I could do this in earnest.


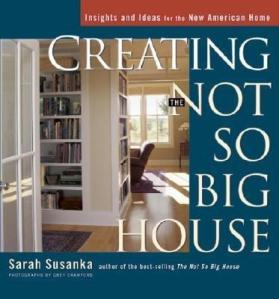
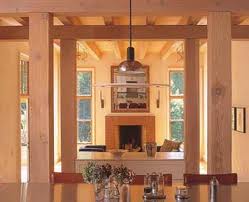
Thankfully, there are some great resources out there and my current bible of home design is from Sarah Susanka’s Not So Big House empire. Specifically, her book Creating the Not So Big House has been an excellent source of ideas, as well as providing me with the language to convey to our future architect what we’re looking for. Finding a book like this which encapsulates your own desires for house design can really help with the whole process. I’m pretty sure that an architect will be able to come up with far more efficient uses of space, and far better workflow patterns, than I’ve been able to come up with during my forays into cubist floor-planning.
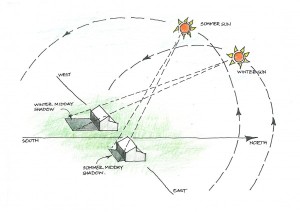
Another important consideration is that we wish to incorporate passive solar design principles into our home. This means orienting the long side of the house to the south, placing most of the windows there, and incorporating thermal mass into areas of the home to retain and release heat when the sun goes down. Without going into too much detail about passive solar design right now, it does place some limitations on layout. But now that I know we’re not limited to an L-shaped site it’s not really an issue anymore.

Step #4: The Materials.

It won’t come as a surprise to anyone who has been reading my blog for a while to learn that I want to build our home from natural materials, locally sourced wherever possible. The choices boil down to cordwood, rammed earth, cob, and straw bale. While rammed earth construction has been done here (music legend David Crosby has a rammed earth home on nearby Salt Spring Island that was featured in an episode of David Suzuki’s The Nature of Things) and it is beautiful, it’s not really my style. Cordwood is problematic in climates with high moisture like ours, and while I think it looks pretty I don’t want a whole house made out of it. I’d had it in my head for some time that cob would be our best choice because I thought strawbale wasn’t suited to our damp climate. I’ve since learned that this may not be the case. And I’m concerned about the fact that cob is a relatively poor insulator. So right now I’m leaning toward strawbale.

We will, however, be using timber-framing for the skeleton of the house. The strawbales (or whatever we choose) will be infill rather than supporting walls. Timber frame simply looks incredibly beautiful, there are several very skilled companies locally that do timber-framing, and the lumber can be sourced right here on the Island (and some of it probably from our own property).
 

Step #5: The Idea Book.
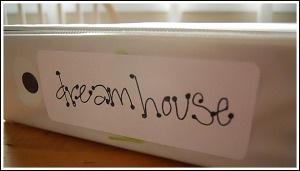
I started this as a Word document some time ago. Any thoughts or observations I have go here. It could be anything from noting that I spend a great deal of time during the day in the kitchen, to wish-lists requesting, for example, a covered outdoor area for hanging laundry when it is raining. I’ve put a huge amount of thought into all the details and recording them in one place makes for a handy reference.

My tip would be to spend a day thinking about where you go in your home at various times of day, what areas are used the most, and which are not used much at all. What items do you have lying around that need a home of their own – plastic shopping bins for groceries before they get taken back out to the car, recycling, mail that needs to be sorted, clothes going to goodwill, etc. Think about what you like about your current home, or what wish you had – for example, when you are taking a shower do you love that there is a window there? Do you wish the shower were wider? And of course there is my favorite topic: how easy is this to clean? I’m amazed at how many design features I see in magazines and websites that look beautiful but I know from experience would be magnets for dust and cobwebs, or be a pain to vaccuum around.

I also wanted to share a great website I found called Houzz.com. Here are hundreds of thousands of images of room design, including exteriors, that you can browse through and add to your own personal Ideabook. My one complaint with the site is that most of these homes are quite ostentatious, much too over-the-top for my liking. I’m looking for something simpler and more humbler than most of the homes shown here, but there are so many great ideas that I continue to build up Ideabooks for various rooms in my future home. The best part will be sharing these books with our future architect, who can then get a very good idea of our taste and style without having to conduct extensive interviews with people lacking the language to describe what they like (that would be me: “Um, I like kind of a rustic look but not messy-looking, sort of traditional but not uppity, something between country and west coast luxury home…but small”…???).

So that’s where I am now. Building up my Ideabooks, having fun with graph paper, and making notes of things that will be important when it comes time to sit down with an architect. Of course there is much that needs to take place in-between, but there’s nothing I like more than immersing myself in some project that leads to the fulfillment of a Dream. Sometimes it doesn’t even matter if the dream ever comes true; I enjoy the process that much.
 

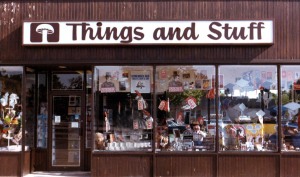
Do you know where your STUFF comes from?

I’m taking a departure from my usual farm updates to share some of my recent thoughts about consumerism and the STUFF we bring into our homes and our lives.

It’s increasingly common to hear people asking about where their food comes from, particularly in communities like ours with their heavy focus on local food producers and small farms. People are starting to look at a food item in the grocery store and ask questions: where was this grown and under what conditions? who tended to this crop and were they paid a fair wage? how far did this item travel to get to me? what exactly is IN or ON this food that I might be concerned about? how much real nutrition is in this food item (i.e. how useful is it for my body)?

After having practiced this conscious consideration of the food I put on my family’s table for years now, it naturally began to extend to other areas of my life. Lack of time and budget makes it tempting and easy to pick up cheap, mass-produced goods. I have to steer myself away from the very low-priced (and usually, low-quality) kids clothes in our local Superstore when I do my grocery shopping, or that inexpensive sweater that would add a pick-me-up to my day without putting a crimp in my bank account. But with the Holiday Season approaching to remind us of the rampant consumerism that plagues our society I am making a conscious effort to steer away from those things and to think carefully about every item that enters my home.

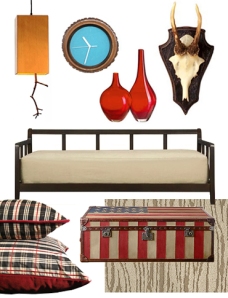
It started when I was writing in my “Dream Home Journal” – this is a collection of thoughts, ideas, sketches etc. that I am putting together in anticipation of building a proper house for ourselves on the property. Having moved plenty of times over the years and being a fond practitioner of Decluttering, I was struck by the idea that every item in our new home should be consciously chosen. As much as possible, that is. I can’t afford to replace our mass-produced, fake-wood bookcases all at once. But I will need new items, as one always seems to when moving, like perhaps some rugs or something to put on the walls. And here’s where I would like to be particularly conscious in my choices.

I’ll give you an example of what I mean: I’ve had two “decorative” glass jars for several years now. I bought them at Ikea, on a whim, because they went with the colour scheme I’d chosen for the living room in our rented house. The jars serve no purpose – they are not functional and could not be put to any practical use. They were mass-produced on factory assembly lines in Asia and sold cheaply by the millions. They sat on our fireplace mantle as part of an arrangement of objects that was supposed to “harmonize the room’s colour scheme while being attractive and suited to the room’s style”. They have no meaning for me. There was no artist whose hands and creative spark touched them, they weren’t a well thought-out gift from a loved one. They are just items that take up space and need to be dusted.

To me these jars represent all that is thoughtless and mindless about consumerism. Right now they sit on my bedroom dresser, a faded pink three-drawer Ikea unit sandwiched in between two identical ones in fake brown wood finish. The bedroom in our ugly old mobile home is wallpapered in some tacky 80’s country rose pattern that clashes with everything else. The jars look ridiculously out of place, both in style and in colour. But I have kept them there because every time I dust them I’m reminded of how silly such items are, how easy it is to acquire such things, and what a colossal amount of money the average consumer throws away on such things over the course of our lifetimes.

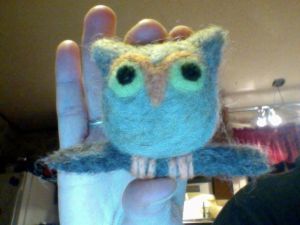
I’ve decided that, in our new home, decorative items will be displayed because there is a story behind them. Perhaps one of the kids made it for me, or it was a gift from someone special who put their heart into it. It may be a souvenir from an important event or experience in my life. It may be from a local artist I admire and, if so, will definitely be handmade from natural materials. It may even be made by myself as I pursue my growing love of fibre art.

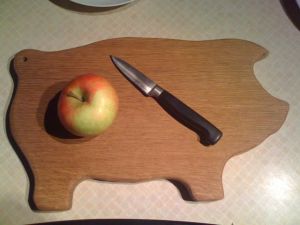
Another example: I have some plastic cutting boards (Ikea again!) that I don’t like and they are starting to really show their age. Despite my mother’s insistence that plastic is “hygenic” because you can put it in the dishwasher, some of mine are showing signs of mold/mildew in the cracks and cuts and I’m having to soak them in bleach. I have a wooden cutting board. One is pine strips glued together (yes, it’s also from Ikea) and it is really not holding up well (which I should expect given that it cost me $5). It’s warping and splintering and I realized I don’t even know where the wood came from, or how it was harvested and I don’t know what sort of glue was used to hold the bits together. I decided I was going to ask for a proper, handmade wooden cutting board for Xmas – the kind I see at the farmer’s market. Then a couple weeks ago I was at a local Xmas Fair held at a therapeutic farming community and I found a guy who made cutting boards from fallen Garry Oak. The Garry Oak is native to the Pacific West Coast and our island is home to some of the few remaining Garry Oak ecosystems, which harbour a number of rare species of wildlife. Now that has meaning for me. The cutting boards were carved by the man who was selling them and he explained to me how to oil it regularly to keep it in good shape. When I saw he had one carved into the shape of a pig I knew destiny had led me to his table. I treated myself to the board and it was only $15. Sure, that’s five times more than the cheap-ass one from Ikea, but you get what you pay for, right?
And so as we head through the holiday season and I put together my Xmas gifts I’m trying to be conscious about these things. On a recent trip to Vancouver my mother and I went shopping. It was a very rare treat for me to be able to spend a day with my mother without kids in tow, but honestly the Mall was not the attraction for me. It was spending time with her (and the sushi lunch we had!). As I wandered the stores all I could see was masses and masses of…stuff! Stuff I didn’t need, stuff I didn’t even want until I saw it all done up so nicely in the displays. I passed a window with a lovely fair-isle style sweater and thought “oh, that looks nice” and then I thought to myself “Chain store, likely made in India by poorly paid workers, ten million of them released this season, then by next season they’ll be on the clearance rack because they’ll be ‘so last year'”. That took all the yearning for the sweater out of my head. Not to mention the fact that I’ve always wanted to try Fair Isle knitting and one day I’ll either make one myself or buy it from a local fiber artist. That is worth waiting for (or saving up for).

I’m pretty good at steering clear of “shopping as a hobby”. I do think about the things I buy and I strive to be frugal and keep clutter down to a minimum. Truth is I buy very little. But around Xmas I tend to go into a frenzy of buying stuff I normally wouldn’t because I feel the pressure of this time of year.

So over the next couple of weeks as you make up your gift lists (and wish lists for yourself), think about the things coming into your home and the things you are sending into others’ homes. Ask the same questions you would about your food: where did this come from? who made it? who tended to it? were they treated well and paid fairly? And ask some more questions: is this well-made and useful and will it last? or will I be chucking it out in a few months?

Rendering Our Pig Fat Into Lard

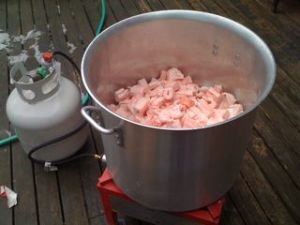
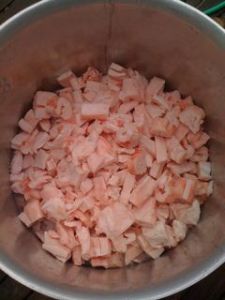
On Friday we received 110 lbs of custom-made sausages, which necessitated taking some things out of one of the freezers to make some room. Out came the huge box of pig fat, along with some bones and two halves of a pig’s head. I was disappointed that the latter items would likely have to be disposed of, but I was not going to let the fat go to waste like we did last year. So on Sunday we fired up the propane burner out on the deck, washed out the 60L steel pot, and set to work rendering our fat into lard.

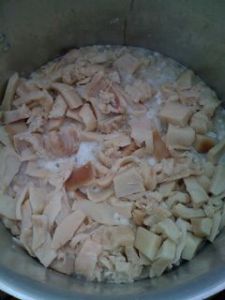
It took longer than expected to trim the fat of any meat still attached, and I had to hand the knife over to Husband after about an hour because my cutting hand was starting to hurt. We added the fat to the pot with some water and sat back to wait. I expected it might take a few hours, having read instructions on the Internet that gave times of 1.5 – 2 hours. However, it turns out they were dealing with much smaller amounts and I ended up having to shut the process down at around 8 pm that night. While stirring it was definitely getting easier, it still didn’t resemble anything like the end product.

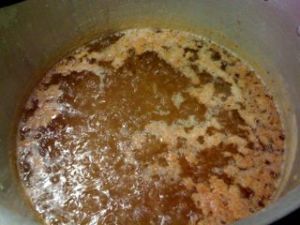
The next day I attempted to fire up the burner, only to discover a few minutes later that we were out of propane. I was determined not to give up on the process, but it was pouring with rain and I was alone with the kids, so a trip to the gas station to get another tank was less than appealing. I decided to just put the darned thing on my stove, set two burners onto low, and see if I couldn’t continue the process (note: I discovered that night that I’d burned the stovetop a bit and there were now marks on there that would likely never come off, but given that our stove is almost 25 yrs old I’m not shedding any tears; however, when one day I get a new stove I won’t be doing that again). I was rewarded a couple hours later with the first signs of melted lard: a dark yellowish liquid that looks like cooking oil. I was also delighted to see that we had loads of crackling floating on the top.

A couple hours later I saw that the cracklings had sunk to the bottom and that was the sign I was looking for: it was done. While I let the pot cool a bit I set out every mason jar I could find with a lid. I’d run them all through the dishwasher the day before, and even dried them in the oven. I was thinking I’d attempt to can the stuff so it wouldn’t need to be stored in the freezer (freezer space is a real luxury here, despite the fact that we have 3 full freezers in the garage plus the top compartment of our kitchen fridge). But I simply couldn’t coordinate the sterilization of the stuff with the endpoint of the rendering process so I gave up on that plan. Still, at least I had plenty of clean and dry jars.

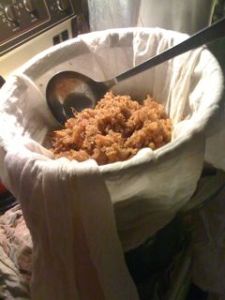
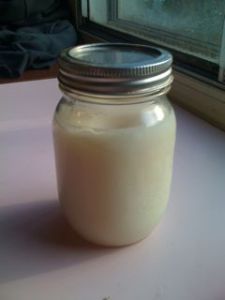
But first I had to strain the liquid with cheesecloth to remove the cracklings and any other bits of non-fat. Dealing with such huge quantities of liquid was challenging, but I ended up scooping it out with a small saucepan and straining it over my biggest soup pot. It worked well and didn’t actually take too long. When the soup pot got full I’d pour it out into the jars. When I was done the light amber liquid had filled just over 19 Litres’ worth of mason jars (not all of them are shown in the picture below). I was very pleased, and hoped that the cooled, solidified product would be something close to white. This process also made me realize how handy it would be to have a large farm-kitchen style work surface, and so I added that to my mental wish list.

The most prized lard is that made from “leaf” fat, and is apparently snow white. I used all the fat we had, since I couldn’t tell the difference anyways and I was not interested in making two batches. Not to mention, I rarely ever make pastry so it wasn’t all that important to me. But I figured that the whiter my product was, the higher quality it might be. It’s hard to tell in the light of this photo, but it was actually pretty white in the end so I think I did alright.

Of course the real test would be using the lard. So this morning I had my usual cheese omelette for breakfast, but this time I fried it in half butter, half lard. Then I topped the dish with a generous handful of salted cracklings. I have to say, it was sinfully delicious (and yet not sinful at all!).

Of course no post about lard would be complete without mentioning the fact that this much-maligned substance is now revealing itself to be a healthy food product. I won’t go into too much detail since many others have covered this topic, but suffice it to say that until the fat-hysteria of the latter part of the 20th century, centuries of housewives before me had known that cooking and baking with lard produces wonderful foods. I don’t think any of them would care what the latest scientific analyses of lard tells us about the beneficial fats, the optimal ratios of essential nutrients, or the beneficial effects of saturated animal fats on cholesterol composition and overall health. Lard from pastured pigs is good, healthy stuff and I am thrilled to bits to have such a huge stock of the stuff put up for the year ahead.
And finally, no such post would be complete without a nod to Emeril Lagasse, the first celebrity chef to unabashedly admit that Pork Fat Rules!


I survived the a-Pork-alypse.

I was cutting things rather close, not unusual for me. On Tuesday I had to pick up a few hundred pounds of pork, but first I needed somewhere to put it all. We’d been hoping to buy a used freezer but couldn’t find a big one for sale on the local used networks, and eventually decided that rather than fill the garage with an odd assortment of small ones, we’d cough up the money for a new large one and be done with it. It would arrive at the store on Tuesday, and I was too cheap and stubborn to pay the $100 for delivery. However, it meant I was going to have to get it home and set it up all by myself.

Husband was heading to Seattle on business and I was on my own with two kids. I needed to pick up the pork, but I needed the freezer up and running before I did, and to be honest I wasn’t exactly certain I could do it. I was a wee bit worried I’d end up in a pickle and have to call my dear neighbours to rescue me. However, did I mention I’m stubborn? Fingers crossed, I headed down to the appliance store with Husband’s Ford Expedition (just driving that behemoth makes me feel strong). The 17 cu ft standup freezer actually fit in the truck, so I could scratch Worry #1 off my list. And my son was absolutely delighted:  for the one and only time, he was allowed to ride the short distance home in the passenger seat as there was no room in the back for him.

The next obstacle, Worry #2 (the biggest), was getting it out of the truck and into our garage. I knew that if I was really in a bind I could call on my neighbours for help. But I had a lot to do that day and my stubbornness once again paid off. Backing the truck up to the garage door I was able to pull the freezer out onto the smooth concrete floor, remove the packaging, and set it up. I felt like yelling “I am woman, hear me roar!”. Yeah, I was pretty darned proud of myself. Now, off to the meat guy to pick up our pork.

While I was helping the staff load about a dozen boxes of frozen meat I wondered why I’d asked for the heads. What on earth would I do with them? My dog eats raw food but a whole pigs head is a few meals for her and the thought of it lying outside for her to snack on over a few days was not appealing. Turns out they had sawed them in half and there really wasn’t a huge amount of meat left (the jowls had been removed, as had the tongue, eyes, and brain) so they may just work as dog food after all. But I just couldn’t bear the thought of not using every bit of our pigs. Back at the house I proceeded to unload box after box of chops, roasts, and ribs. This year we got regular-cut chops rather than the thick-cut ones and had them put 2 per package rather than 4. Easier to handle, easier to cook, and no worries about wasting meat (with Husband gone so often there is only so much cooked meat I can eat myself in a couple of days). The roasts were also smaller which is great – I’ve developed a real love for pork roasts and pulled pork and the sizes we have are perfect for a couple of meals. I also got tenderloin this year, which I’ll save for special occasions.

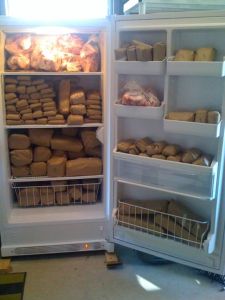
I was feeling pretty relieved as I emptied the last of the main boxes and saw that I would be able to fit it all in, but then I realized there were still two boxes of bones, a box of fat, and two boxes of pig heads and feet. I am determined to render the fat into lard this year (last year we couldn’t fit it into the freezers and it went bad), and managed to find room for that, plus the heads and feet and bones. My years spent as a research scientist in the field of medical science has immunized me against the shock of looking at so much cut-up animal, but I have to admit the half-heads were rather gruesome and looked rather like they belonged in an anatomy lab floating in formaldehyde. However, the newbie farmer and wannabe homesteader in me was proud of the fact that we were reaping every scrap from our harvest, and that we would find a use for it all (even if it is just saving money on the dog’s dinners). So, freezers pretty much stuffed, I closed the garage door and headed out for my next task.

I delivered about 100 lbs of “trim” to our local sausage makers. The trim is what they cut off when making various cuts and roasts, plus we threw in the shoulders and the “picnic” roast cuts. Sausages are one of the few, if not the only, meal that I can make which everybody can and will eat (the sausages contain no filler or artificial ingredients; they are gluten- and dairy-free). The kids love them and it’s a quick easy dinner to thaw a half-dozen and fry them. I enjoy them with spaghetti squash that has been tossed with butter and parmesan cheese. But I digress…

The sausage makers, a husband and wife team who live nearby and run a small smokehouse, were tickled by our custom order. These days everybody wants “lean” and “low fat” so they actually remove the fat from their meat before turning it into sausage. I told them that our family doesn’t buy the notion that animal fats are bad for health, and we wanted our sausages to be made with every scrap of fat that God saw fit to put on our pigs. They winked and secretly agreed with me that it’s the pork fat which gives sausages all their flavour and that they’d be more than happy to use it all. At that moment a toast to Emeril Lagasse seemed in order (“Pork Fat Rules!”).

Our bacon and hams will be ready in a week or two. By then I hope to have rendered the fat into lard (I’m no longer upset that Husband bought a huge propane fuelled heating element and giant pot last year when he got the urge to fry a turkey whole). That should buy me enough room for the bacon and hams. Can’t wait to taste home-grown bacon again! Buying the stuff from the store was a real downer…

So that’s my tale of feminine victory. As I crawled into bed that night I felt it had been a particularly productive day, and that I’d definitely earned my modern homesteader badge!